I love the 80/20 principle in life. It boils into everything… work, fitness and my home. I’m not a perfectionist which I believe is good although sometimes I think being a perfectionist is preferable. When it comes to organizing and decluttering, I particularly like the 80/20 principle. What that means is I shoot for 80% good. If I’m still motivated to tackle the remaining 20%, so be it. I have this mindset because if a job is too big or I have too high of expectations, I’ll never start. This checklist setting out the 18 steps to a decluttered kitchen embraces the 80/20 approach. The first ten steps get you to 80% done. The remaining eight steps finish it. If you get through steps one through ten, that’s fantastic. Here they are. At the end, there’s a link to download this checklist as a PDF.
1. Empty Your Cabinets and Drawers Completely

🔥 Would you like to save this?
Start by taking everything out of your kitchen cabinets and drawers. Lay the items on a clean surface, like your dining table or countertop, so you can see everything clearly. This step gives you a complete picture of what you own and helps you assess which items are duplicates, unnecessary, or rarely used. Wipe down the inside of each cabinet and drawer with a damp cloth or an all-purpose cleaner while they’re empty, ensuring they’re fresh and ready for reorganizing.
In order to come up with the very specific design ideas, we create most designs with the assistance of state-of-the-art AI interior design software. Also, assume links that take you off the site are affiliate links such as links to Amazon. this means we may earn a commission if you buy something.
2. Sort Items into Categories: Keep, Donate, Toss

Create three distinct piles: items you use regularly (keep), items you don’t need or use but are in good condition (donate), and items that are broken, expired, or beyond repair (toss). Be honest with yourself—if you haven’t used that appliance or gadget in over a year, it’s time to let it go. This step is crucial to cutting down clutter and making space for only the essentials.
3. Check Expiry Dates on Food and Condiments

Go through your pantry, fridge, and freezer to check expiration dates on all food items. Toss anything expired, stale, or freezer-burned. For non-expired items that you know you won’t use, consider donating them to a local food bank if they’re unopened and in good condition. This step not only declutters but ensures your kitchen is stocked with fresh, usable food.
4. Declutter Small Appliances and Gadgets

Examine all your small appliances (blenders, toasters, coffee makers) and gadgets (peelers, can openers, mixers). Keep only the ones you use regularly. If you have duplicates or rarely used items, decide whether to donate, sell, or toss them. For large appliances, ensure they’re clean and functioning properly. This helps free up counter space and storage areas.
5. Organize Pots, Pans, and Bakeware

Stack pots and pans in a nested fashion to save space, and use a rack or dividers to organize lids. Check your bakeware for duplicates or items you rarely use, and consider donating those. If you have items that are warped, scratched, or damaged, it’s time to toss them. Store the most-used items in easily accessible spots and keep specialty bakeware in higher or lower cabinets.
6. Sort and Streamline Utensils

Go through your utensils drawer and group items by type (spatulas, knives, measuring spoons). Toss anything broken or duplicates of items you rarely use. Consider using drawer organizers or utensil caddies to keep everything neat and accessible. Keep only the essentials—if you have five spatulas but only ever use two, donate or toss the extras.
7. Minimize Plastic Containers and Water Bottles

Match all plastic containers with their corresponding lids. Discard any that are warped, stained, or missing lids. If you have an overabundance, pare down to just a few versatile sizes. The same goes for water bottles—keep a manageable number and donate or recycle the rest. Store containers neatly, stacking them to save space.
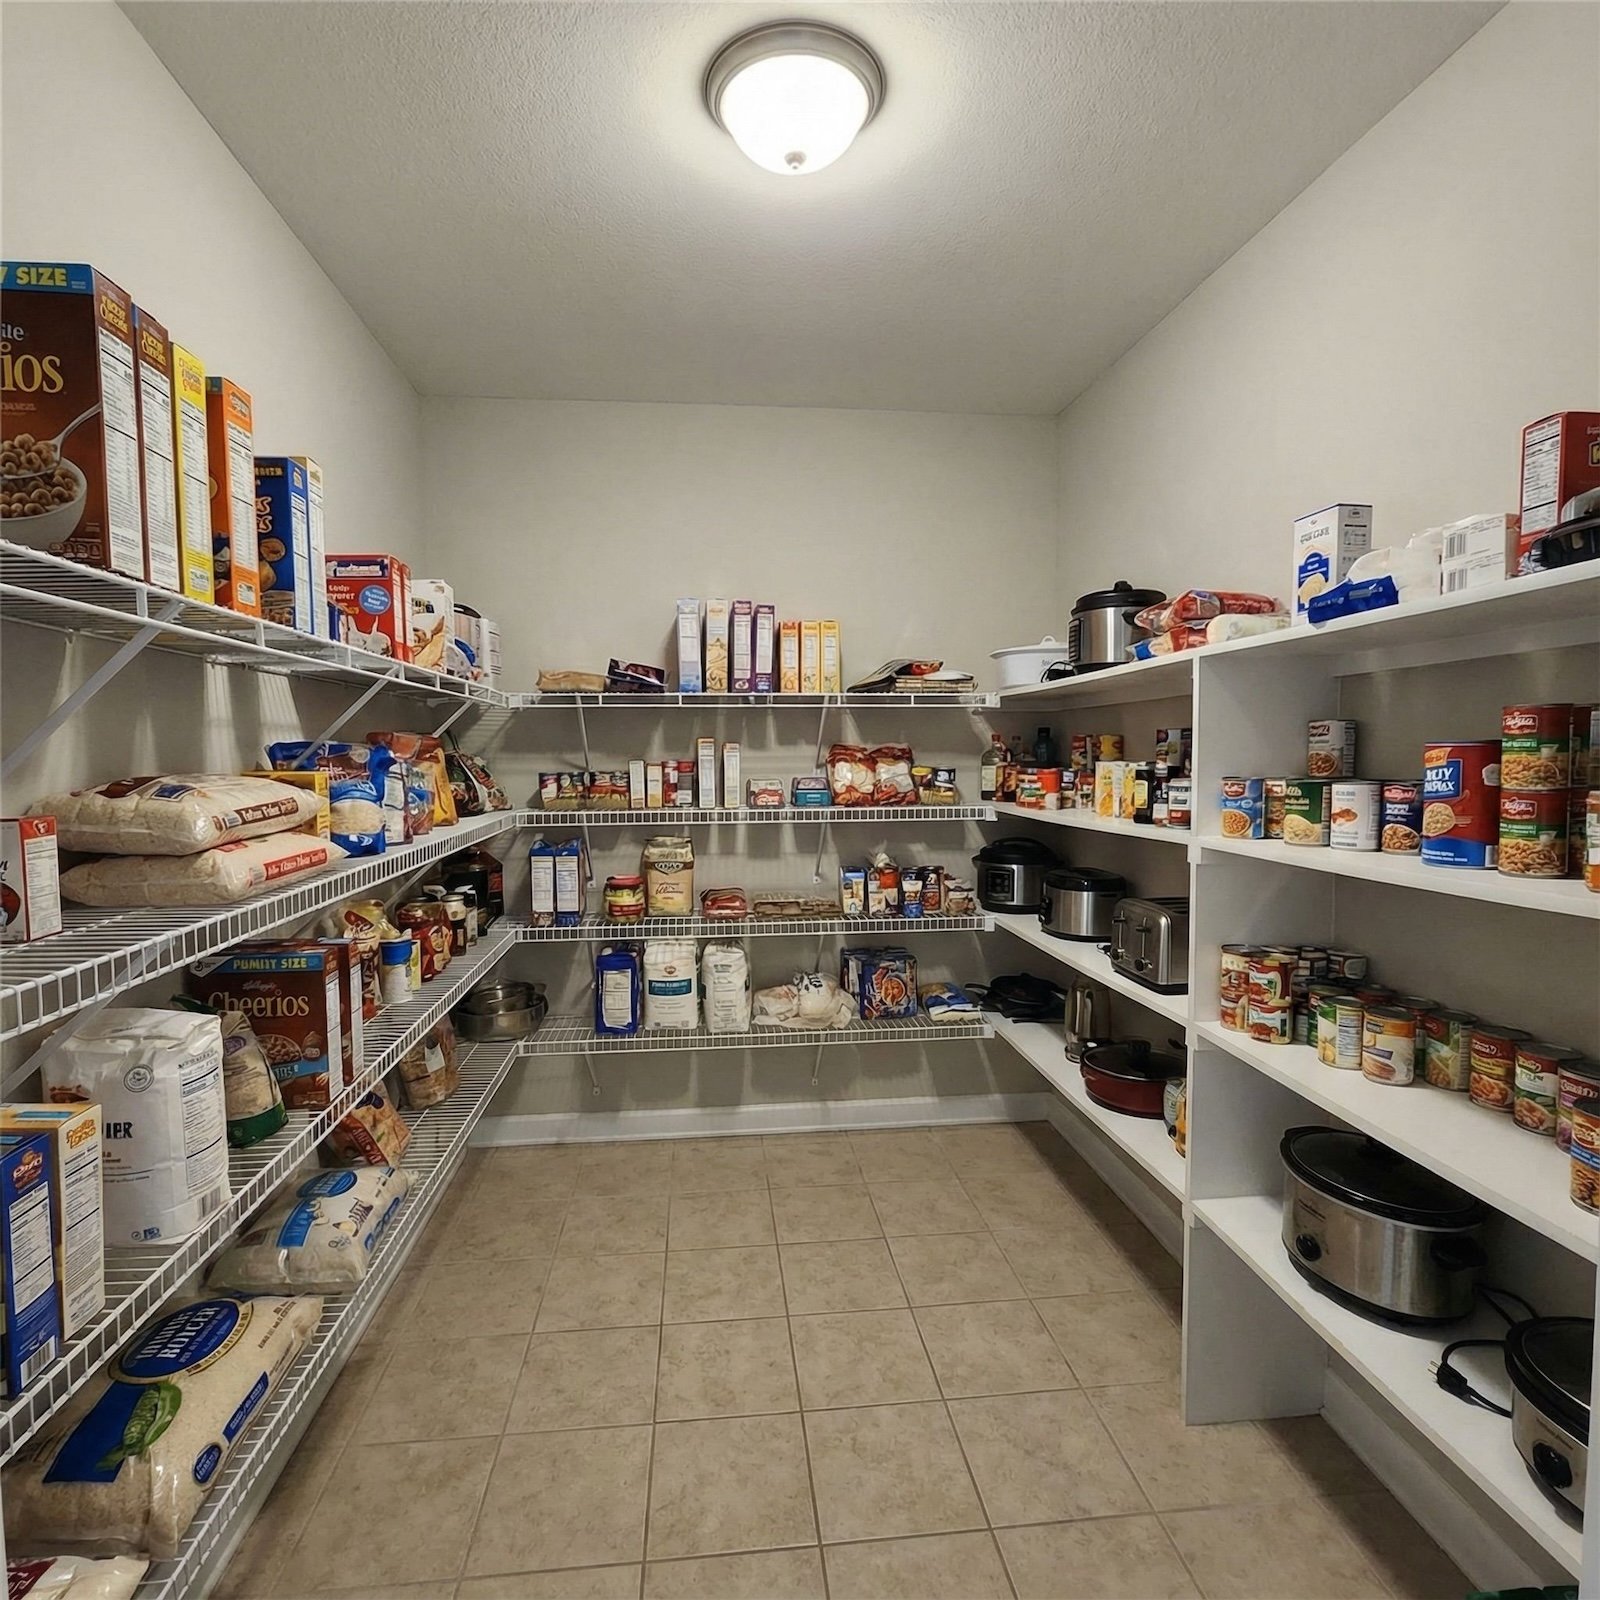
8. Tidy the Pantry with Bins and Labels

Group similar pantry items together (grains, canned goods, snacks) and place them in clear bins or baskets. Label each bin for easy identification and to maintain organization long-term. Keep frequently used items at eye level and heavier or less-used items on higher or lower shelves. This step makes your pantry visually appealing and easy to navigate.
9. Declutter Countertops

Remove everything from your countertops except for the essentials, like a coffee maker or toaster. Relocate items that don’t belong on the counter, like mail or random knick-knacks, to their proper places. Wipe down the counters with a cleaning spray for a fresh start. Clear countertops create an open and inviting space for cooking and meal prep.
10. Create Zones for Everyday Functionality

Organize your kitchen into functional zones: a cooking zone near the stove, a prep zone with knives and cutting boards, a cleaning zone around the sink, and a coffee or breakfast zone for your daily essentials. Place items you use daily within easy reach and store less-used items higher or deeper in cabinets. This zoning system streamlines your kitchen’s workflow and keeps it organized.
At this Point You’ve Completed 80% of the Job. Next… Tackle the Remaining 20% to Fine-Tune Your Kitchen Organization

11. Evaluate Your Spices and Condiments

Sort through your spices and condiments, checking expiration dates and freshness. Discard anything expired or stale. Combine duplicates if possible (e.g., two jars of the same spice). Consider transferring spices into labeled glass jars or a spice rack for a cleaner, more organized look. This not only saves space but makes finding what you need easier during cooking.
12. Declutter and Organize the Junk Drawer

If you have a junk drawer in your kitchen, empty it completely and sort its contents. Toss or relocate items that don’t belong in the kitchen, like old receipts or batteries. Use small dividers or containers to create sections for essentials, like scissors, tape, or spare keys. Keep only what is truly necessary, ensuring the drawer serves a clear purpose.
13. Hang or Mount Frequently Used Items

🔥 Would you like to save this?
Install hooks, racks, or magnetic strips to hang frequently used items like pots, pans, utensils, or knives. This frees up drawer and cabinet space while keeping your most-used tools within arm’s reach. Wall-mounted solutions can also double as a design feature if you keep them neat and tidy.
14. Deep Clean the Fridge and Freezer

Empty your fridge and freezer entirely and wipe down all surfaces. Toss expired or freezer-burned items, and organize remaining food by category (e.g., dairy, produce, leftovers). Consider using clear bins or fridge organizers to keep similar items together and visible, preventing future waste.
15. Maximize Vertical Space in Cabinets

Install shelf risers or hanging baskets inside cabinets to create additional levels for storage. Use these to stack plates, cups, or pantry items, ensuring you’re utilizing the full height of the cabinets. This prevents stacking items too high and makes everything more accessible.
16. Set Up a Recycling and Trash System

Evaluate your trash and recycling setup to ensure it’s functional and accessible. If your system is cumbersome, add bins for composting, recycling, and trash, and label them clearly. This encourages a cleaner kitchen environment and reduces mess.
17. Audit and Organize Kitchen Linens

Sort through kitchen towels, tablecloths, and napkins. Discard any with stains or holes and keep only a manageable number of each type. Fold and store them neatly in a dedicated drawer or basket for easy access and to free up space elsewhere.
18. Label Everything for Long-Term Organization

Once you’ve organized your kitchen, add labels to bins, jars, and containers. Labeling ensures everyone in the household knows where things go and helps maintain the system long-term. It also makes finding and returning items faster. Click here to download the PDF checklist.