🔥 Would you like to save this?
A house can be perfect from the roofline down and still feel like it’s holding you at arm’s length. Nine times out of ten the culprit is sitting in the front yard, not the architecture.
What follows are the quiet landscaping decisions that bury the front door, confuse arriving guests, and make a warm home read cold. Path widths, step visibility, porch scale, entry lighting, plant placement, the heights nobody bothers to measure — we’ll get to all of it. And the fixes? Usually cheaper and faster than you’d ever guess.
In order to come up with the very specific design ideas, we create most designs with the assistance of state-of-the-art AI interior design software. Also, assume links that take you off the site are affiliate links such as links to Amazon. this means we may earn a commission if you buy something.
44. Hiding the Front Door Behind Overgrown Shrubs
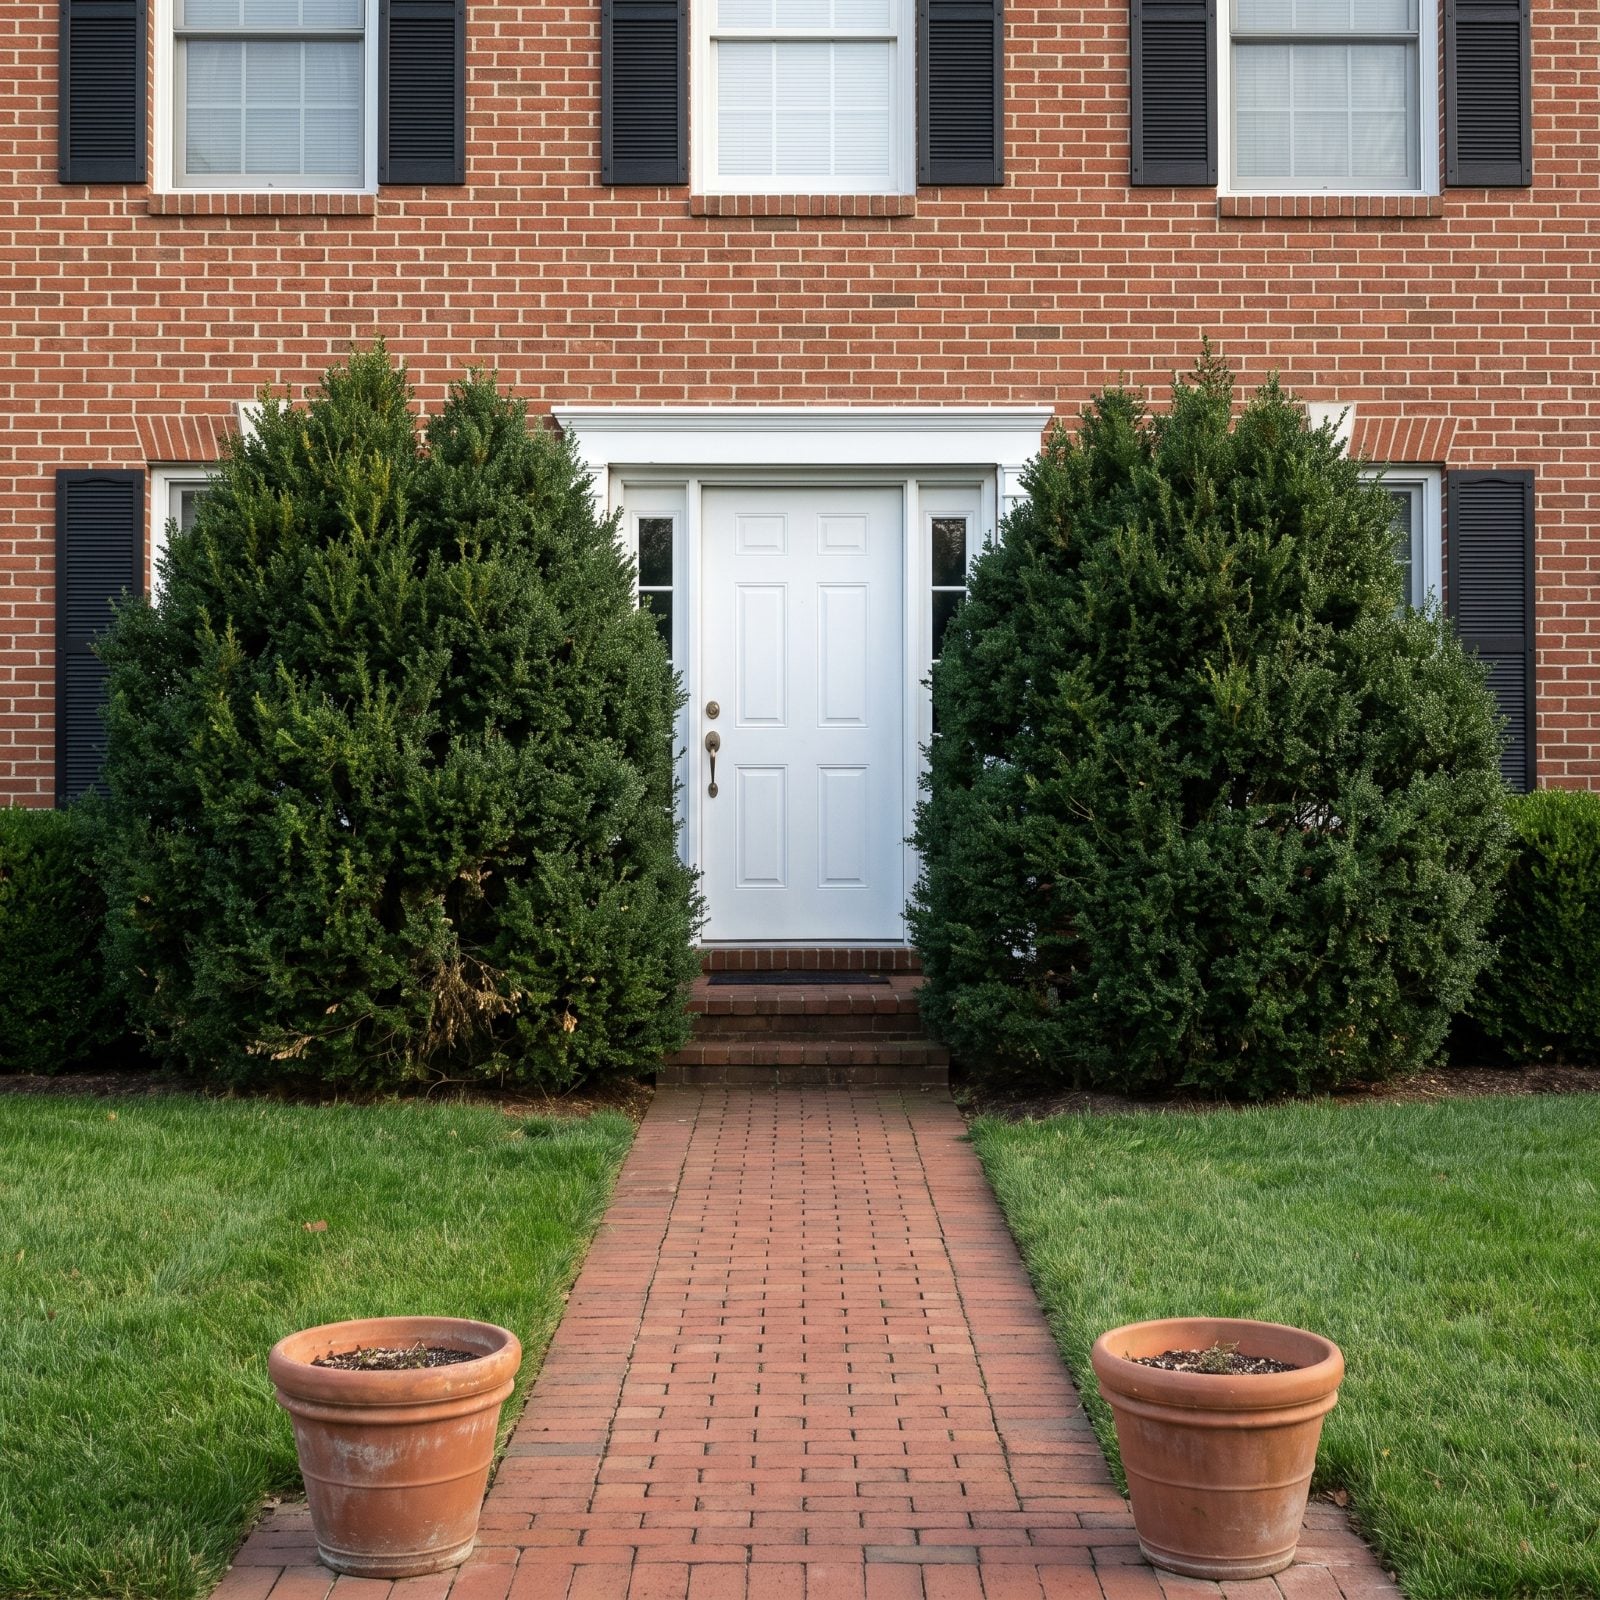
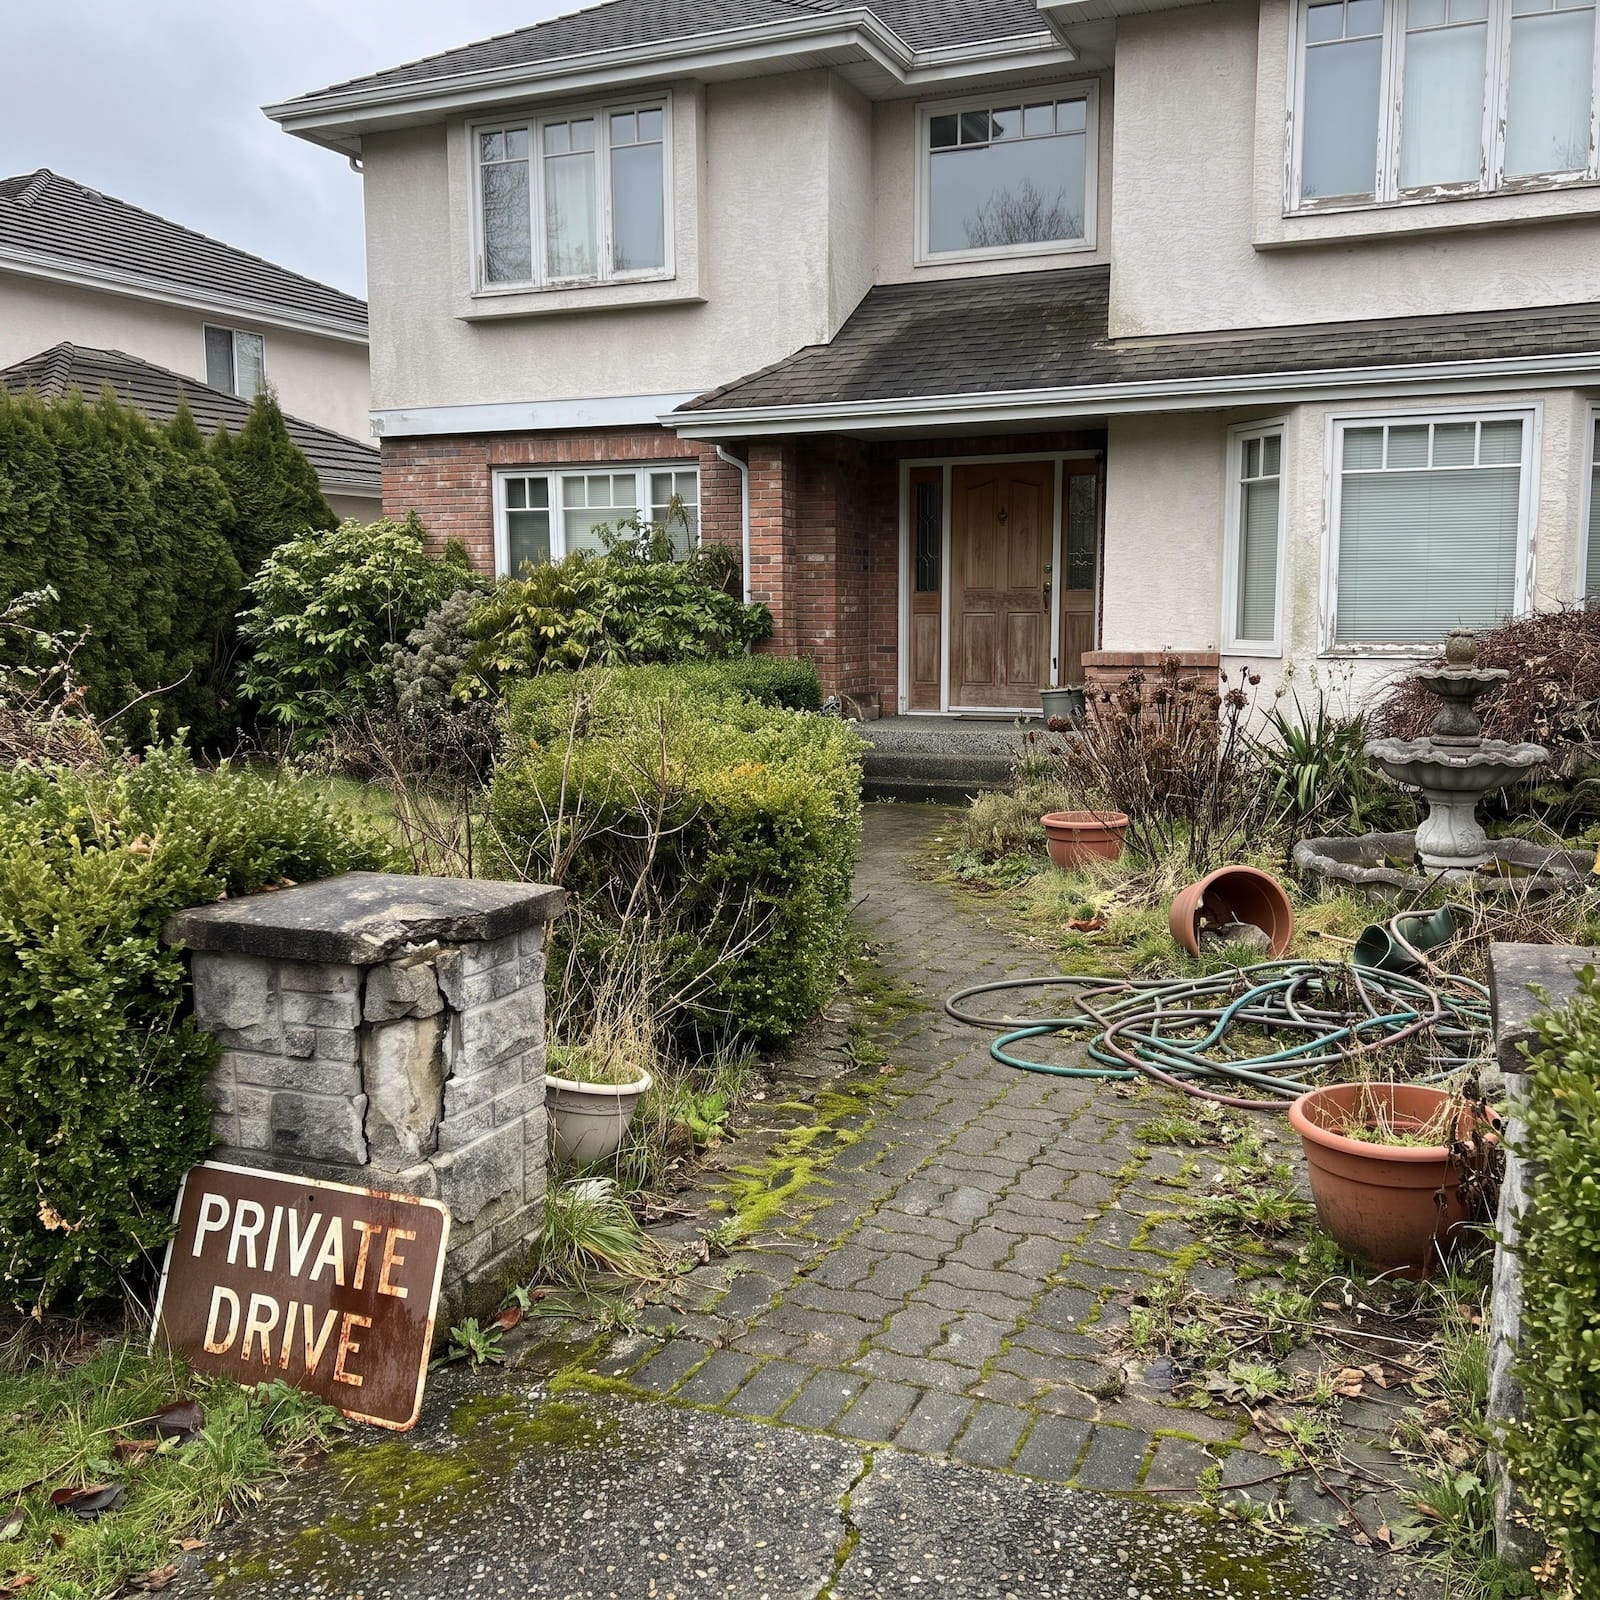
You bought the house for that front door. The nine-foot shrubs on either side have other plans — they’ve crept up past the handle, elbowed into the sidelights, and now the entrance peers out like it’s hiding from the street.
Overgrown foundation planting swallows the one feature a visitor’s eye should land on first. The house loses its focal point, and the whole facade reads shorter and heavier than it actually is.
Keep anything within four feet of the door below the bottom of the handle, and prune in late winter. If a shrub has outgrown its spot three years running, pull it and start over with something that tops out low. A brass coach lamp or two symmetrical planters pull the eye back where it belongs.
43. Leaving Visitors to Guess Which Door to Use
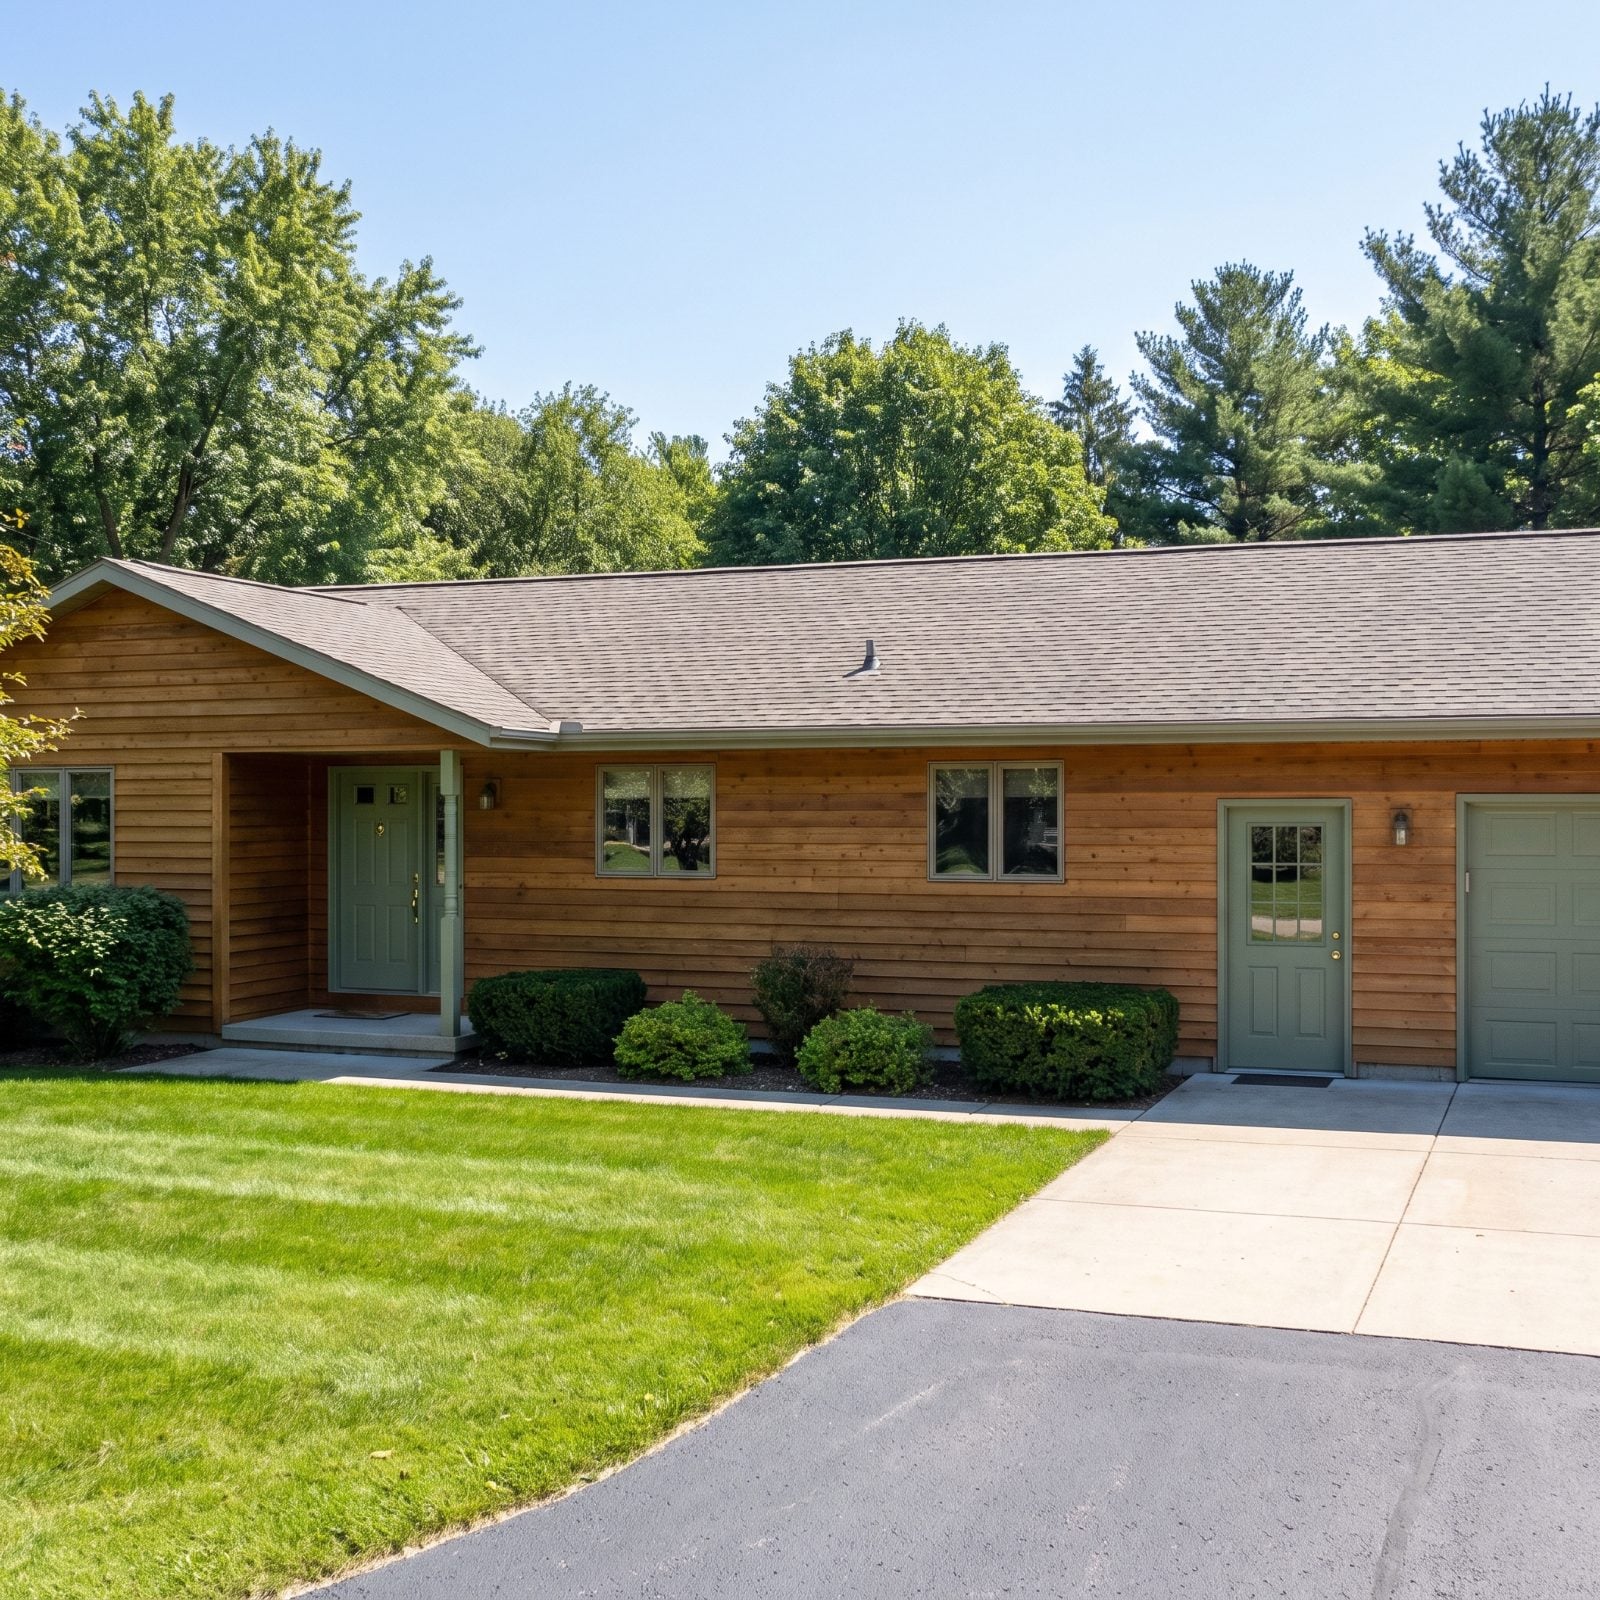
Two doors. Both green. No path committing to either one. Every first-time visitor does that little hesitation dance on your lawn, looking left, looking right, eventually knocking on whichever feels less wrong.
Ambiguity at the entrance makes a home feel standoffish before anyone even gets inside, because the eye wants one obvious answer and you’ve given it a coin toss.
Give the real front door a louder voice. Paint it a different color from the secondary door, add a porch light or an overhead element above it, and run the only paved walk straight to it. A wreath, a pair of planters, a bold number plate — all of them say “here, this one.”
42. Forcing Visitors Onto the Driveway Instead of a Front Walk
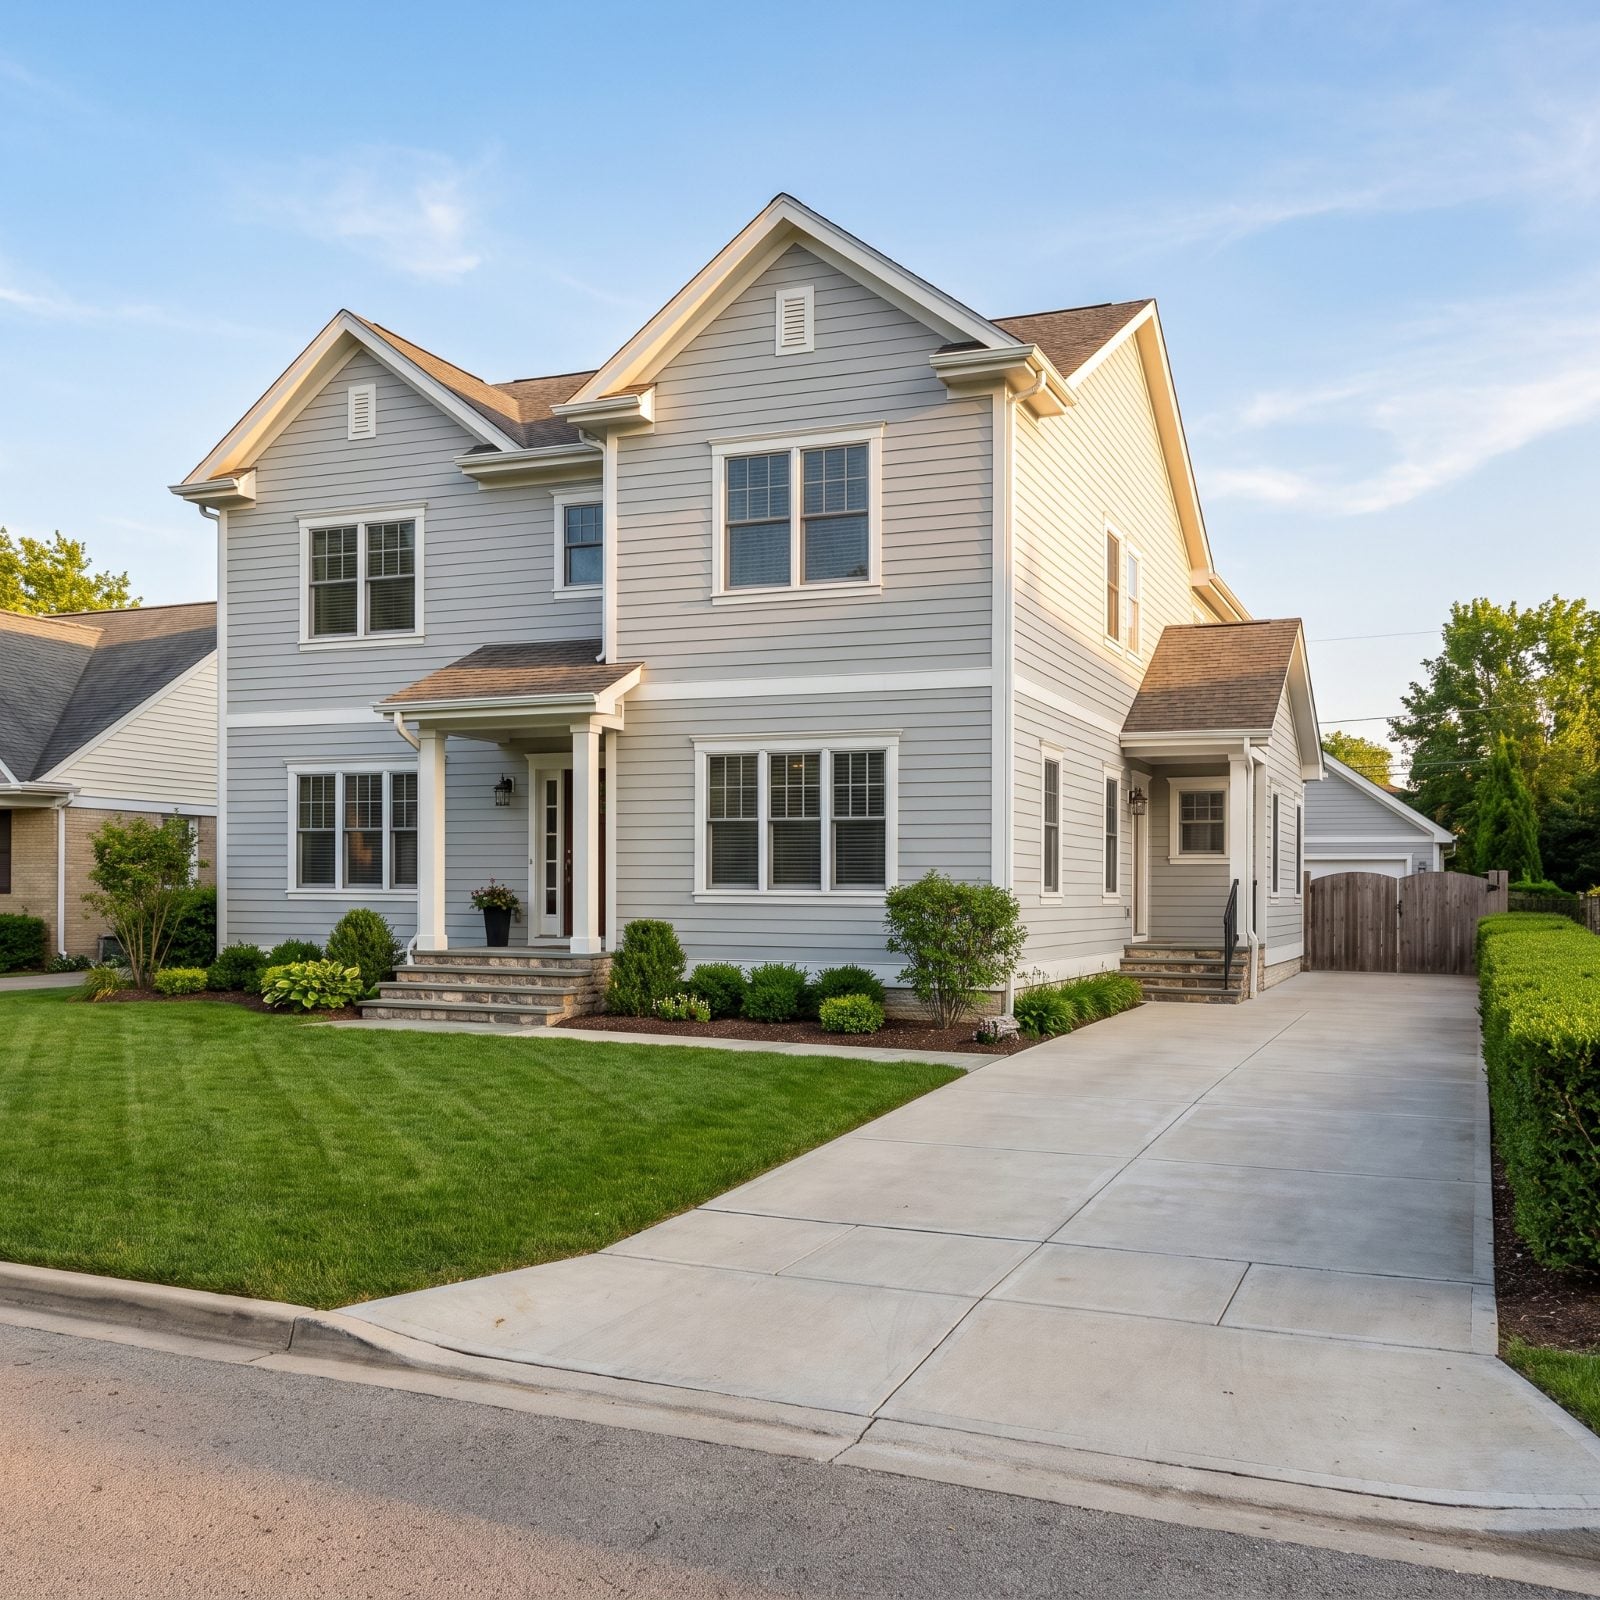
No front walk. Just a lawn and a driveway you’re silently expected to use as the entrance. Guests trek up the concrete, dodge the oil spot, and approach your porch sideways like they’re arriving at a loading dock.
Routing everyone through the driveway tells the street the car matters more than the people. The facade loses its natural line of approach and the whole arrival turns utilitarian.
Cut a dedicated path from the sidewalk or driveway edge straight to the porch — flagstone, brick, or poured concrete pavers all work. Even a simple three-foot run of stepping stones through the lawn reframes the arrival and softens a bare grey front porch approach.
41. Using an Entry Path Too Narrow for Two People
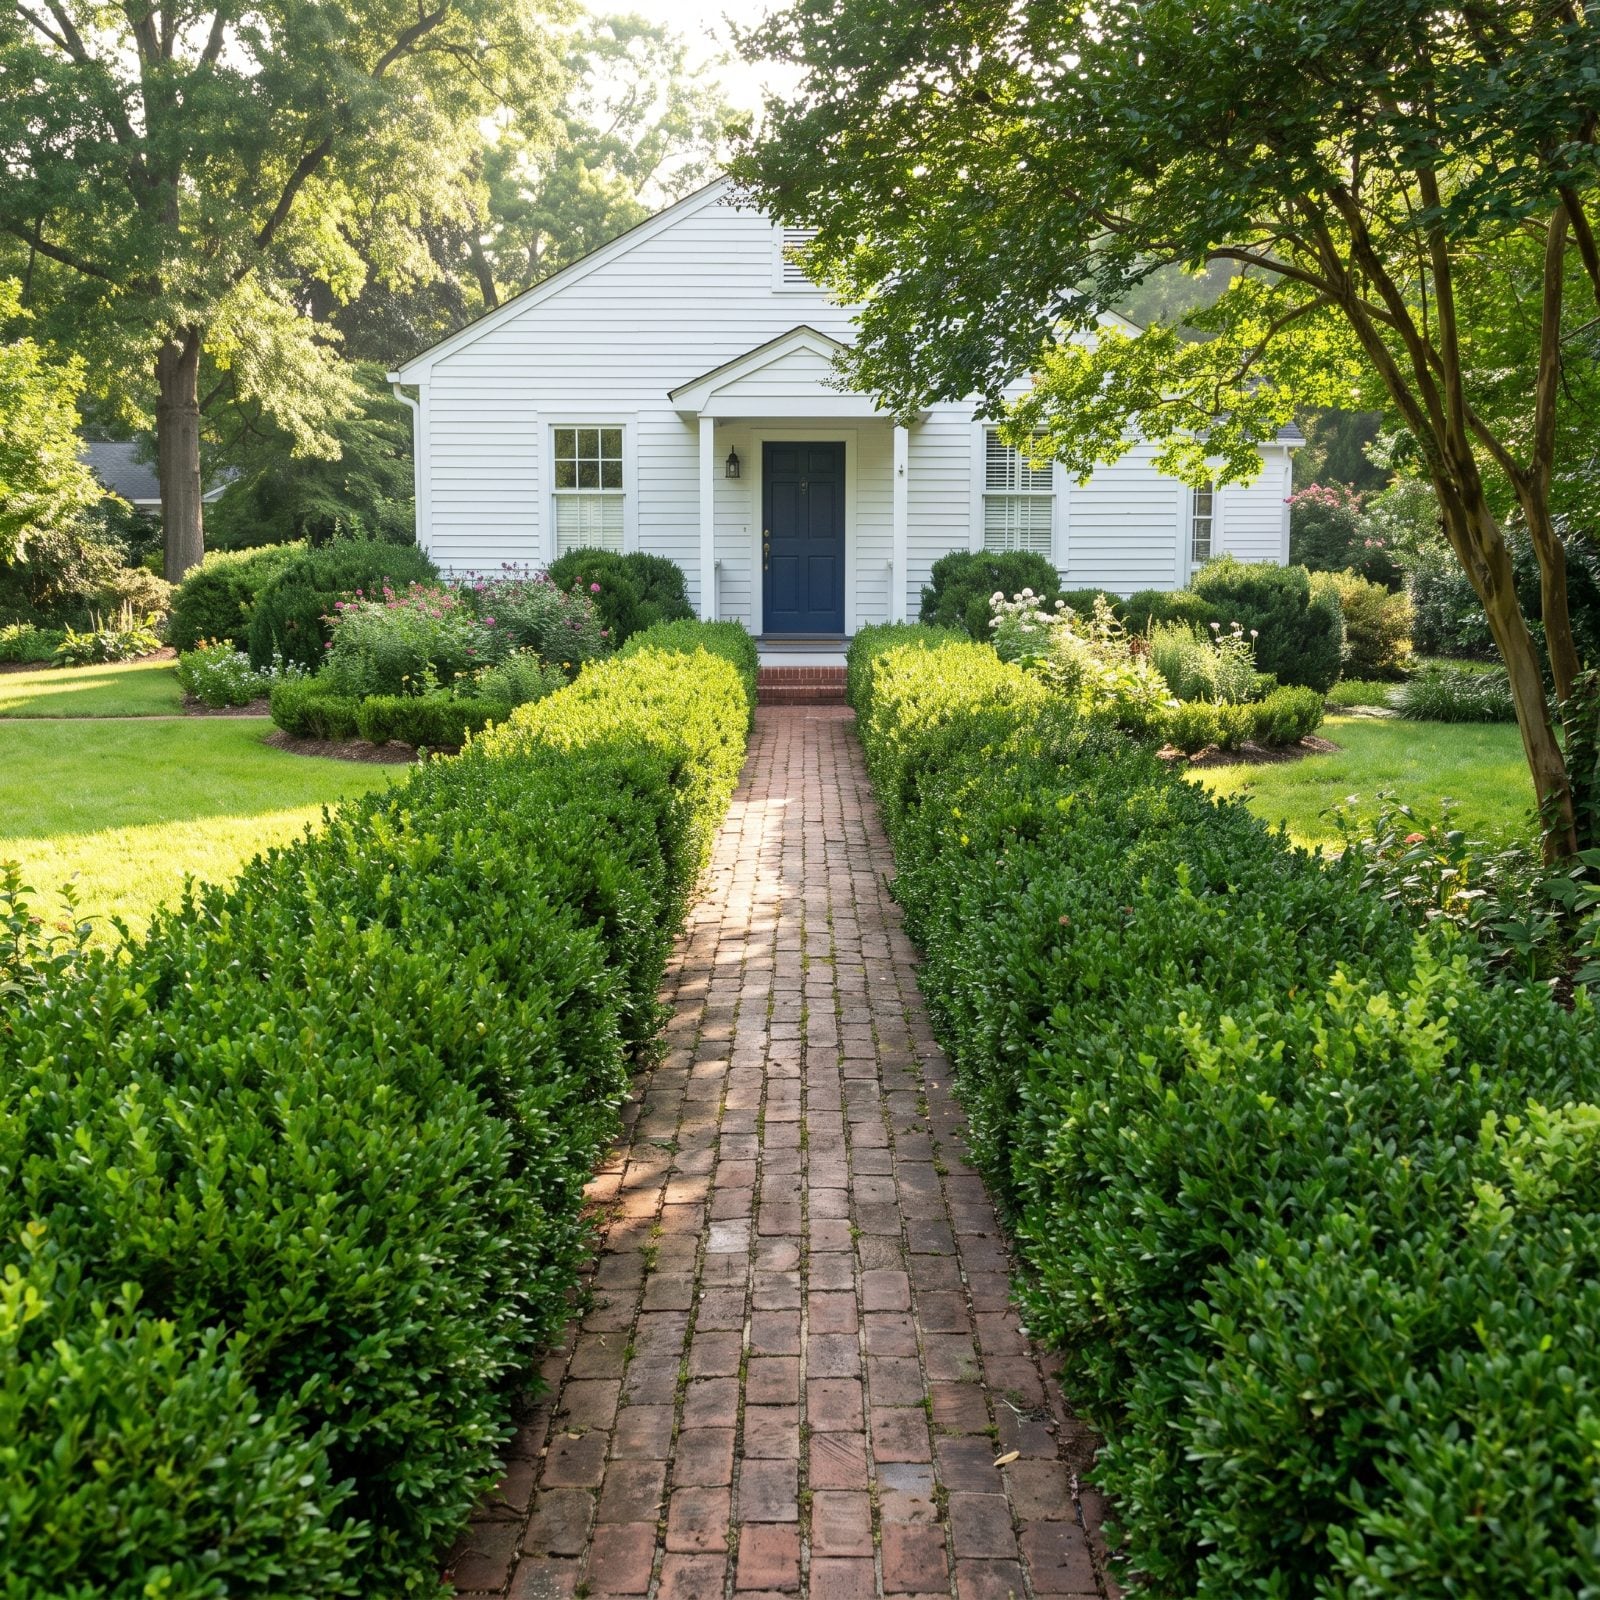
The path to the door is barely wider than your shoulders. Two people can’t walk it side by side, so couples and guests file up single file like they’re boarding a plane.
A pinched walk makes the whole approach feel tense and apologetic. People instinctively read a narrow entrance as “not really expecting company.”
Build or widen the main walk to at least 48 inches — that’s the magic number where two people walk comfortably together. Pull back any planting crowding the edges, and if the existing path was poured too narrow to rip out, add a brick or gravel border on each side to fake the width cheaply.
40. Planting Thorny Shrubs Beside the Entry Path
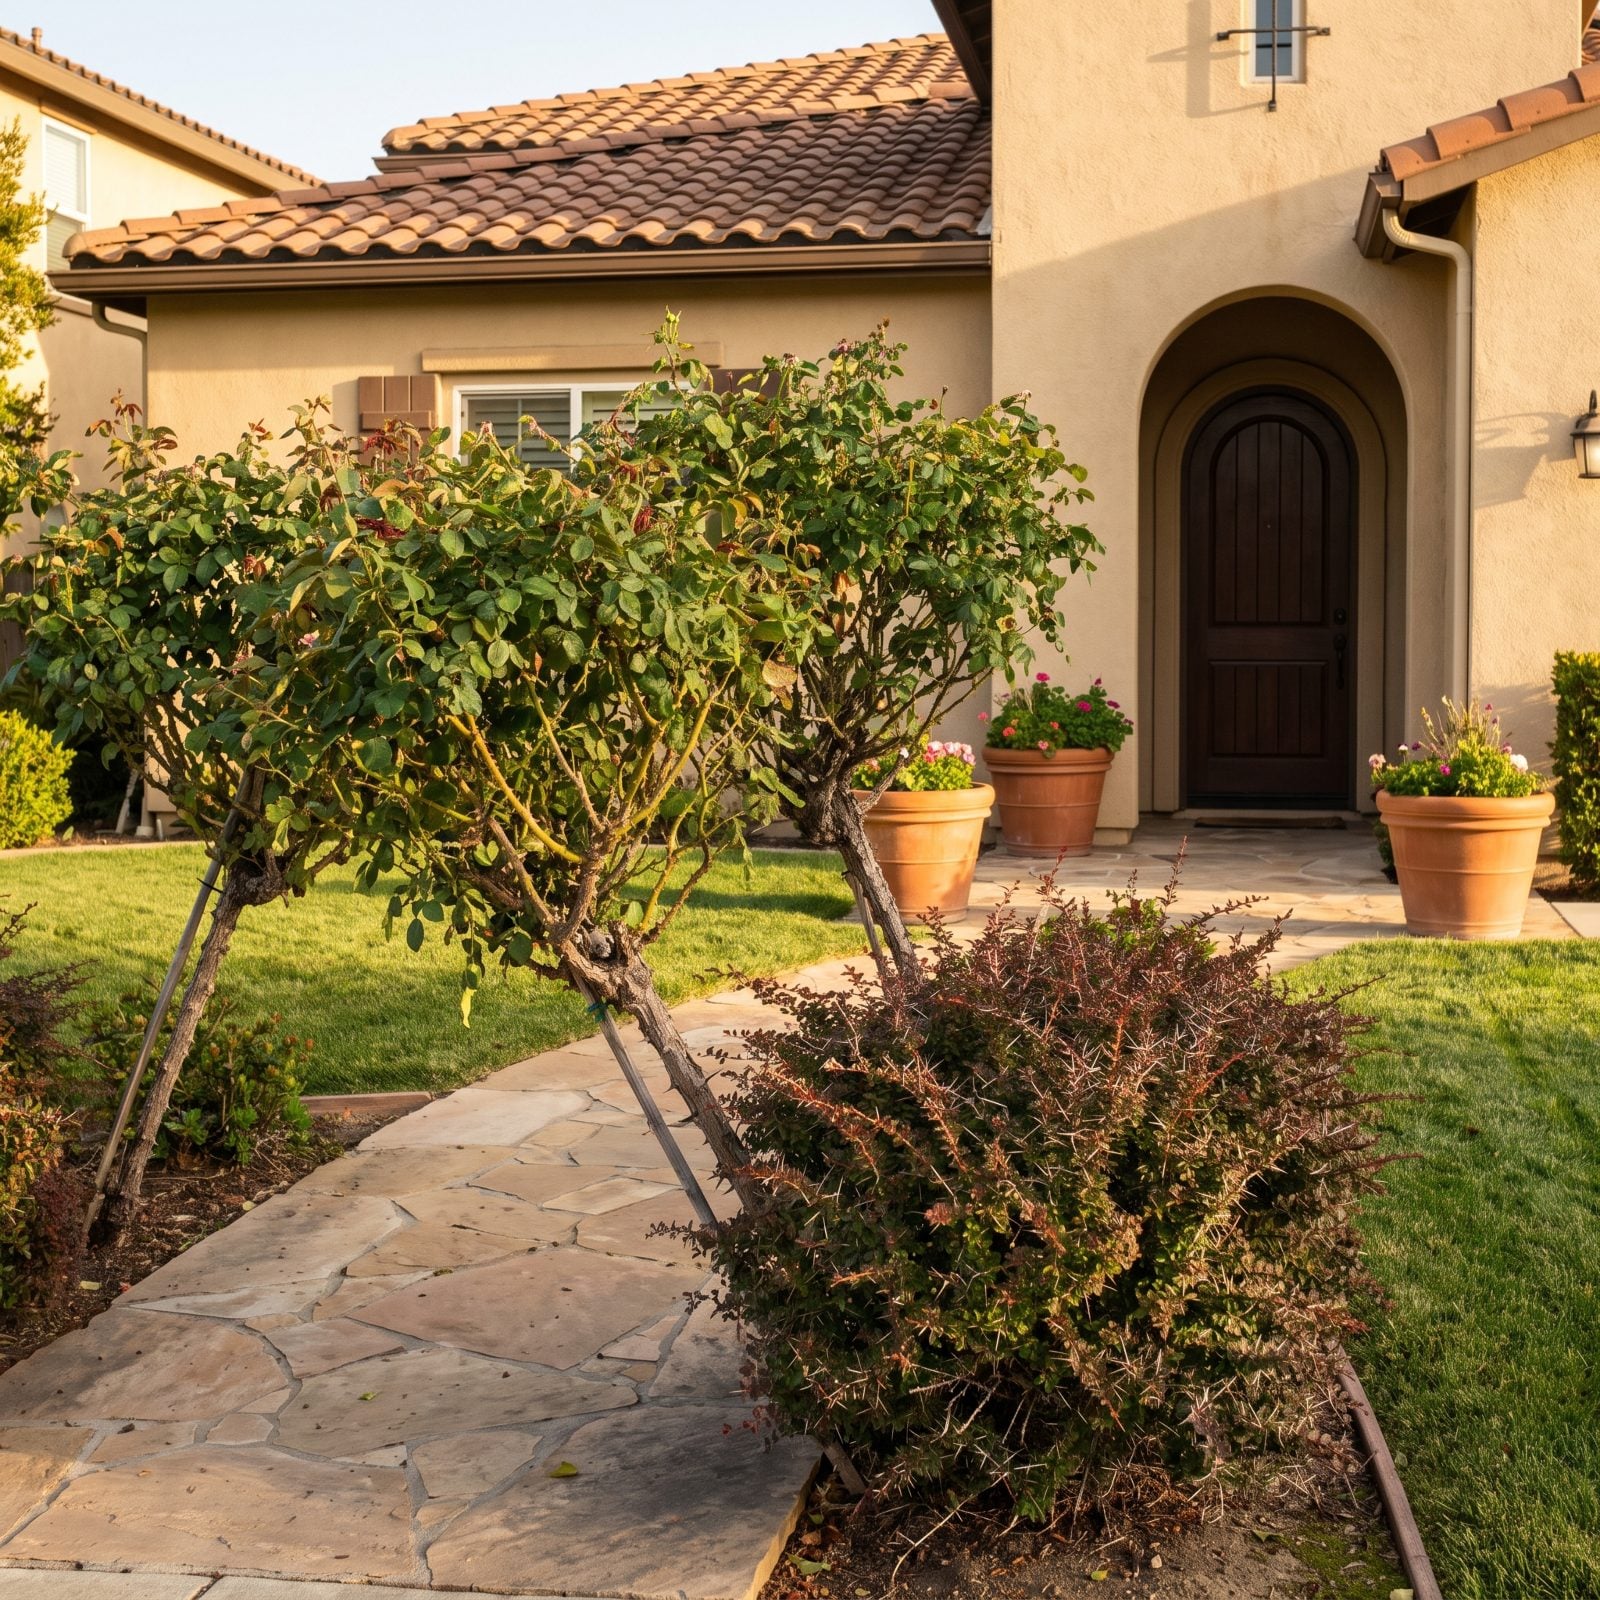
Roses by the door sound romantic right up until a guest in a nice coat snags a sleeve on the way in. Barberry, hawthorn, pyracantha, holly — all of them look great in a catalog, and all of them bite at the exact height where arms swing.
Thorny plants crowding a walk put people on the defensive during the one moment you want them relaxed. Watch closely and you’ll catch guests drifting toward the far edge of the path.
Keep anything with thorns at least three feet back from the walkway, or move it entirely. Swap in something soft that invites touch instead: lavender, boxwood, ornamental grasses, or a low hydrangea that forgives a brushing shoulder.
39. Making the Front Steps Visually Disappear
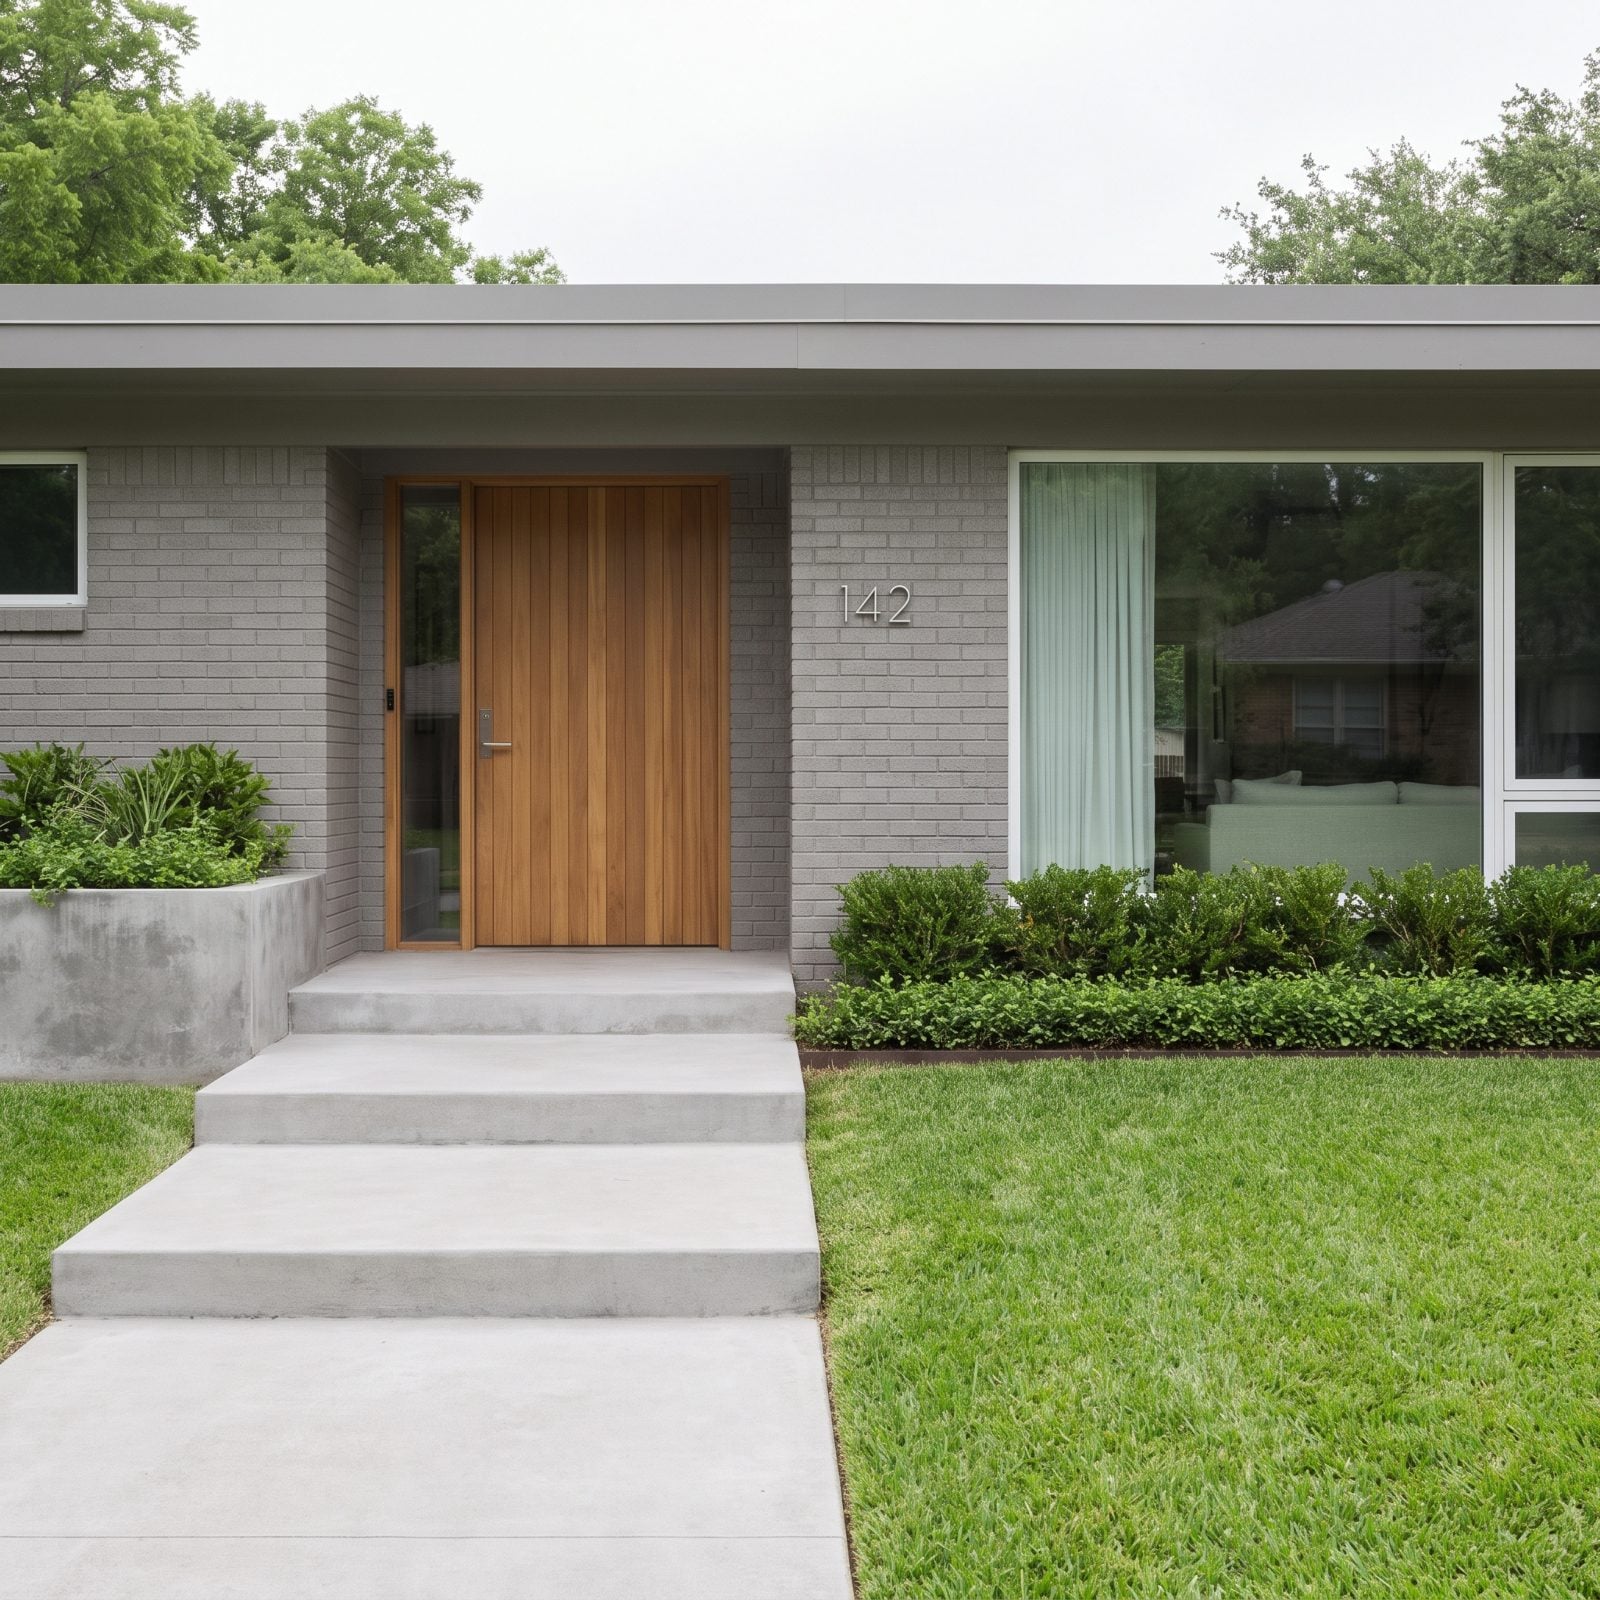
Three concrete steps, every one the exact same gray as the walk and the landing. In flat light they collapse into a single plane, and more than one guest has caught a toe where they expected level ground.
Steps that blend into their surroundings are both a safety problem and a design dead spot. The eye can’t find the change in elevation, so the approach feels disorienting.
Give the risers contrast. Paint the step edges a shade darker, add a strip of contrasting tile or stone to each nose, or run a low railing that catches the light. On a gray front porch, even a thin brass or black edge line turns invisible steps into a clear, confident rhythm.
38. Leaving the Porch Without a Clear Landing Zone
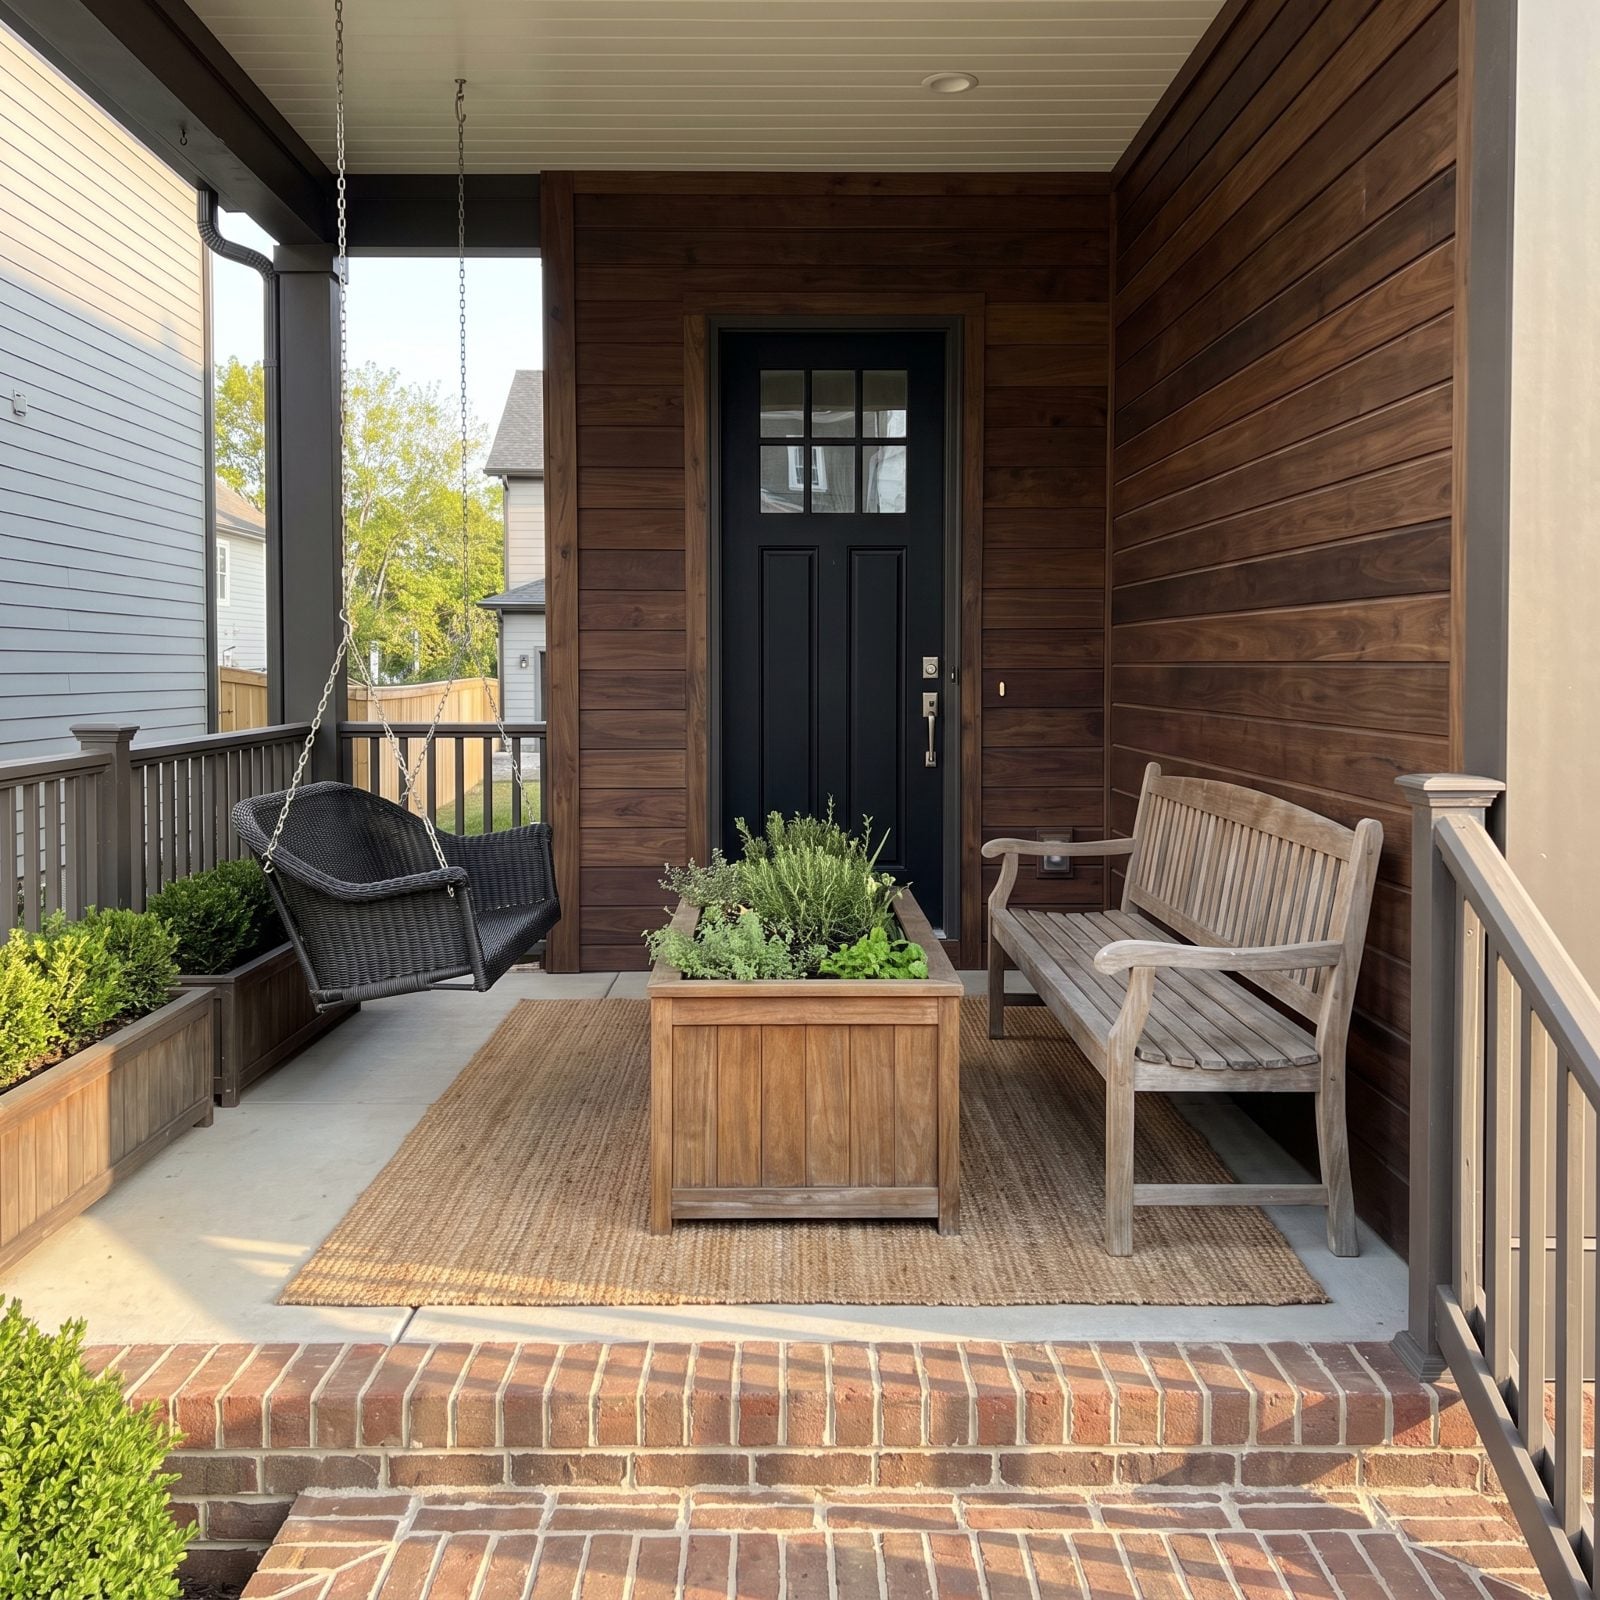
You reach the porch and there’s nowhere obvious to stand. A big planter sits where your feet want to go, a bench juts into the approach, and ringing the bell means a little sidestep around the furniture.
A missing landing zone makes the final step of arrival feel awkward. Pity, really, since it’s the moment you most want to come across as gracious.
Leave a clear three-by-three-foot area directly in front of the door, flat and empty, with a mat anchoring it. Push the planters and seating off to the sides. The cool front porch keeps all its personality; the door just gets its breathing room back.
37. Overcrowding the Porch With Furniture
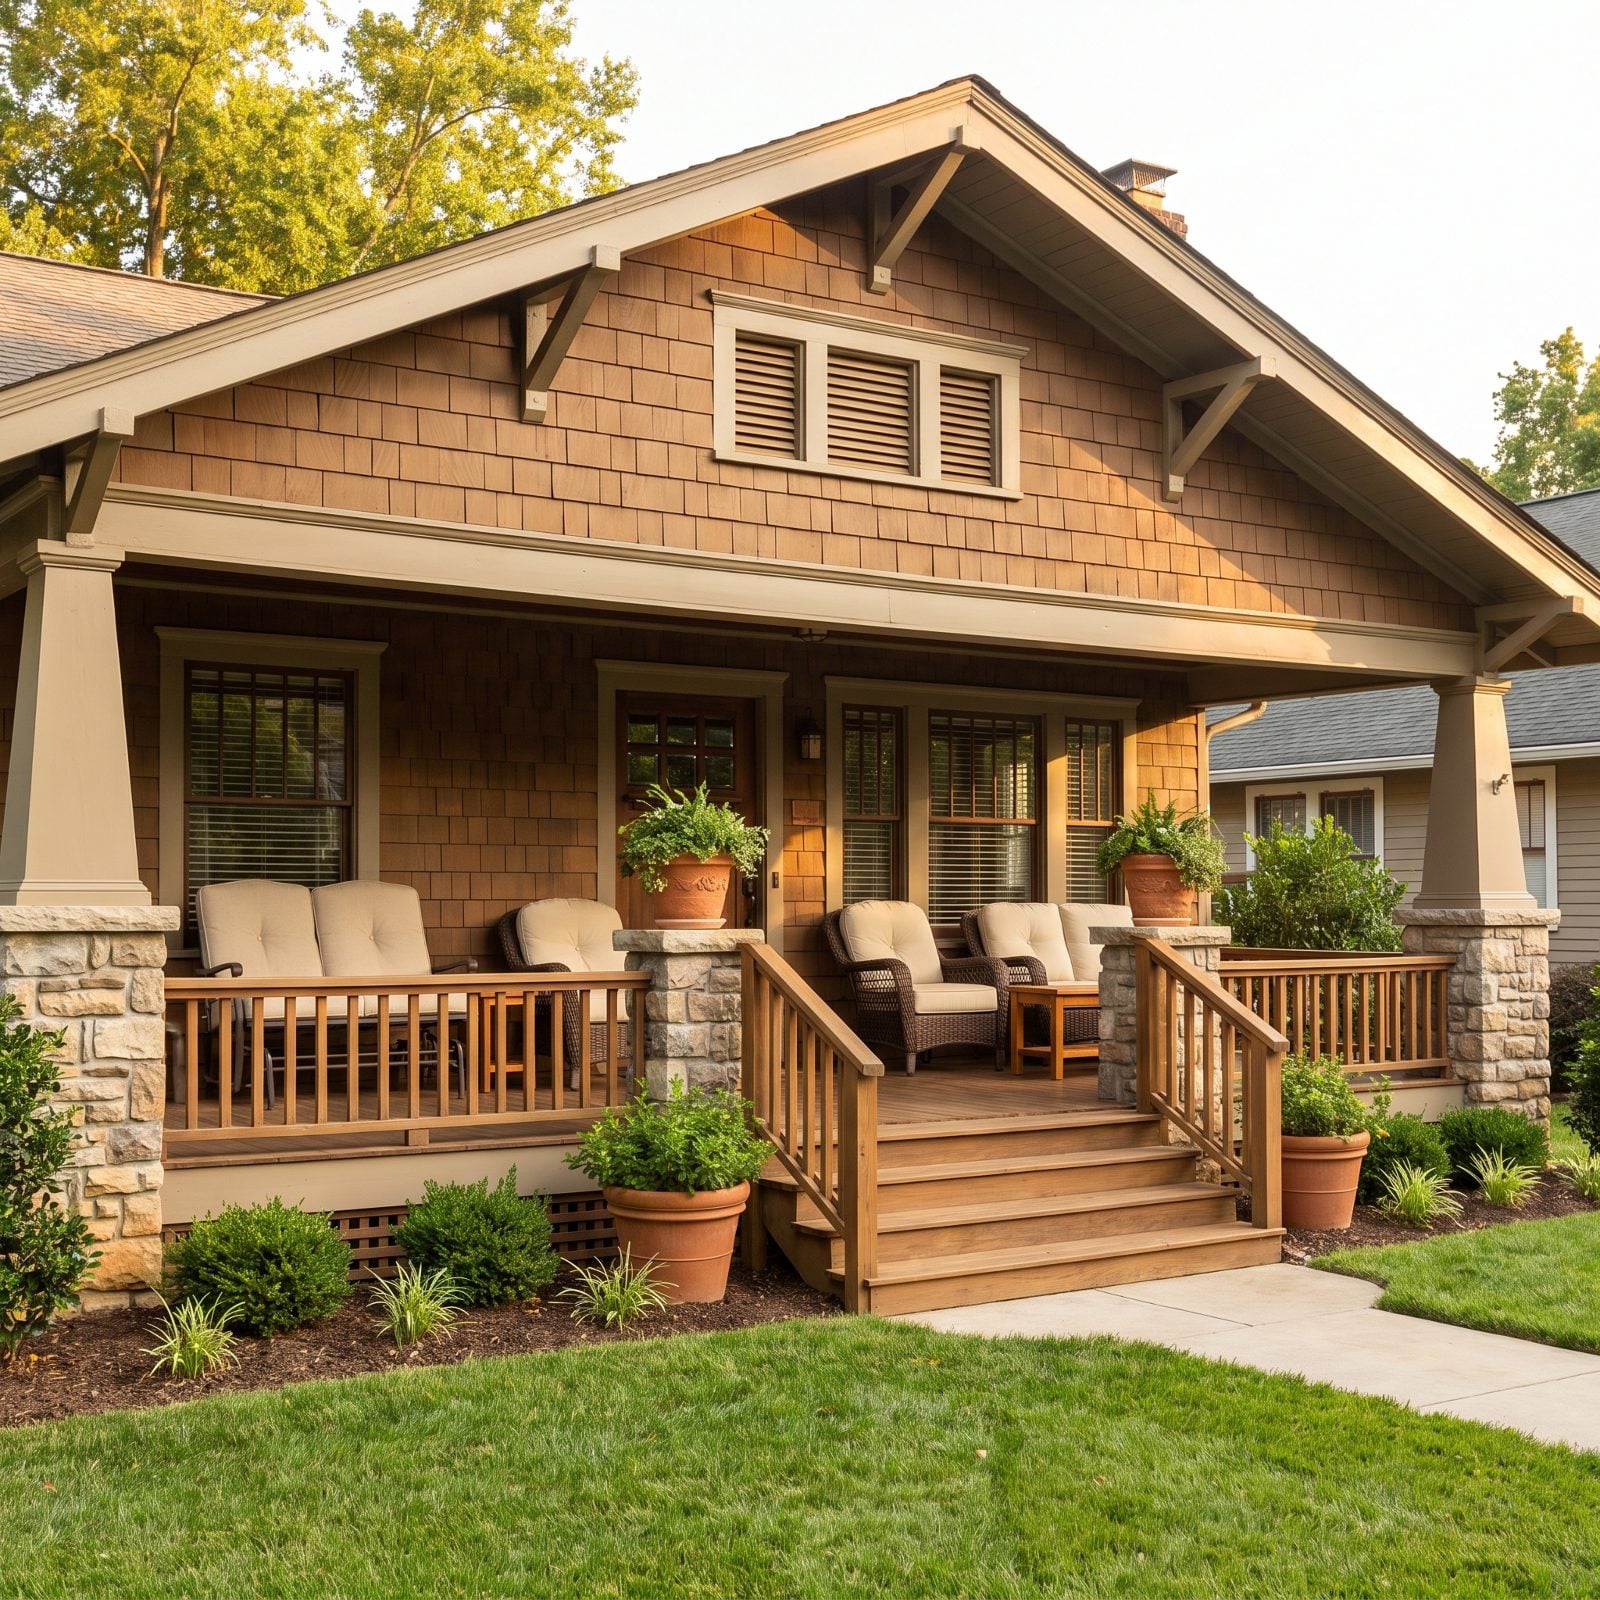
Good furniture, too much of it. A glider, a pair of wicker chairs, a loveseat, three tables, the plants — every piece earns its spot on its own, but shoved together they leave a twenty-inch slot to shuffle through to reach the door.
An over-furnished porch reads as storage, not seating, and nobody actually relaxes there because there’s no room to pull a chair out.
Pick one seating group and let it be the whole story. A pair of chairs and a small table, or a single swing, with a clear path past them to the entry. On a deep porch, a two-seat cream wicker armchair set beats a crowd of mismatched pieces every time.
36. Leaving the Front Door in Deep Shadow
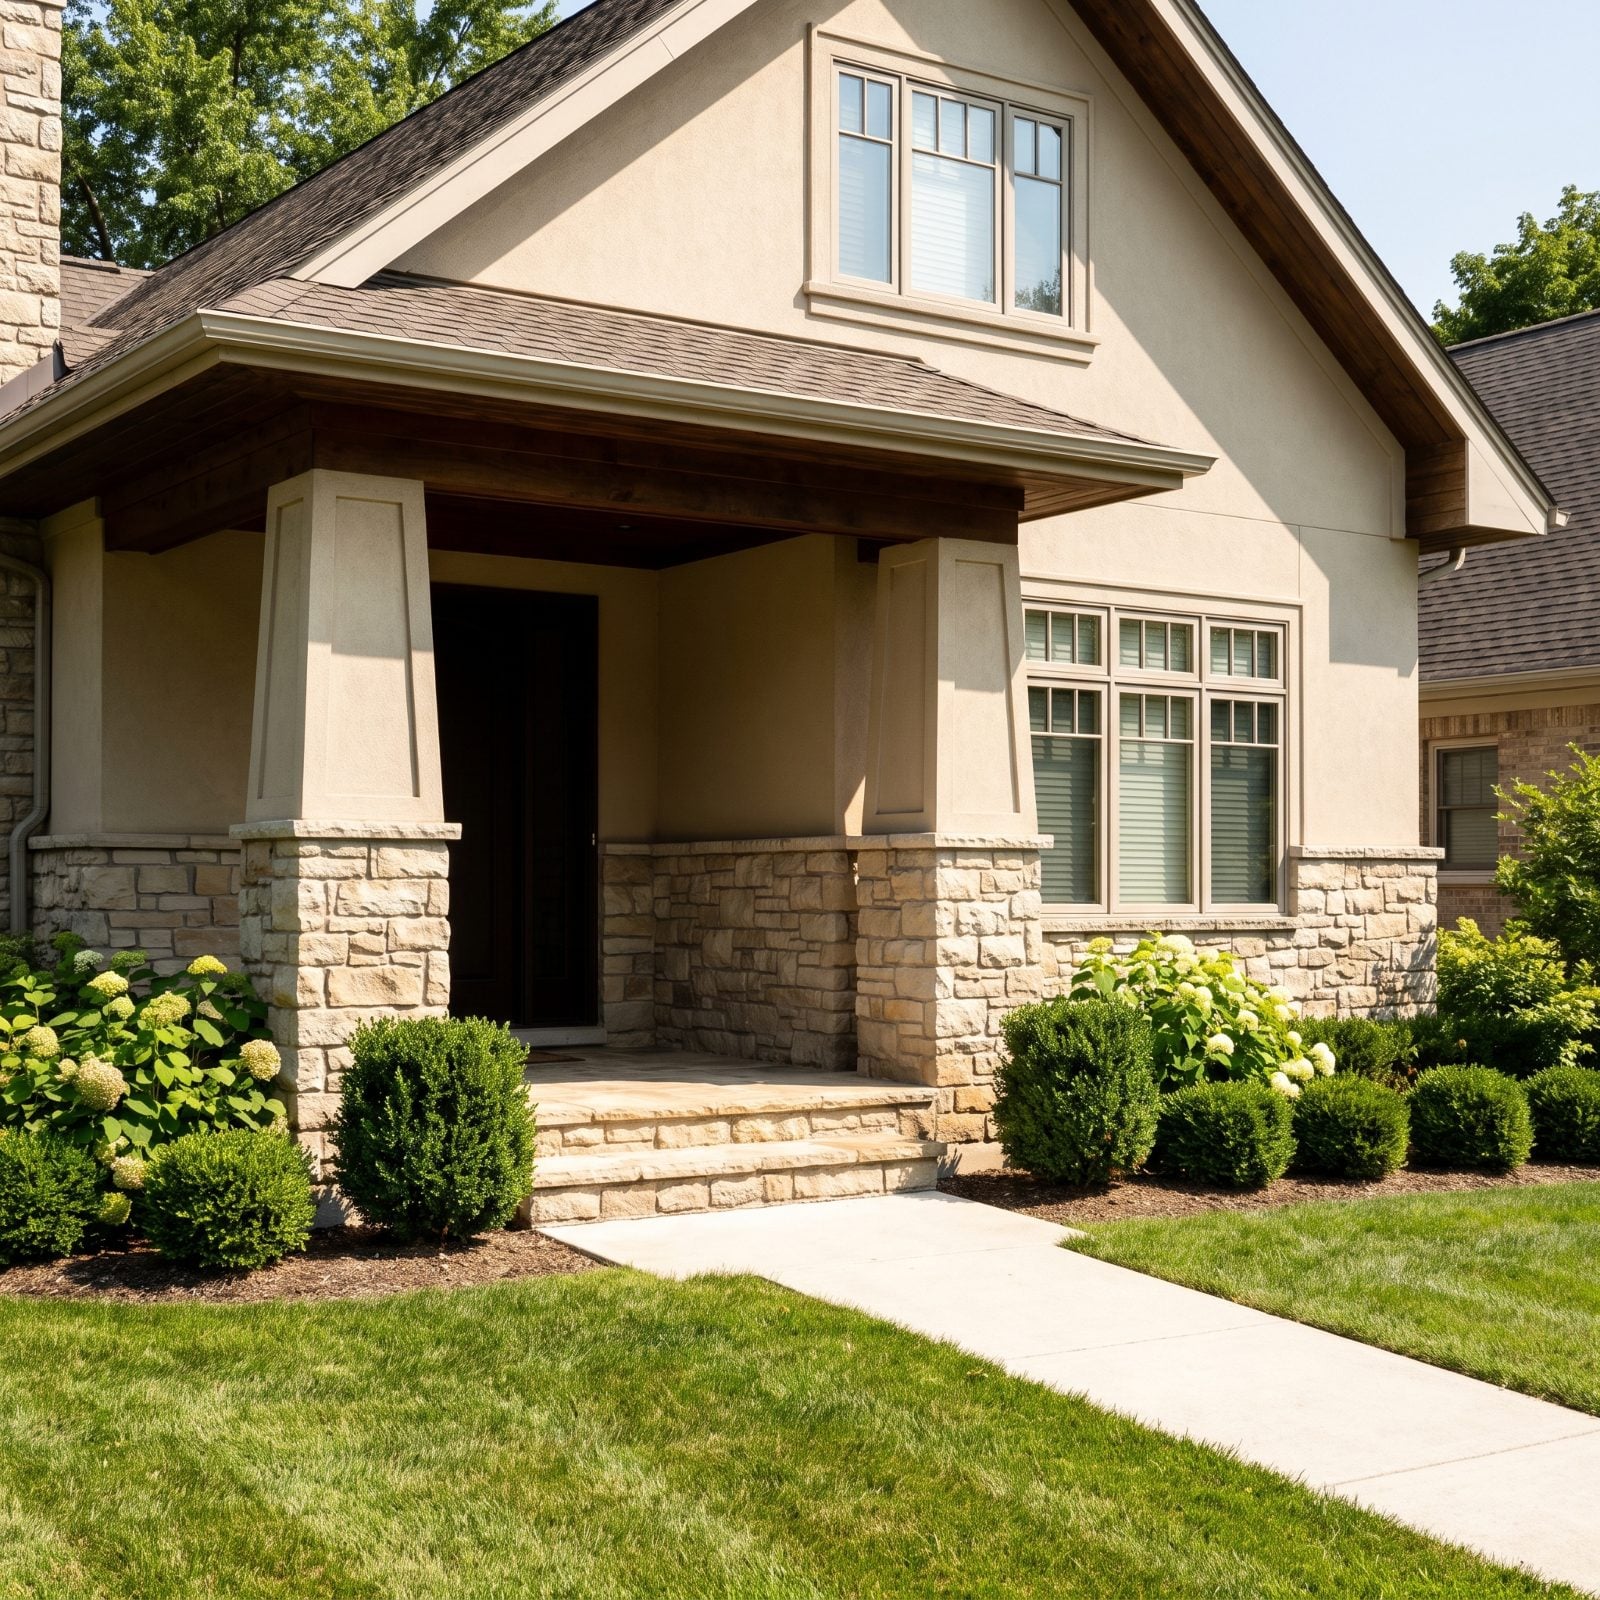
The whole facade is bathed in sun. Then there’s the door, tucked six feet back under an overhang, sitting in a pocket of shadow so deep it reads as a cave. Even at noon the entrance looks closed for business.
A dark recessed entry undercuts every other good decision on the facade. We’re hardwired to approach light and hesitate at dark openings.
So brighten the pocket. Paint the recessed walls and ceiling a pale color to bounce daylight in, hang a pendant or two wall sconces, and choose a door color with some reflectance. Even a single brass entry pendant changes how a shadowed entry reads.
35. Failing to Provide Safe Nighttime Path Lighting
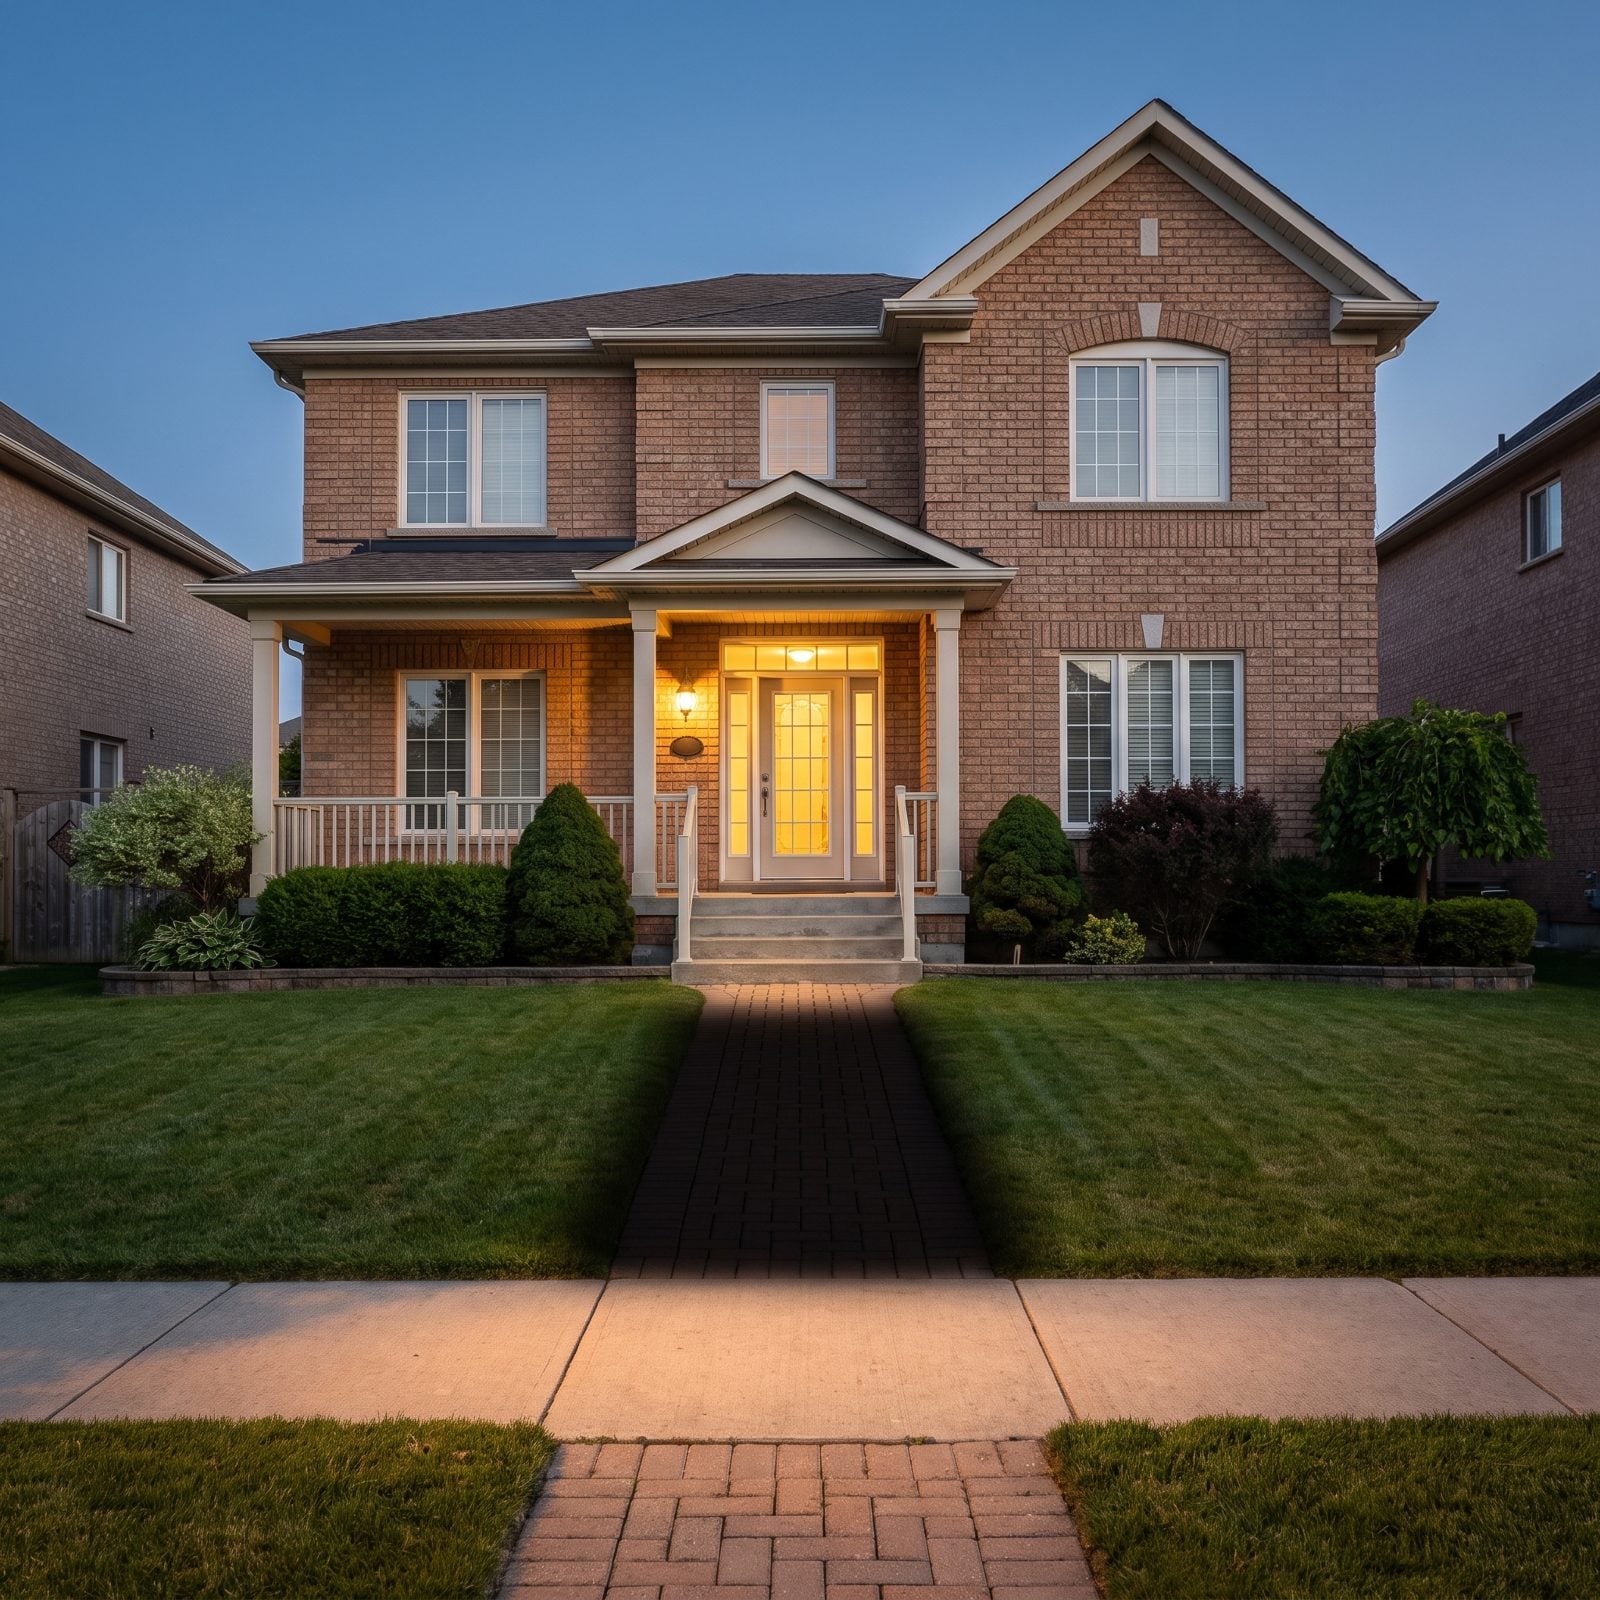
The porch light glows, the door looks warm, and between the sidewalk and the steps lies a stretch of path in total darkness. Guests arriving after sunset pick their way across it by phone flashlight, hoping the walk stays level.
An unlit approach erases all the welcome your lit door was trying to send. And it happens to be the single most common spot for an after-dark stumble.
Run low path lights along the walk, spaced roughly six to eight feet apart, pointed down at the ground rather than out at the eyes. Solar or low-voltage both work. Warm white, never cold blue — that’s the part people get wrong. The goal is a soft runway of light that pulls people safely toward a door that already looks happy to see them.
34. Installing Glare-Heavy Security Floodlights
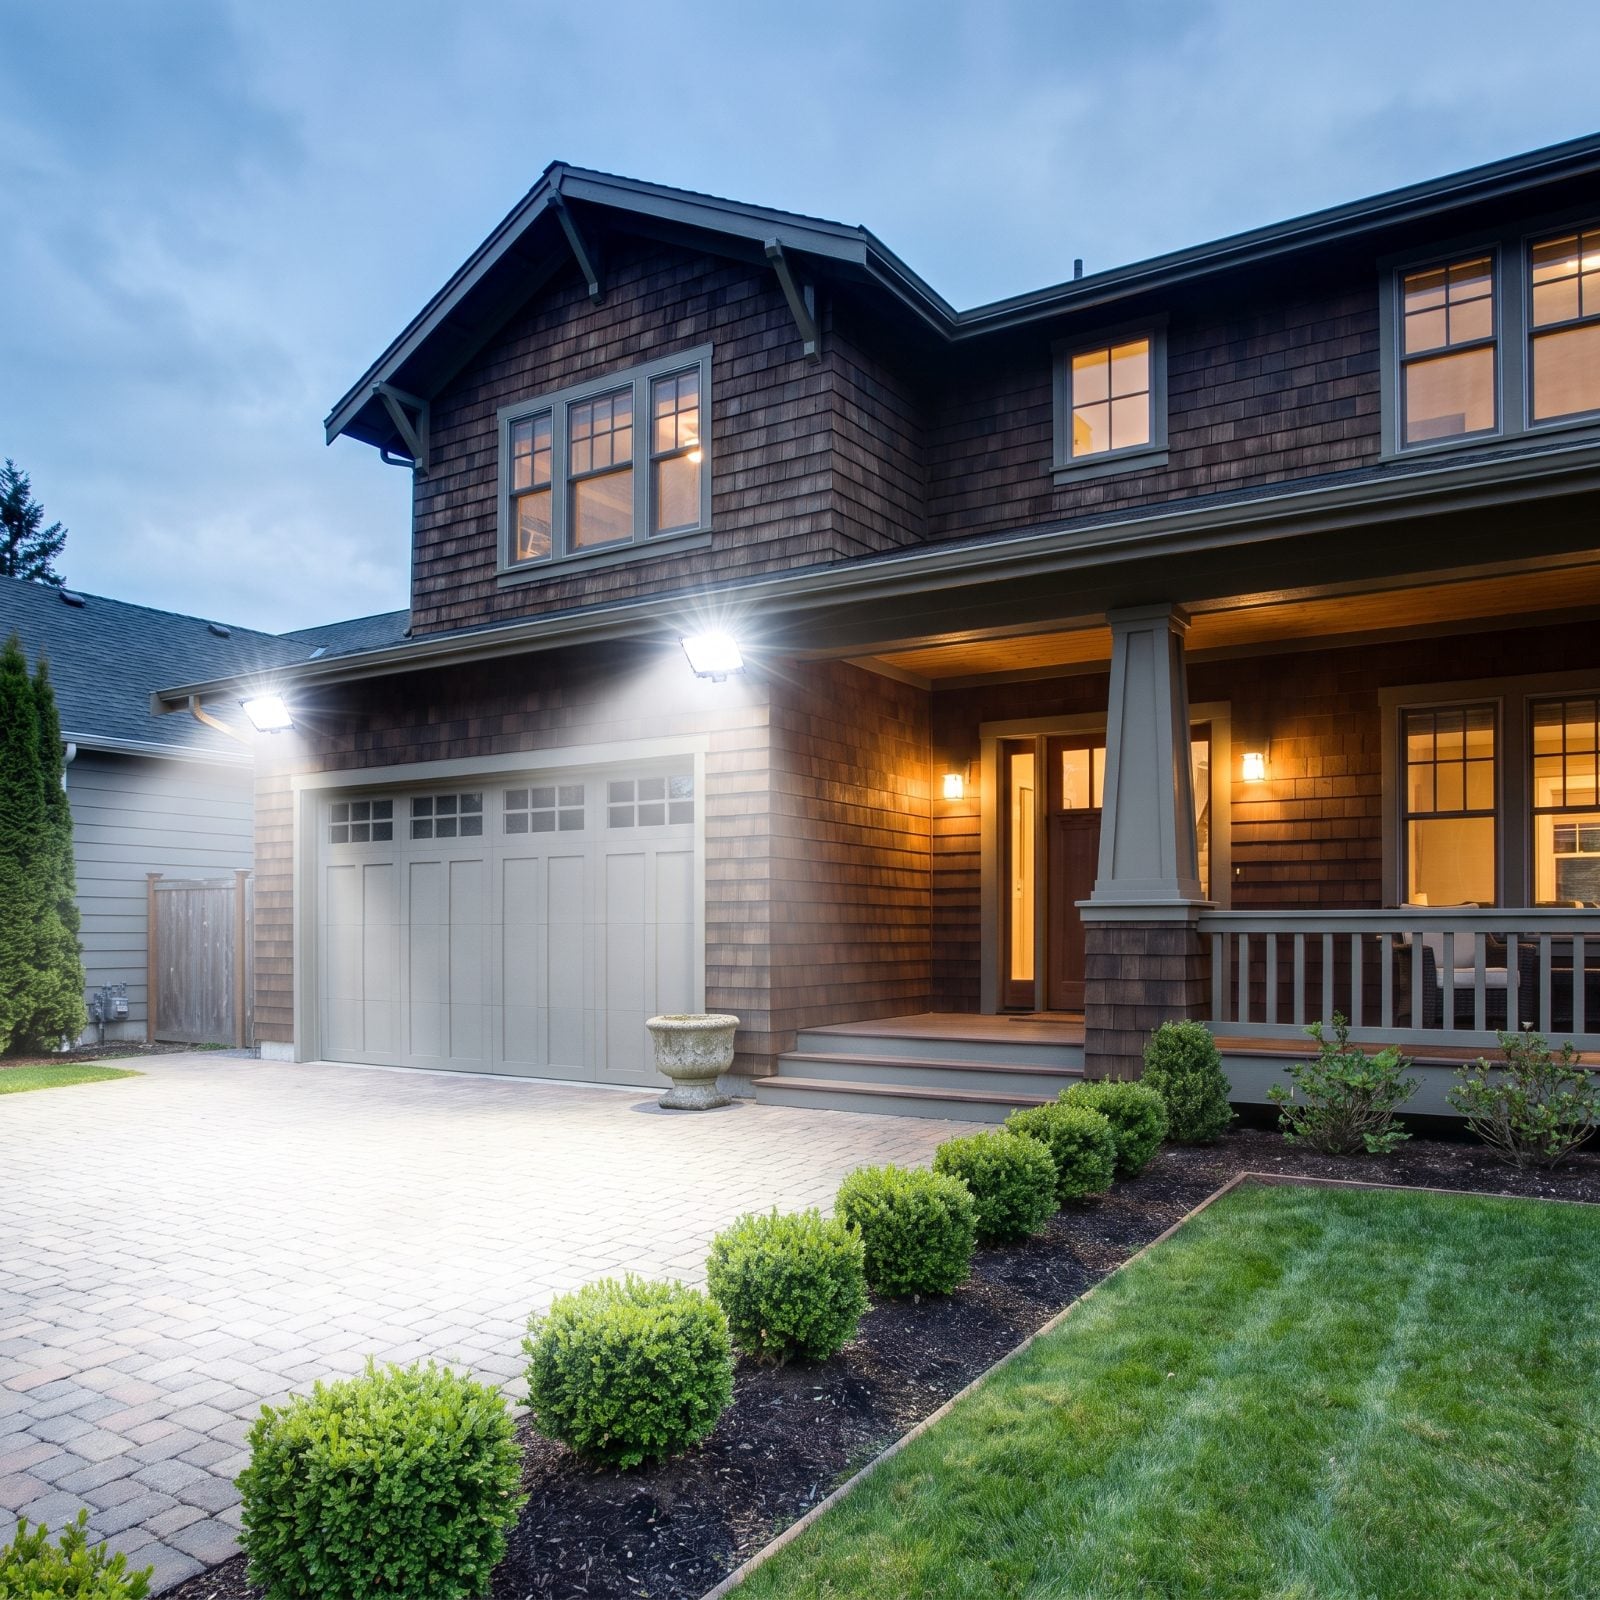
You’ve driven past the house that glows like a parking lot. One pair of floodlights blasting cold white across the yard flattens the whole front of the home, and faces disappear, textures disappear, the brick and shingles and all that planting you paid for just goes gray under the glare.
Bright does not mean safe. It means harsh. A visitor walking up actually sees less, because their eyes fight the contrast between the hot pool of light and the dark around it.
Swap the 5000K floodlights for warm 2700K fixtures aimed at the ground, not at the guest. Path lights low along the walk, a soft wash on the door, a motion sensor set to a tight zone. You get a welcoming cool front porch that still lights up when something moves.
33. Making House Numbers Hard to See or Read
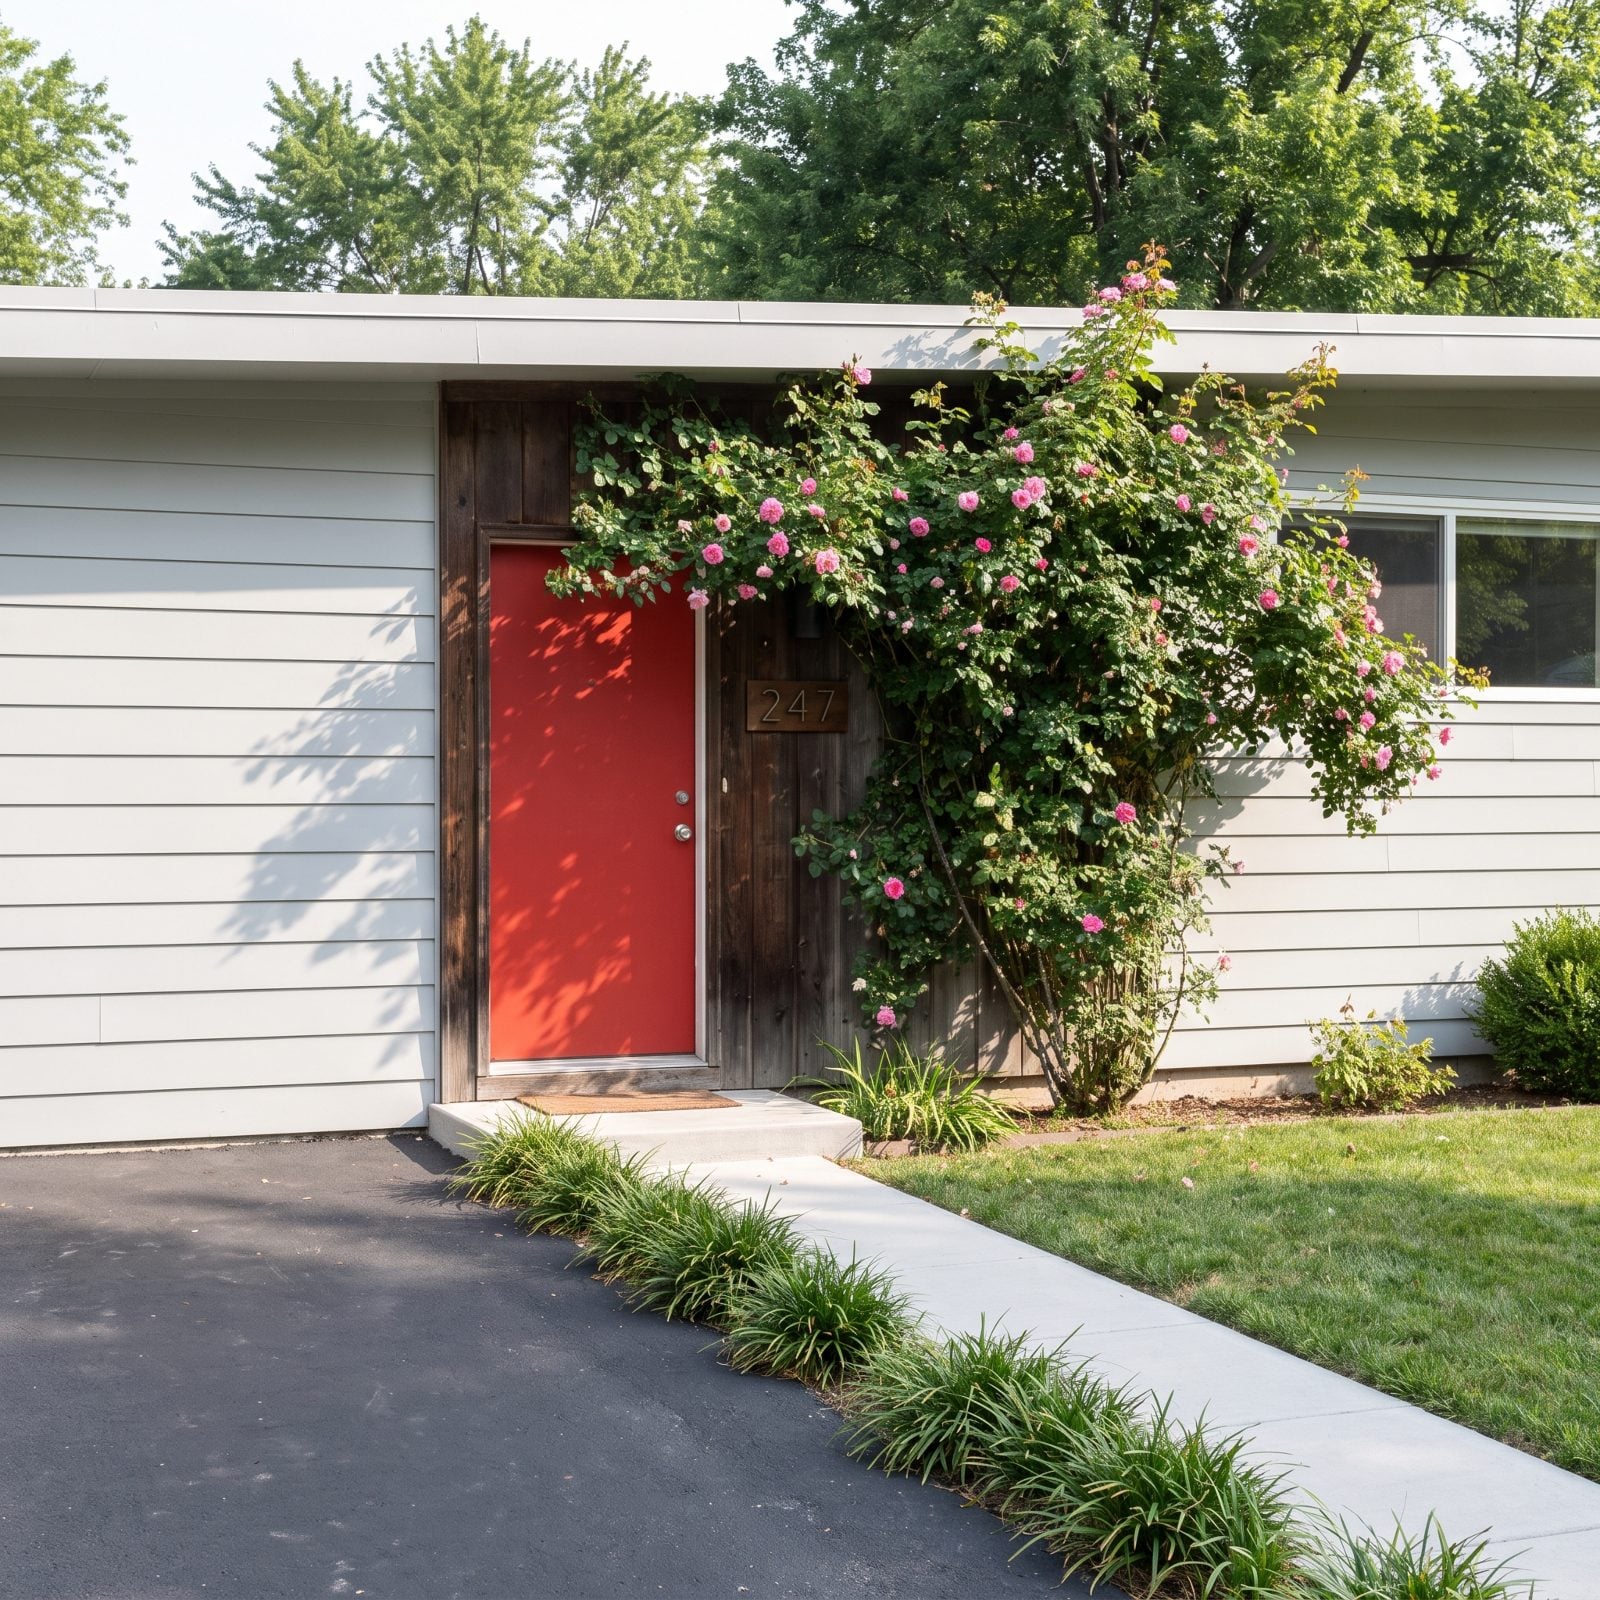
Tiny bronze numbers on bronze trim. A delivery driver circles the block twice, a guest squints from the curb, and you know the drill because you’ve done it yourself trying to find a friend’s place at night.
Numbers that disappear are more than annoying. They read as an afterthought, and the whole entrance feels unplanned.
Go bigger than feels necessary. Five or six inches minimum, mounted where headlights and daylight both hit them. Contrast is the whole game: dark numbers on a light wall, light numbers on a dark one. And light them. A small dedicated fixture over the digits does more for your curb appeal than another shrub ever will.
32. Allowing Foundation Plants to Cover the Windows
🔥 Would you like to save this?
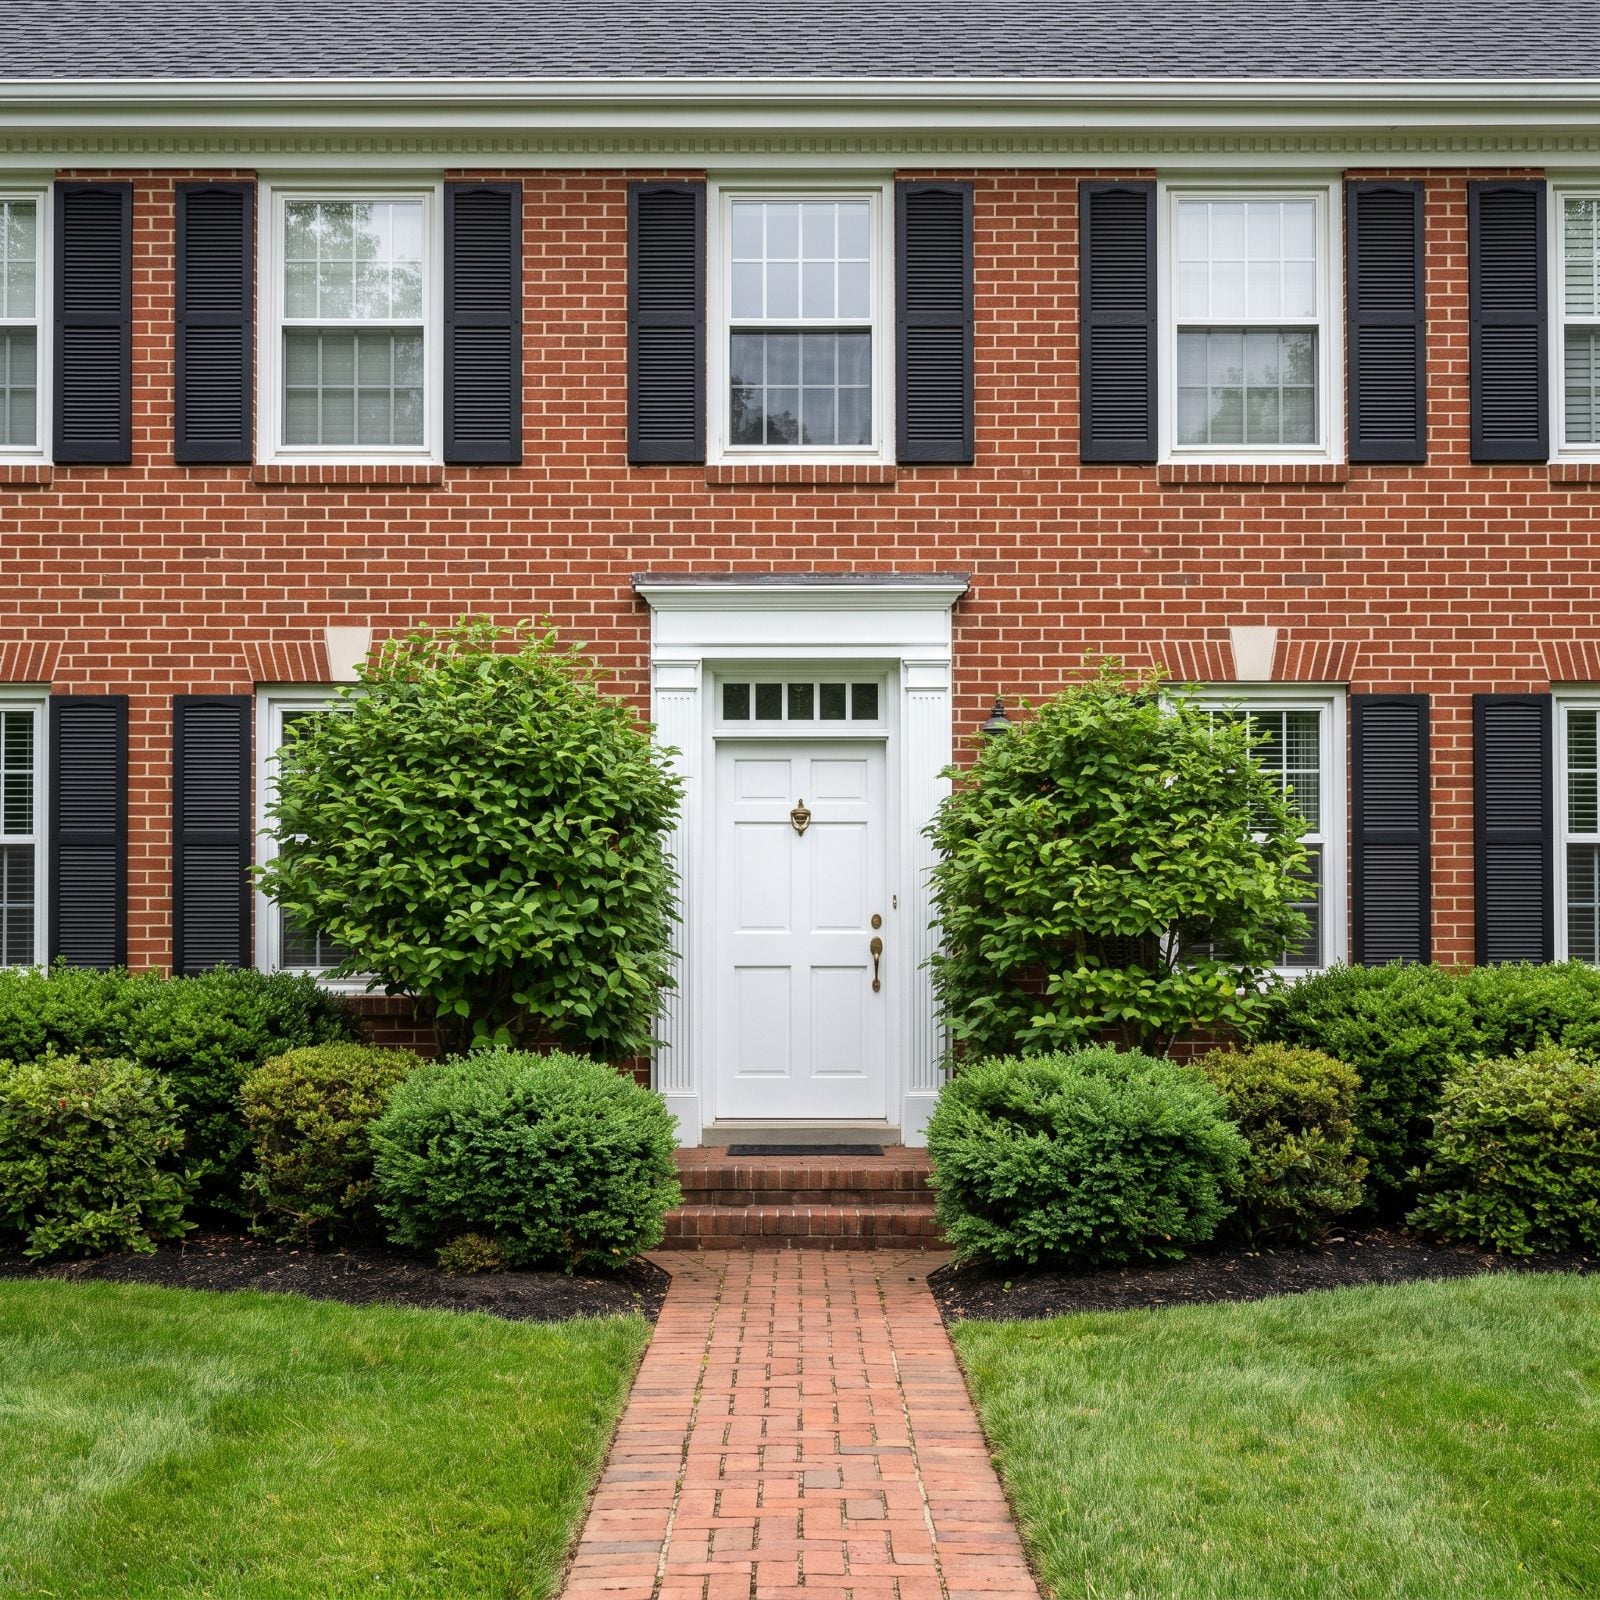
Those foundation shrubs were knee-high at planting. Ten years later they’re eating the windows, the house looks like it’s sinking into the beds, and inside, the rooms lost half their daylight to a wall of green.
Plants that cover windows shrink the whole facade and tell passersby nobody’s keeping up. They also trap moisture against the siding, which is its own slow problem.
Prune hard now, then right-size the replacements. Keep anything within three feet of the house below the window sills, and pick slow growers that top out where you want them instead of fighting a fast shrub with shears twice a year. Your windows go back to being windows, and the home gets its proportions back.
31. Choosing a Front Fence With No Visible Gate
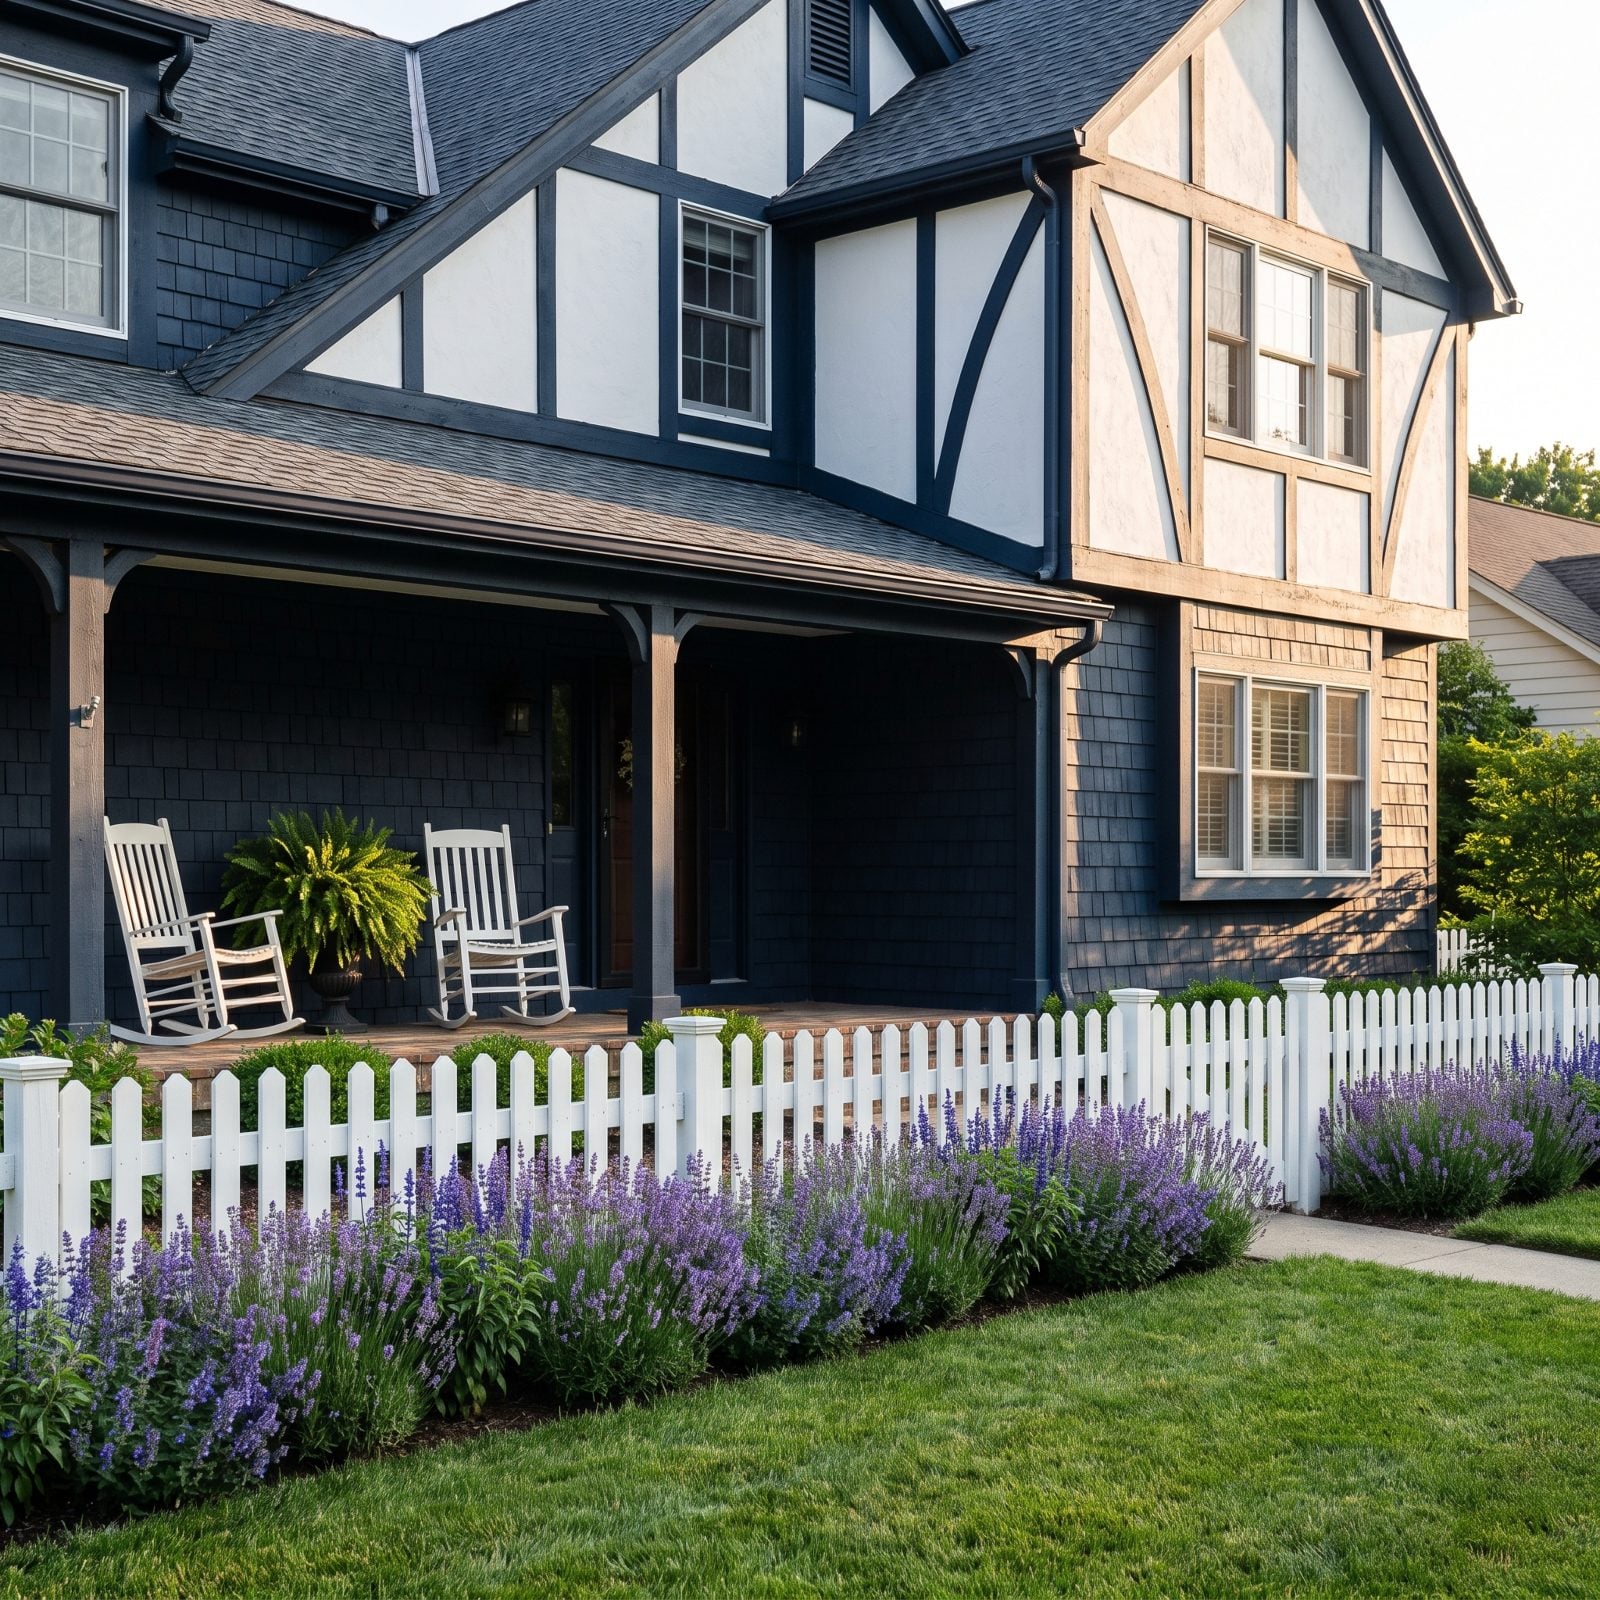
A picket fence should say come in. One with no obvious gate says figure it out yourself. The eye runs the whole front looking for the opening and never finds it, and the house pulls back behind the pickets like it isn’t expecting company.
Fix it by making the entry impossible to miss. Center a gate on the path, give it a slightly taller post or an arbor overhead, and let the hardware read from the curb. A gray front porch waiting behind a clear gate is an invitation. A sealed fence line is a moat.
30. Installing a Gate That Opens Awkwardly Into the Path
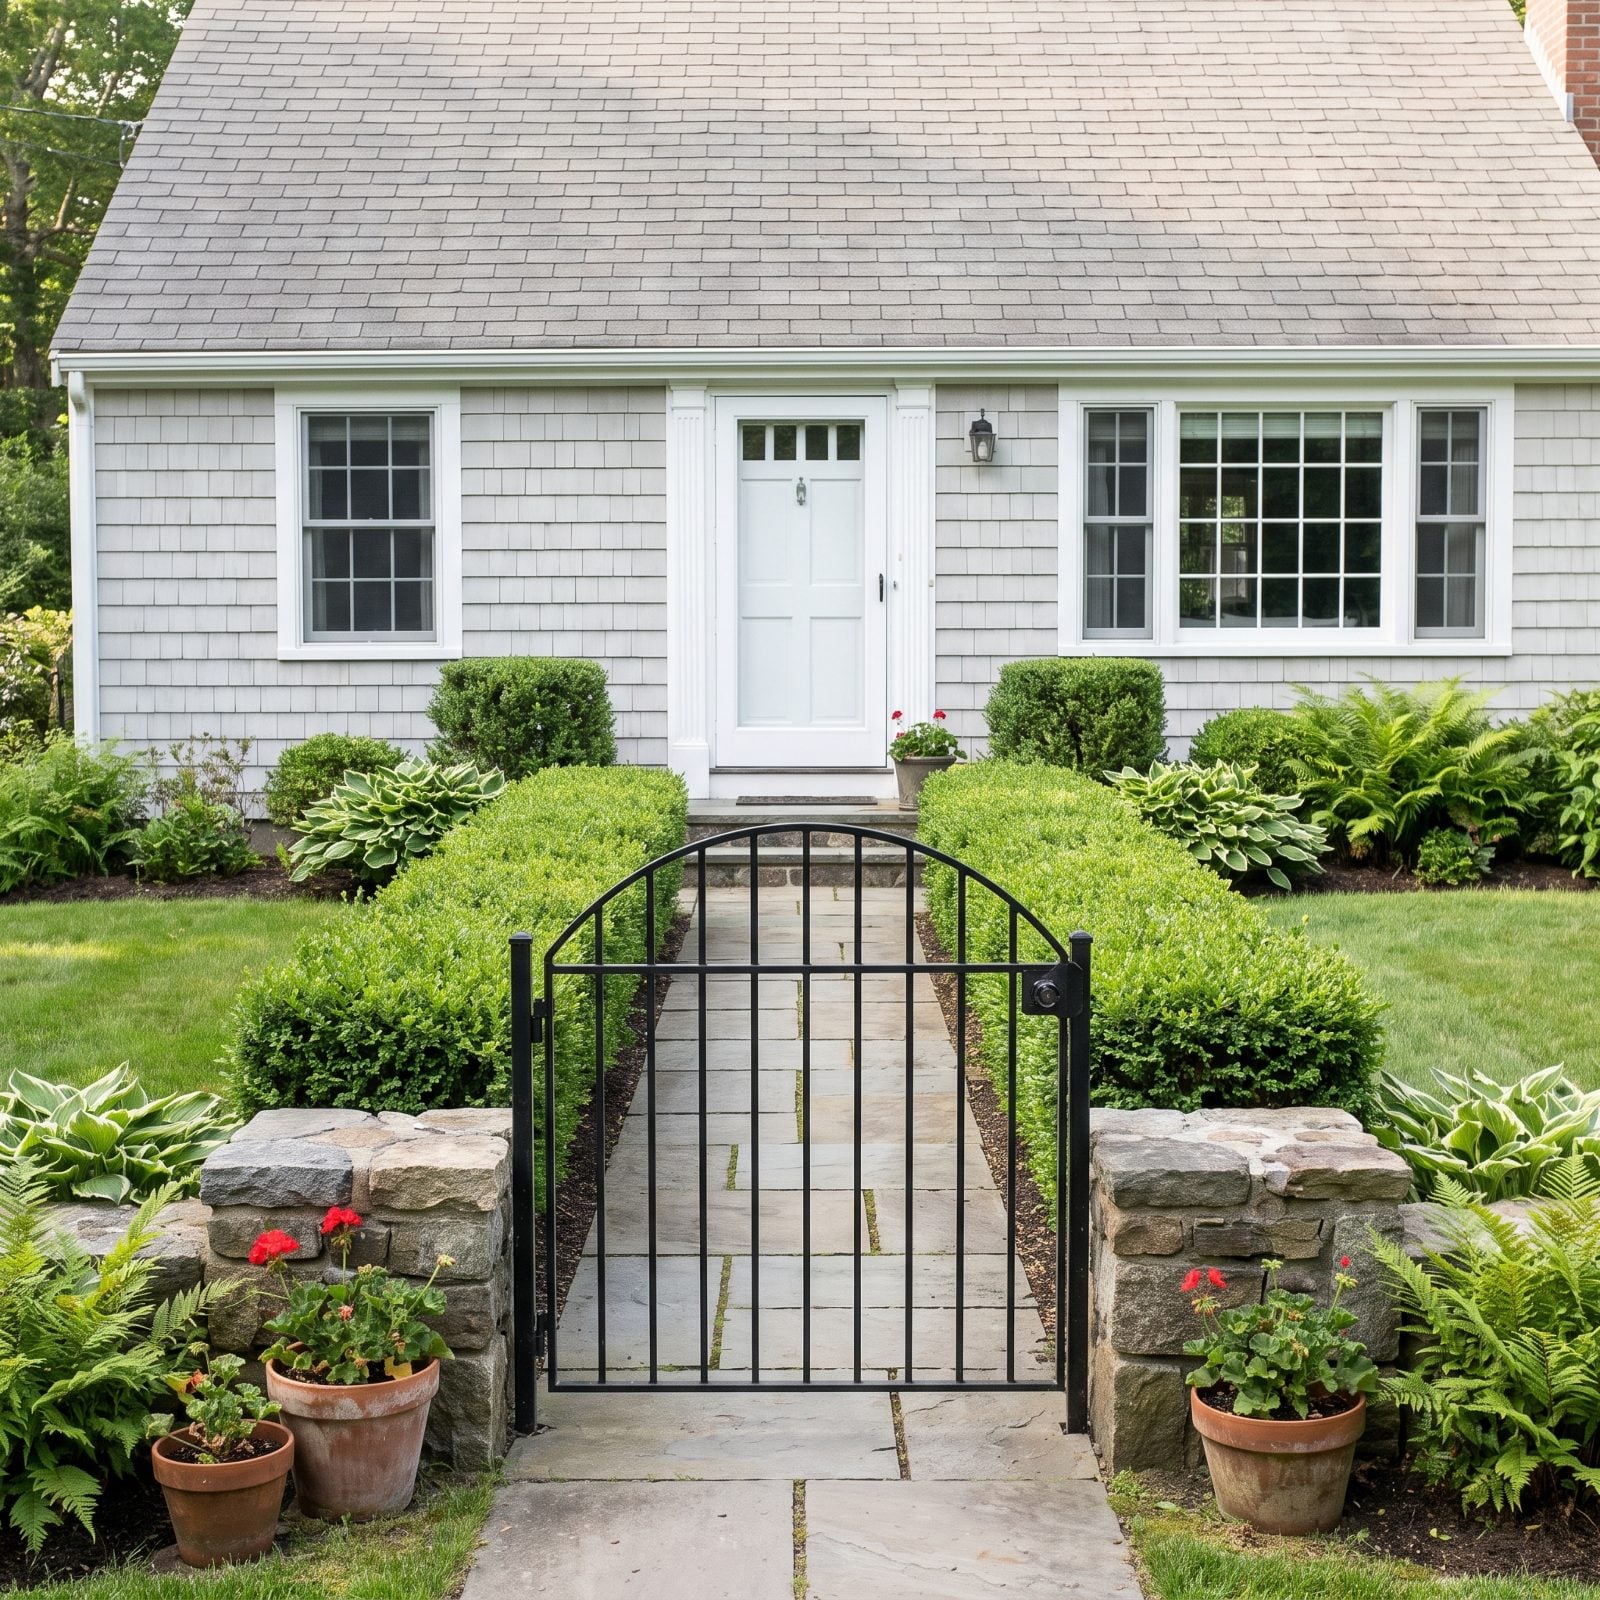
You walk up, reach for the gate, and have to step backward to let it swing at you. Or it opens into the path and you squeeze past it. Small thing, but you feel it every single time, and so does every guest.
A gate that fights the person using it makes the whole entrance feel grudging.
Hang it to swing away from the approach, toward the yard, with enough clearance that a person carrying groceries never has to dance around it. If the path is tight, a gate that opens flat against the fence line keeps the walk clear. Check the swing before the posts go in concrete. Too many people live with a backwards gate for a decade because redoing it felt like too much.
29. Leaving Low Branches Across the Approach
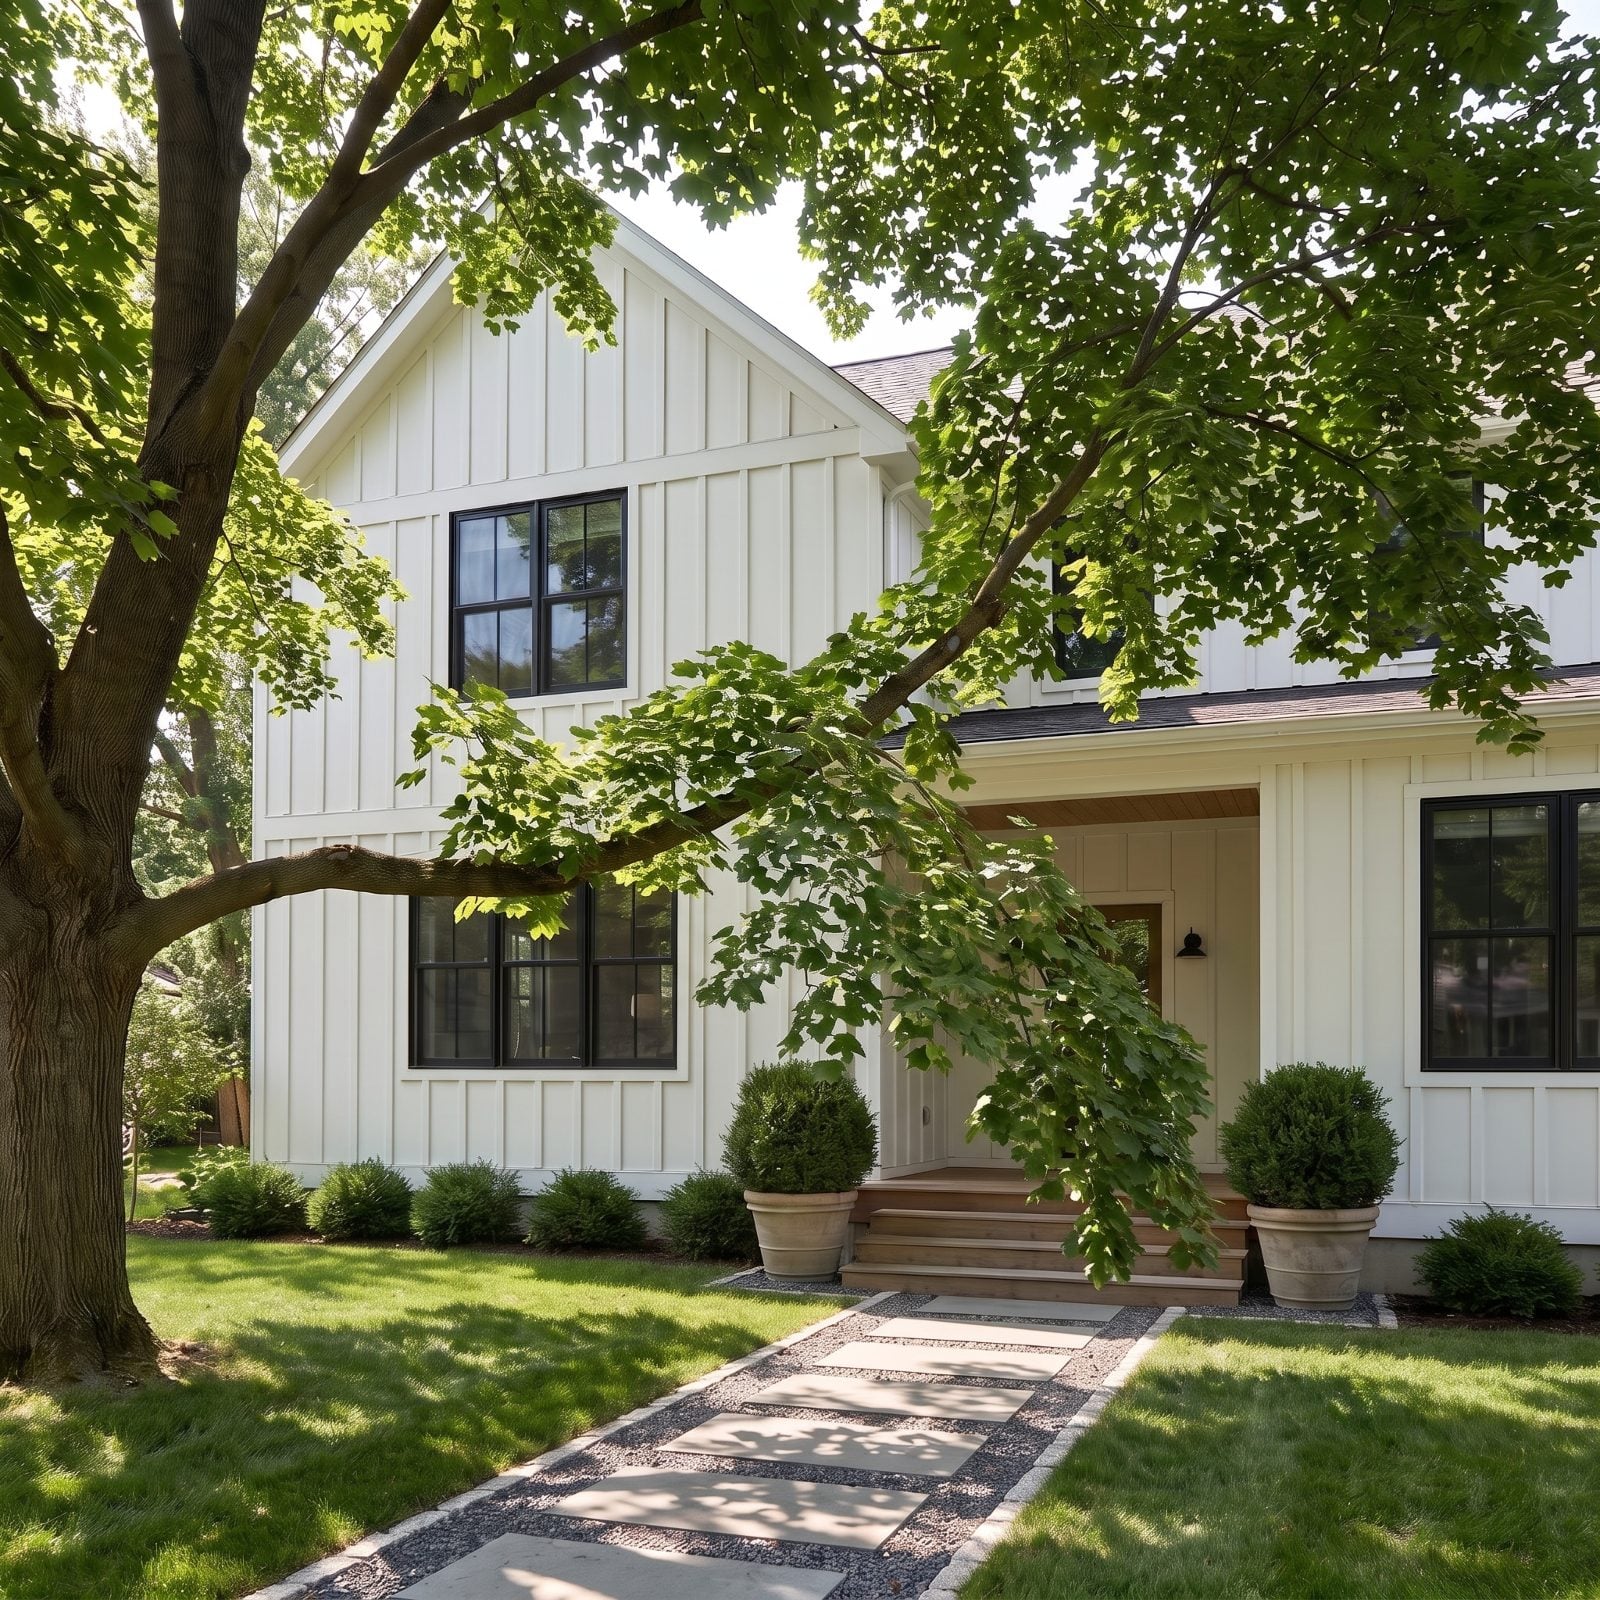
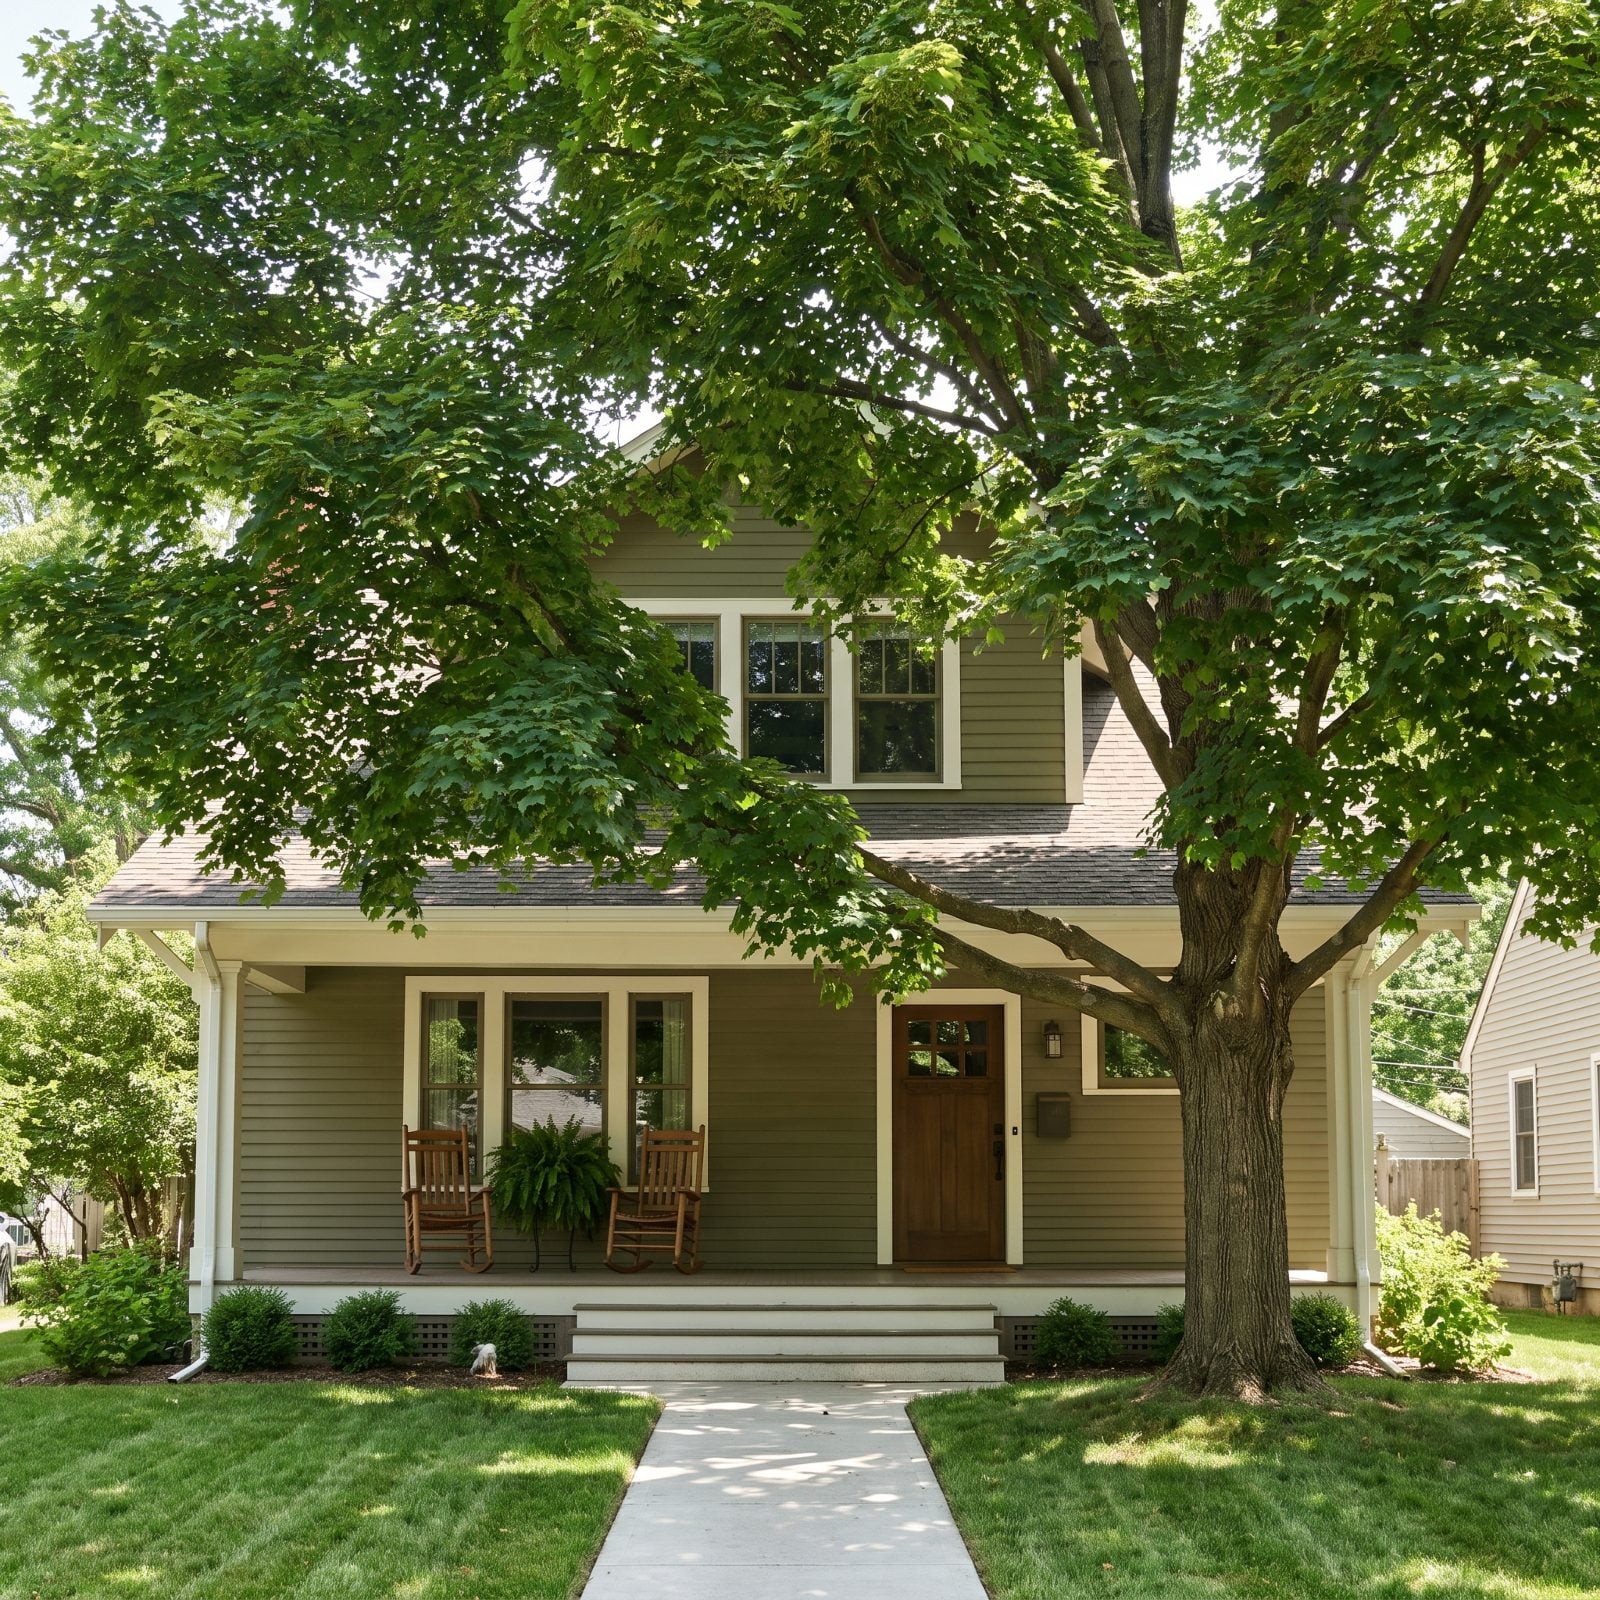
The tree’s gorgeous. The problem is the long limb that reaches out almost horizontally across the facade at about the height of the first-floor window heads, its leafy tips hanging in front of the windows and across the view of the porch, so from the walk the front door is half hidden behind a screen of leaves. You stopped noticing because you’re used to the view.
On a maple, a limb stretched out that far carries a lot of weight a long way from the trunk, so have it shortened cleanly back to a sound branch, then limb up the lower branches to at least seven feet of clearance over any path, higher over a driveway. Crown raising, the arborists call it, and done right you keep the shade and the shape while opening a clean sightline to the door. The entrance suddenly feels generous instead of something you have to navigate.
28. Planting Tall Grasses That Flop Into the Path
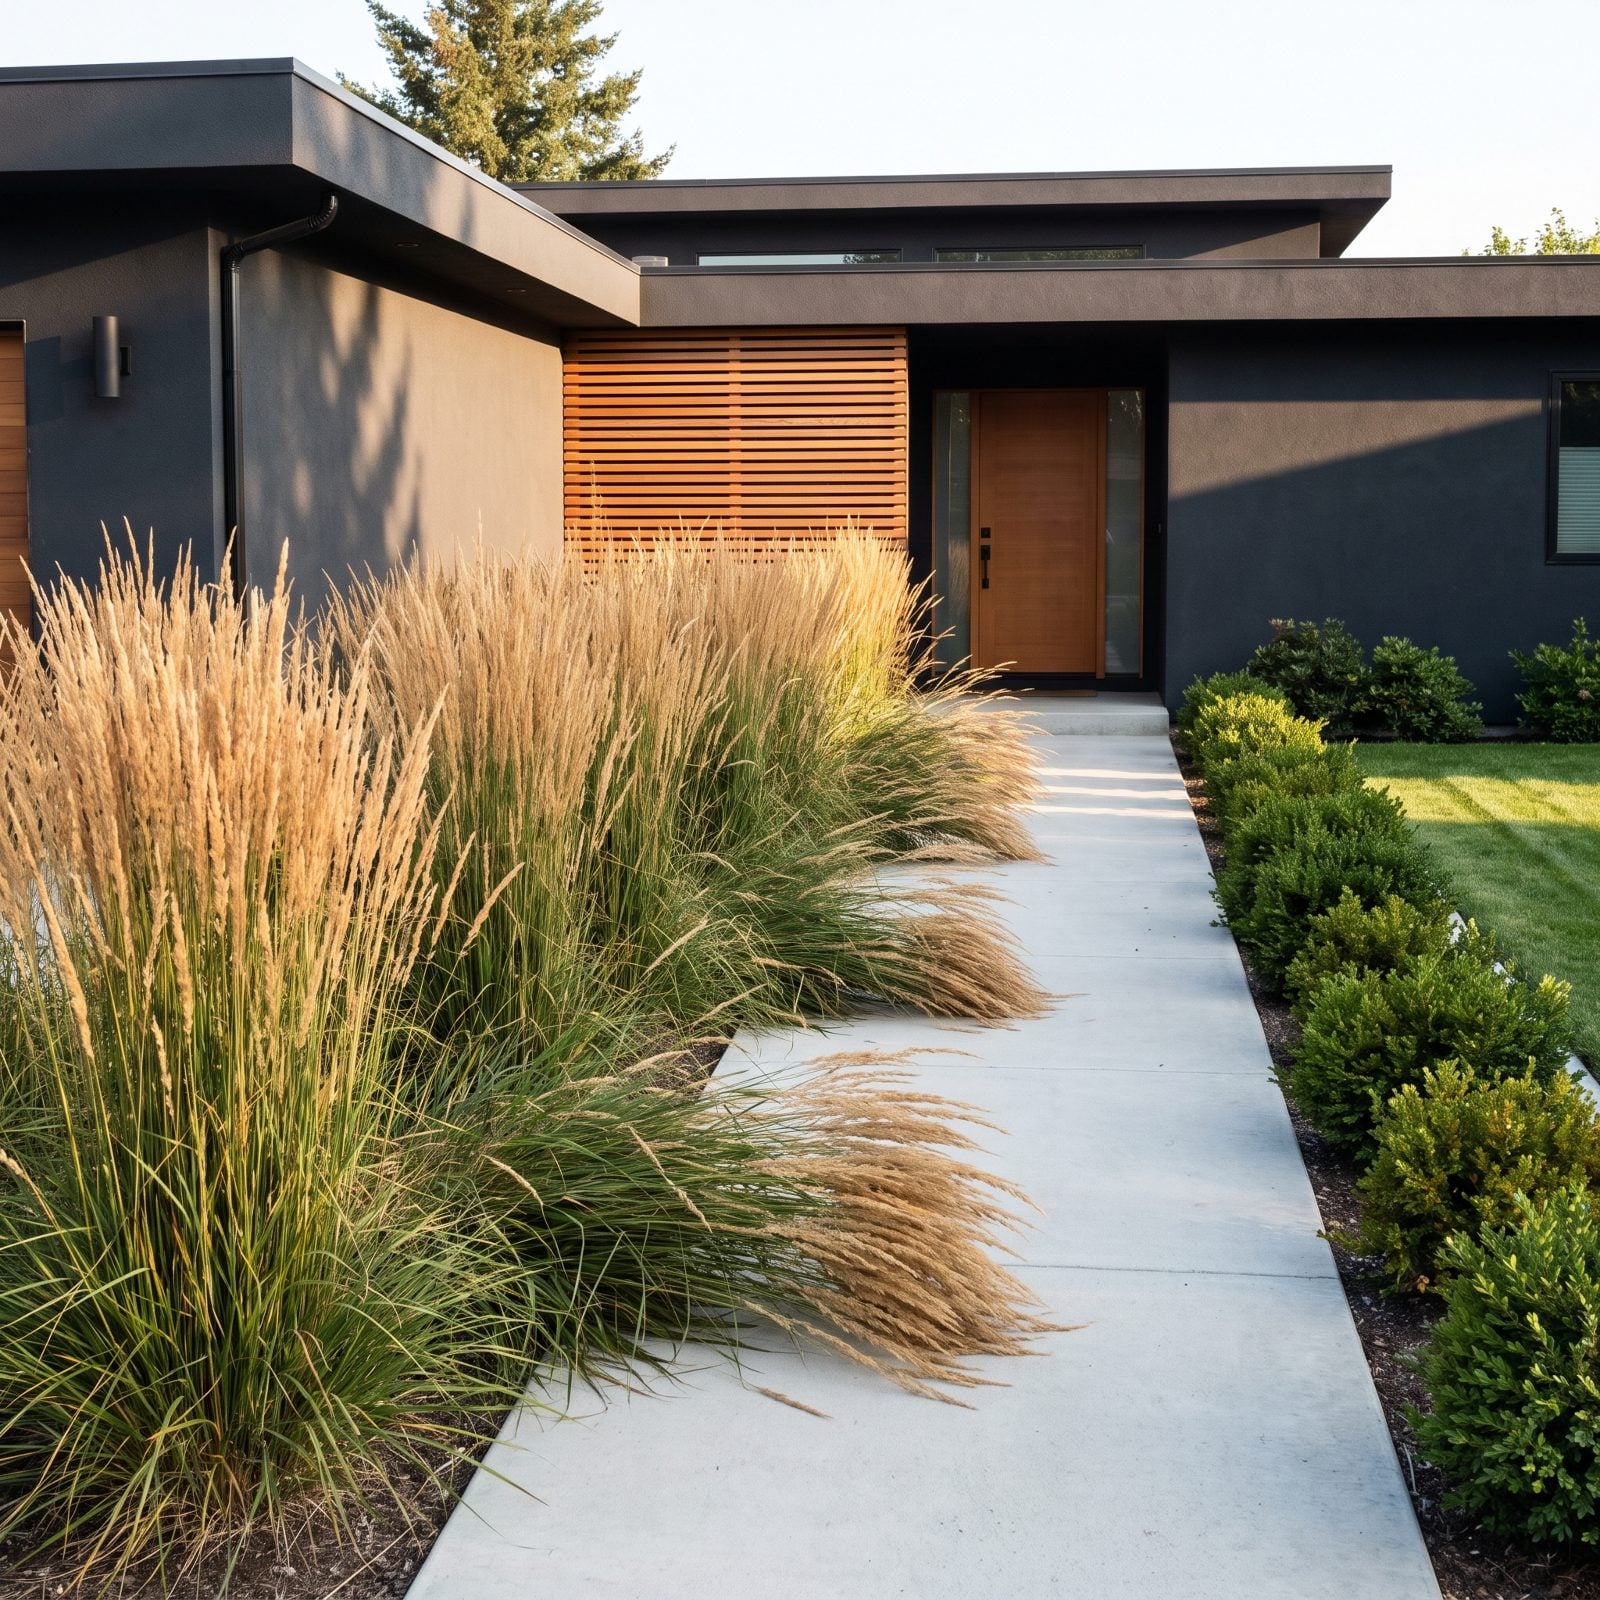
Ornamental grasses look sharp in the catalog. Standing tall, swaying, clean lines. Then late summer hits, the clumps get heavy, and they belly-flop across the walk. Now you’re brushing wet seed heads with your sleeve every time you come home.
Pick grasses sized for the spot. Low, upright varieties near paths hold their shape instead of the four-foot floppers that need a yard of breathing room. Plant tall ones back from the edge, give them their full mature width, and cut them down in late winter so spring starts clean. Keep the drama. Just not on the pavement.
27. Using Loose Stepping Stones on an Everyday Route
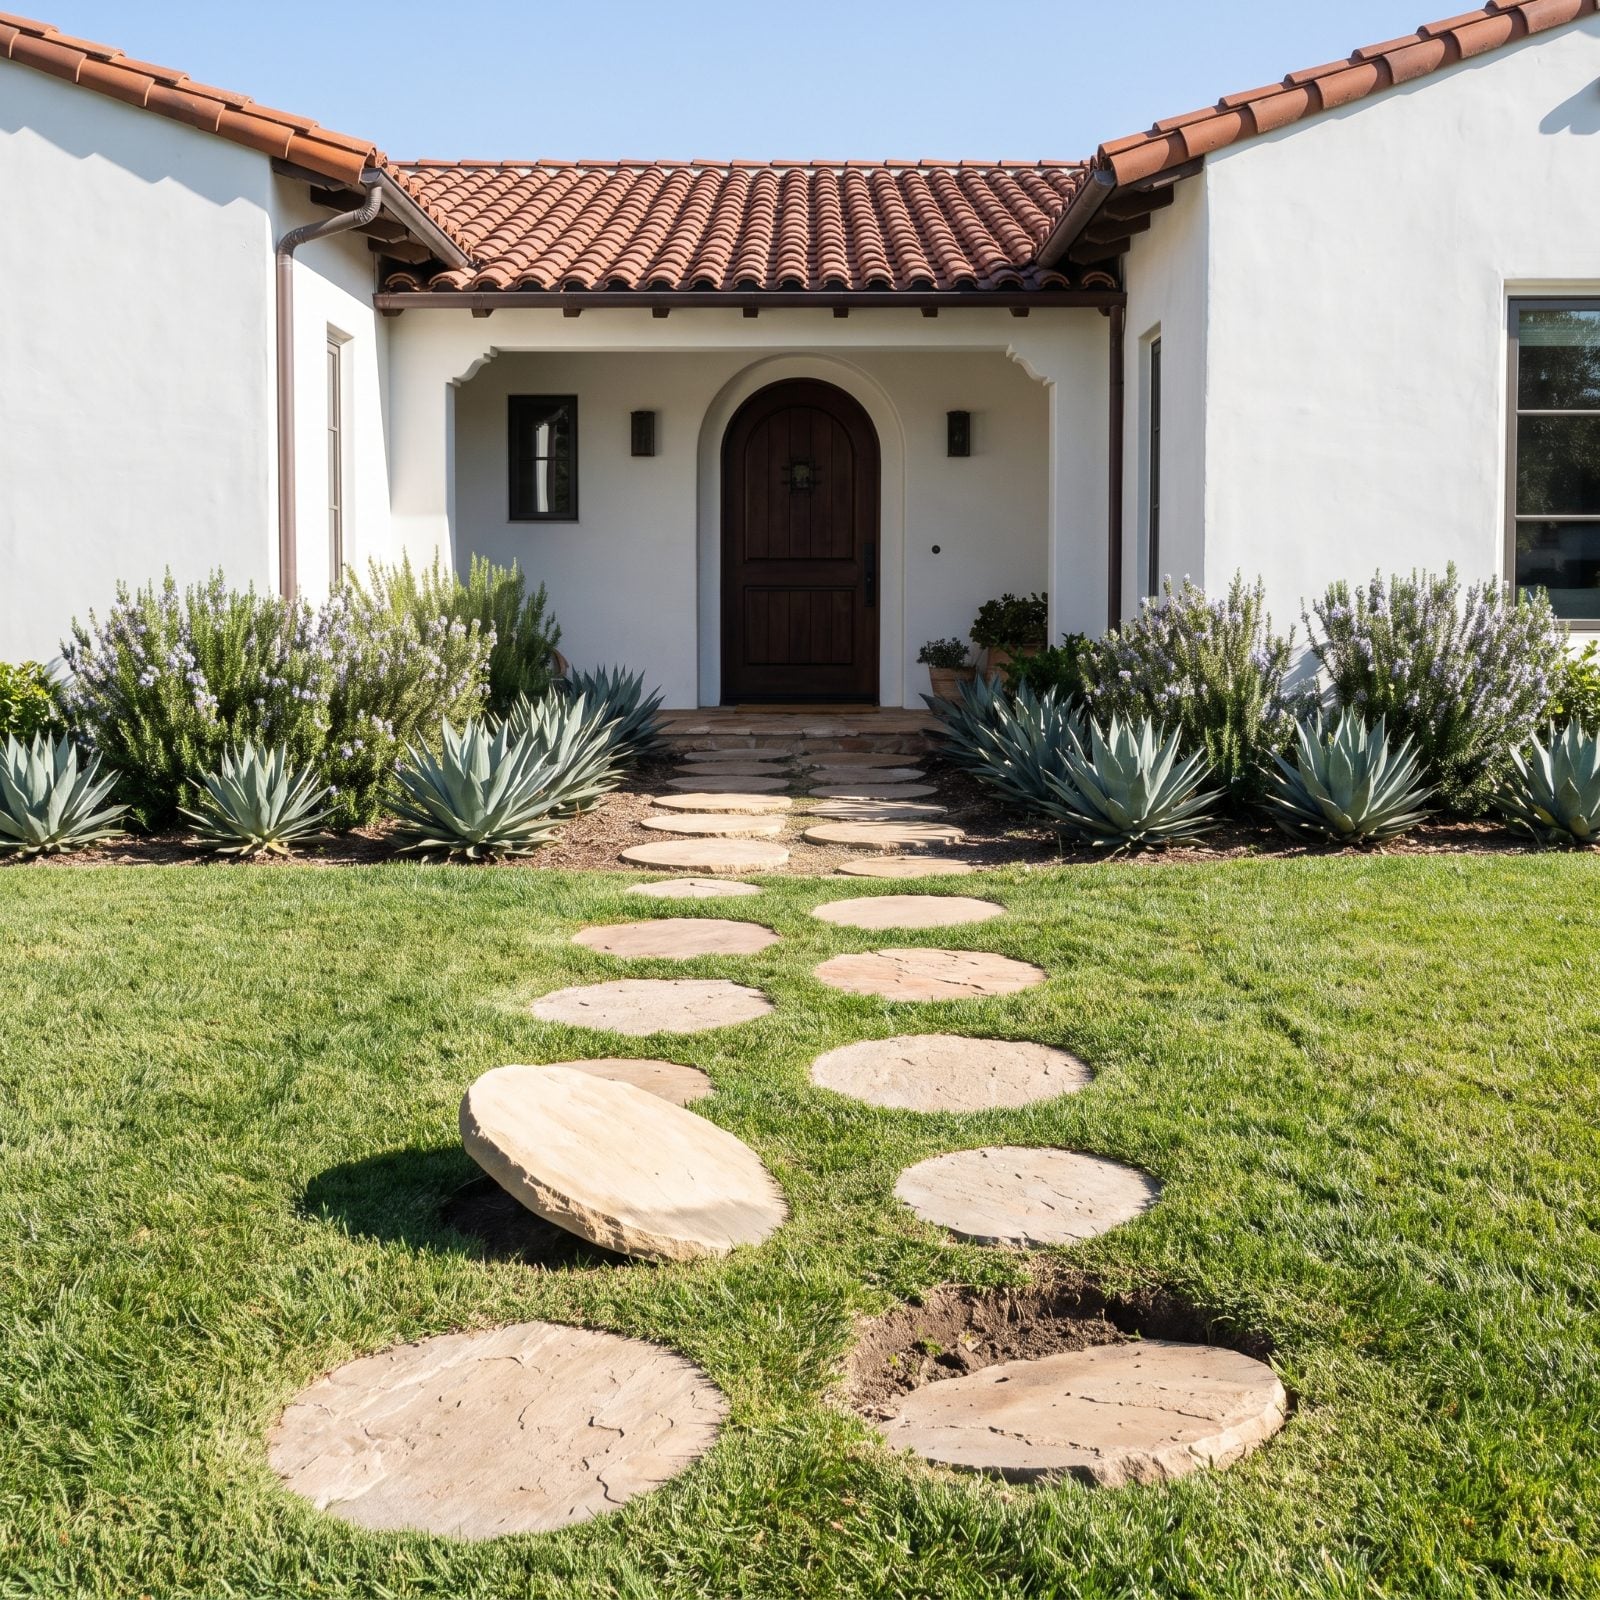
Loose stepping stones are charming in the backyard and a liability on the route you walk forty times a week. They sink, they tilt, they rock when you step on them, and in the dark one wobble is all it takes.
For an everyday approach to the door, you want a stable surface. Set the stones properly on a compacted gravel-and-sand base, bedded so they don’t move, with gaps a normal stride can cover without reaching. Or run a continuous path and save the loose stones for a garden route nobody takes in heels at night.
26. Allowing Tree Roots to Buckle the Walkway
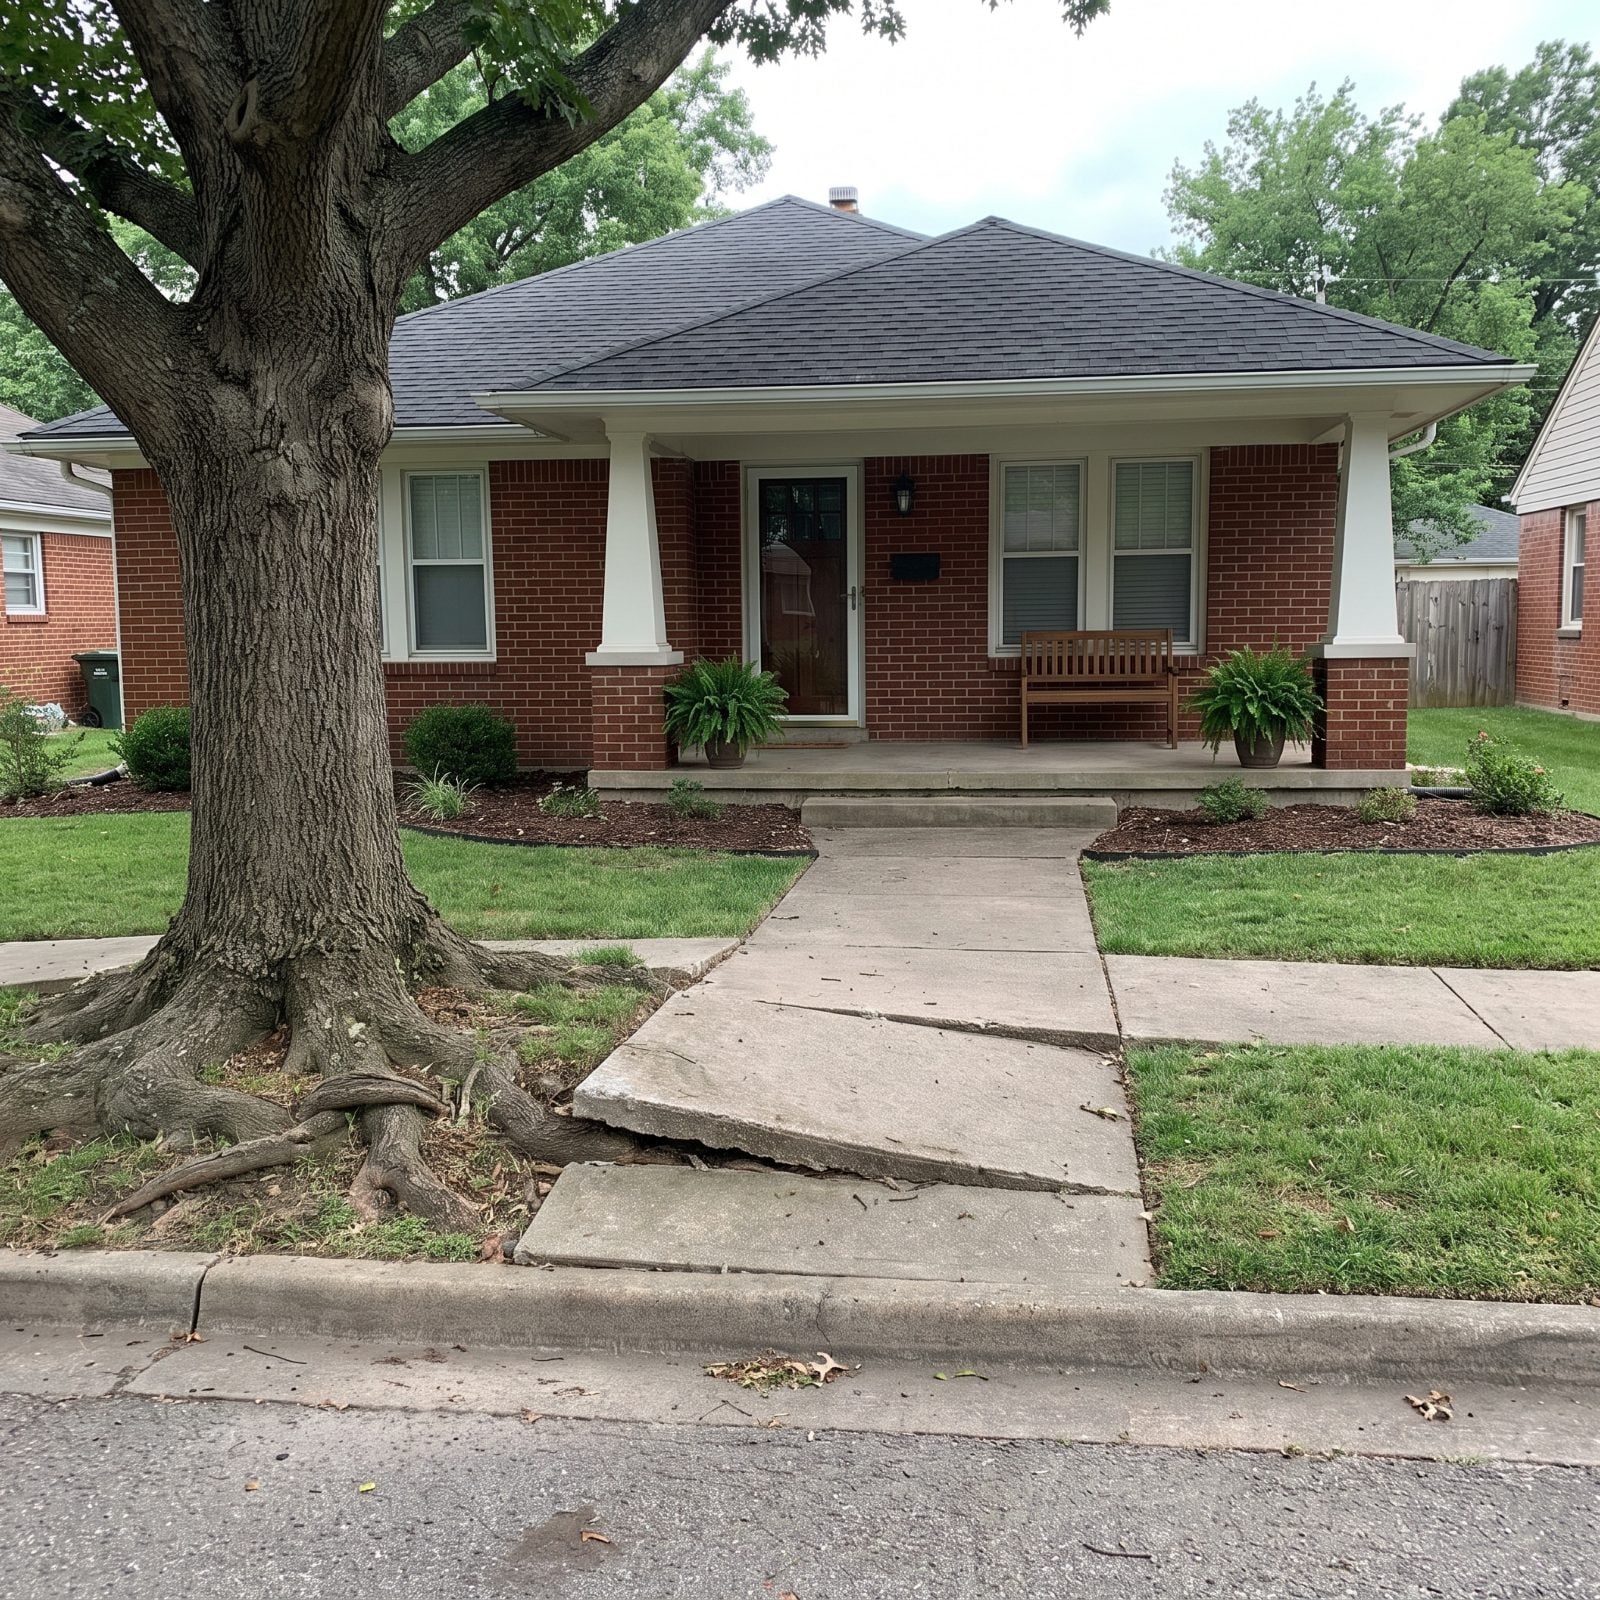
One slab has lifted maybe an inch and a half where the oak root ran underneath. You’ve learned to step over it on autopilot. Everyone else catches a toe on it, and after dark it’s a genuine hazard.
A buckled walk reads as deferred maintenance even when the rest of the yard is sharp. It’s the first thing people notice and the thing they remember.
Grind the lip flat as a stopgap, but the real fix is lifting the section, cutting the offending root cleanly, and relaying with a root barrier so it doesn’t come back. If it keeps happening, reroute the path a few feet away from the trunk. The tree stays, the trip hazard goes.
25. Installing Steps Without a Needed Handrail
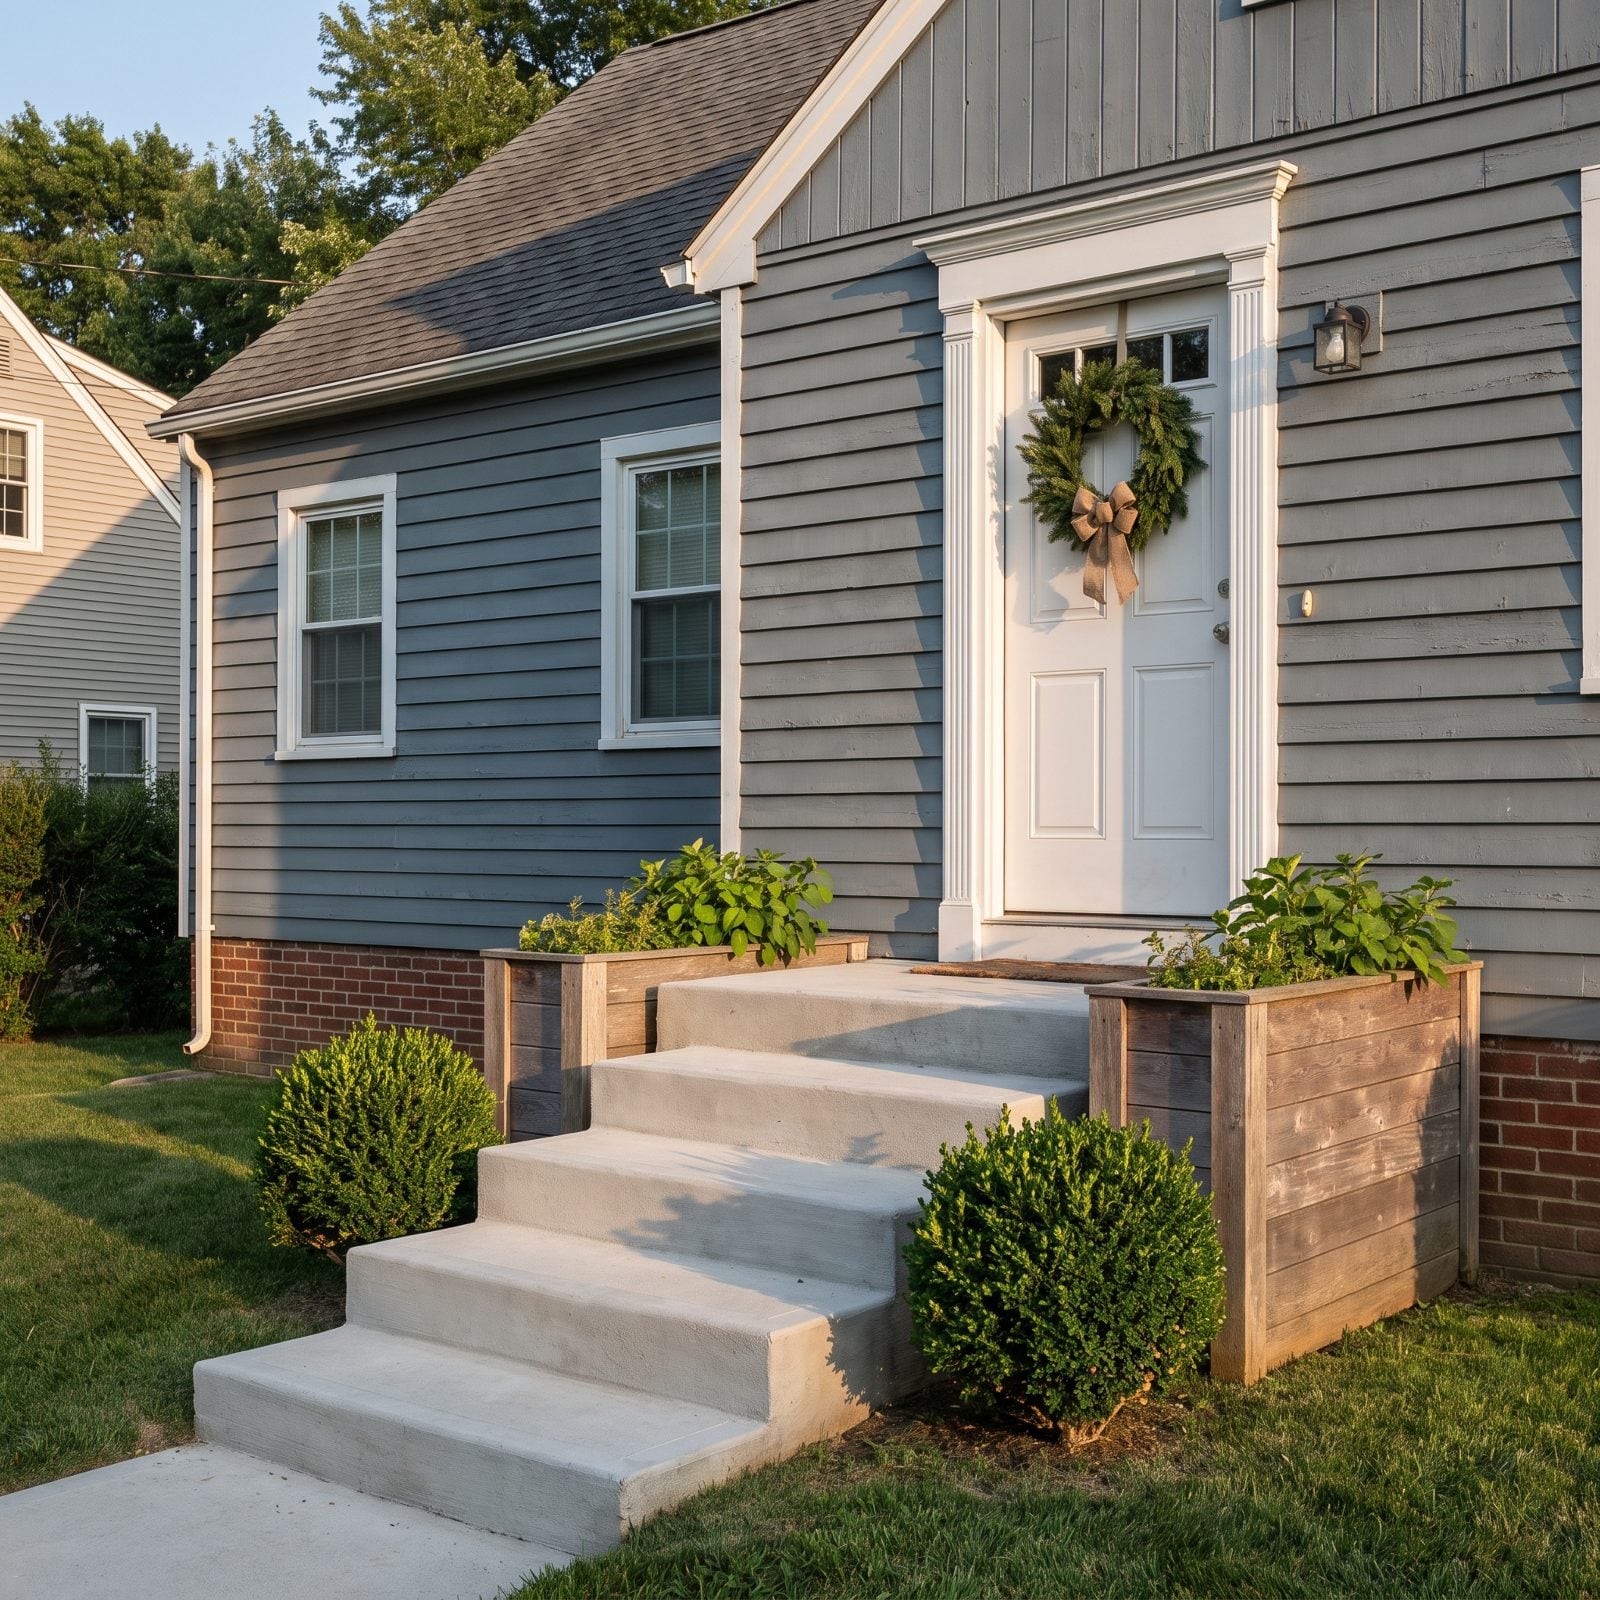
Four steps, no rail, nothing to grab. Fine when you’re twenty-five and carrying nothing. Not fine with an armload of groceries, a visiting grandparent, or a patch of frost on step two.
Beyond safety, a missing rail leaves the entrance looking unfinished, like the steps are floating with no frame.
Add a handrail that suits the house: slim black metal on a modern facade, a turned wood post on a traditional one, graspable and roughly 34 to 38 inches above the nosings. On an entry this visible you can treat it as a design feature, not just a code line. Done right it defines the approach and makes the door feel like a destination. Every exterior step deserves something to hold.
24. Letting Poor Drainage and Downspouts Flood the Front Walk
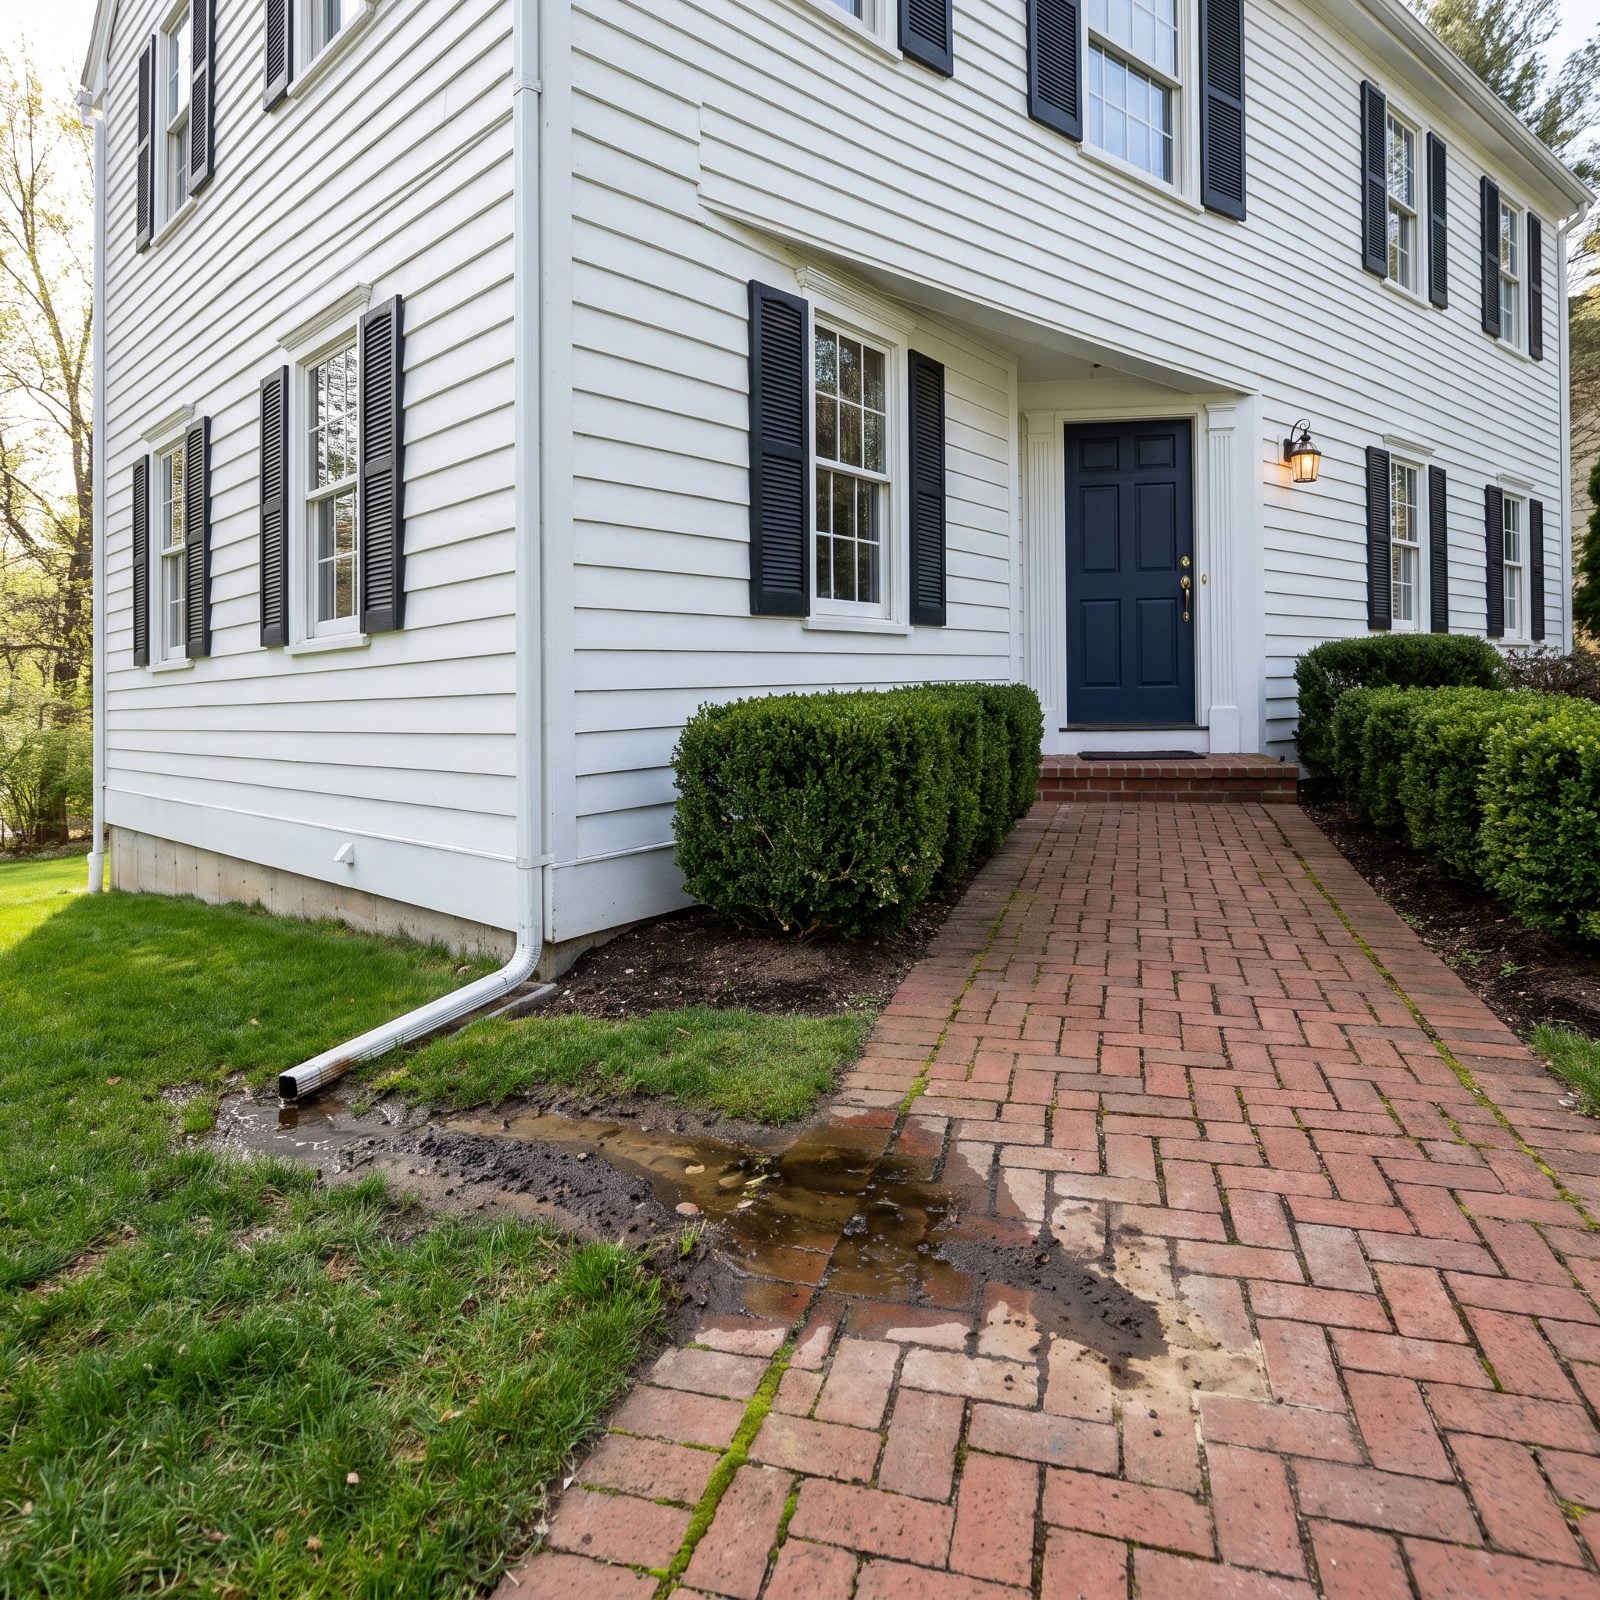
You know the walk that has a dark patch halfway down it, the one that never quite dries even two days after rain. That’s a downspout dumping its whole roofline onto the ground beside your path, and gravity carrying the runoff straight across the brick.
The effect is quiet but real. Moss creeps in, the pavers stain, and the first thing a guest does on your property is step carefully around a wet spot. Not the welcome you want.
Fix it at the source. Add a downspout extension or a buried drain line that carries water well past the walk and into a bed that can absorb it, then grade the soil to fall away from the path rather than toward it. Dry, clean brick reads as cared-for. A permanent puddle reads as an afterthought.
23. Choosing Gravel That Spills Across the Walk
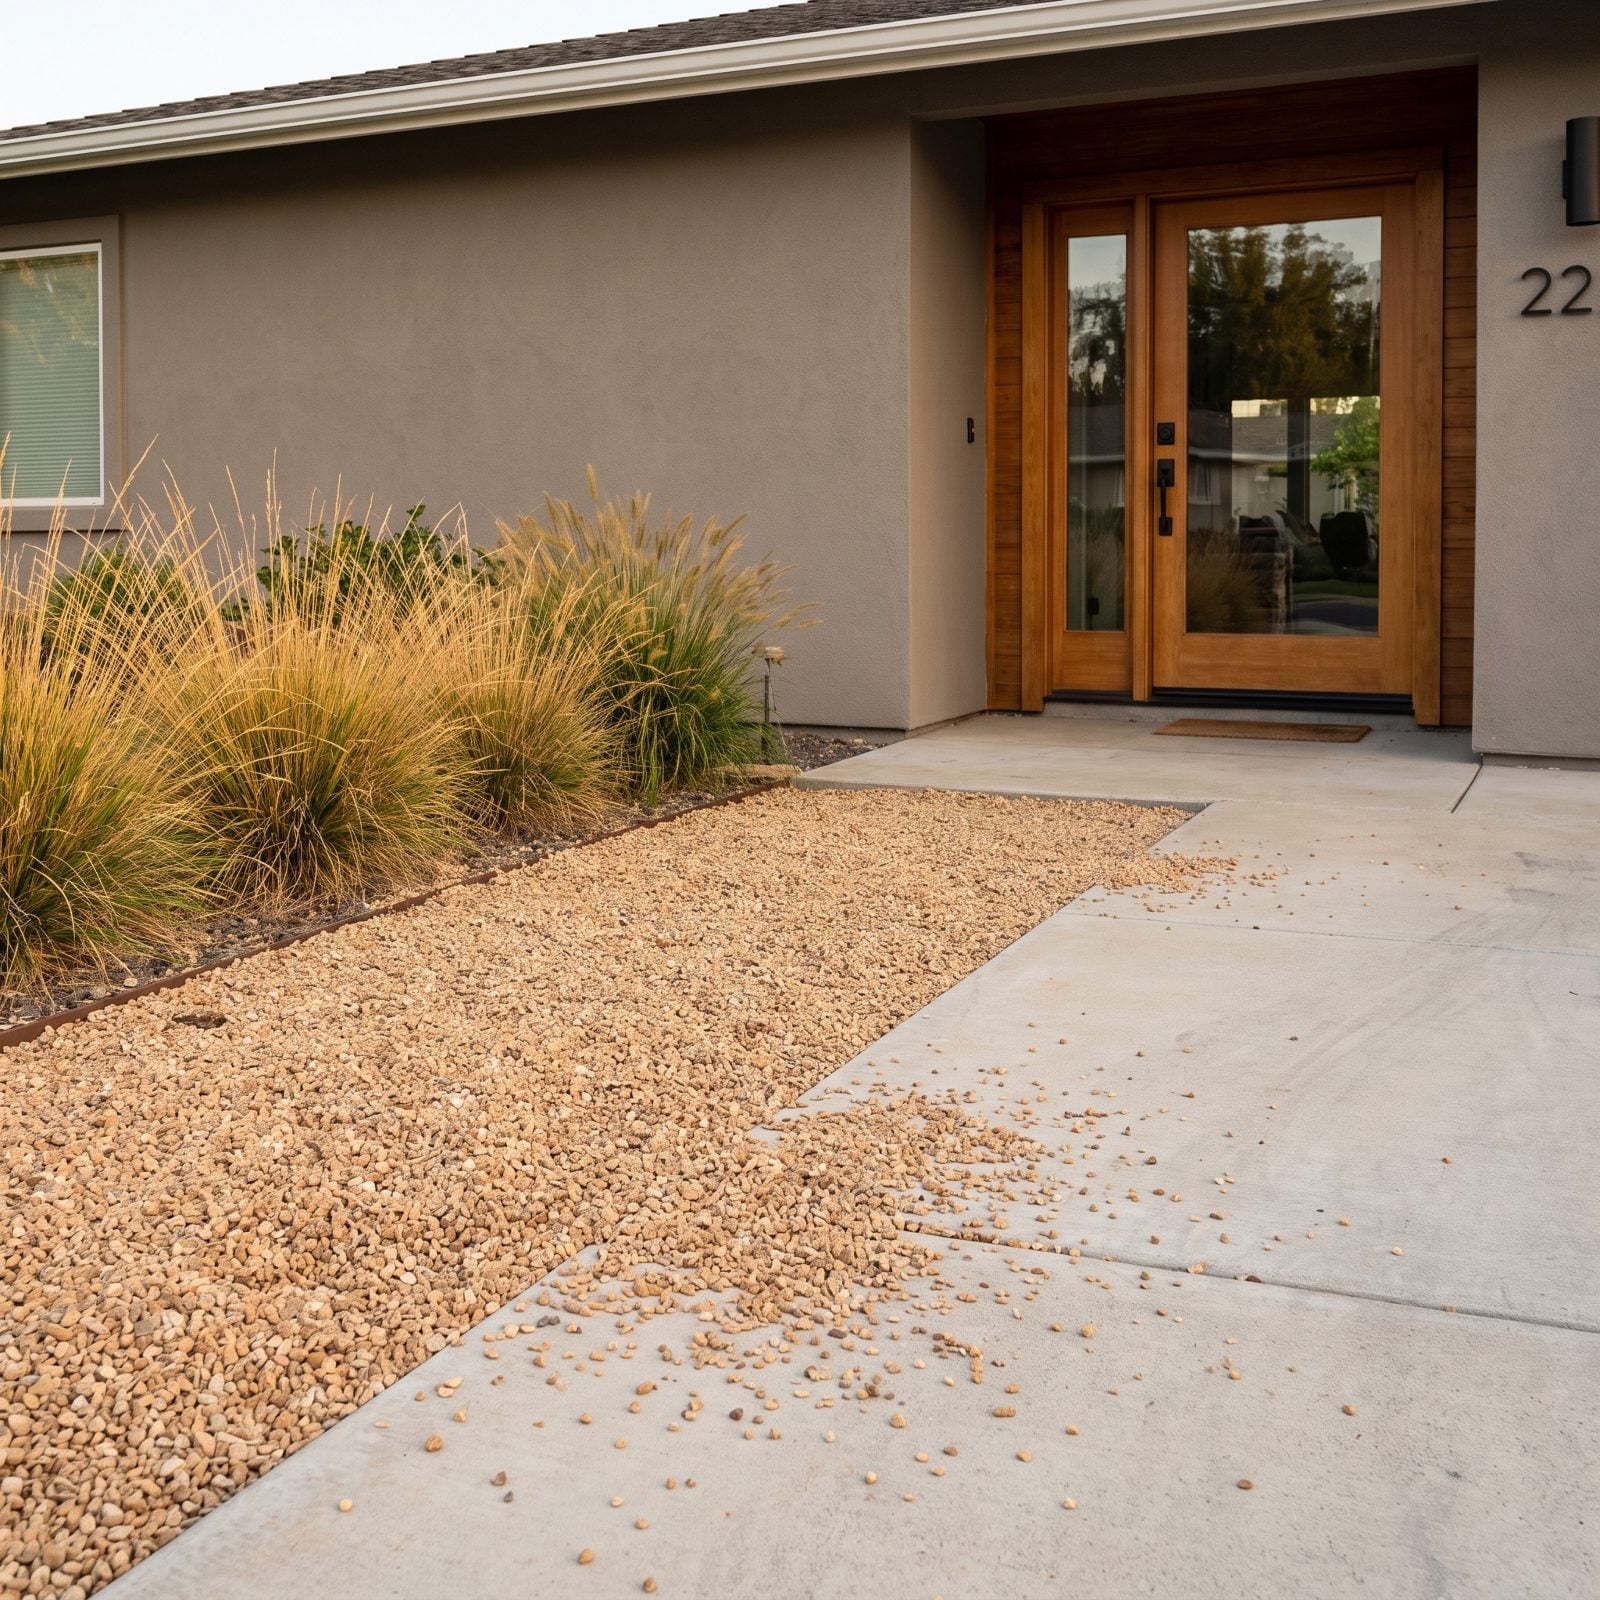
Gravel beds look crisp the day they go in. Six months later the loose stone has wandered onto the path, crunching underfoot and skating out from under your shoe on the way to the door.
The problem isn’t the gravel. It’s the missing edge. Pea gravel and small round stone won’t stay put on their own, and once they’re on the walk they read as neglect even when everything else is tidy.
So give the bed a hard border: steel edging, a row of cut stone, or a mortared paver lip that sits proud of the gravel line. Choose angular crushed stone over rounded pea gravel so the pieces lock together instead of rolling. A defined edge is the difference between intentional and spilled.
22. Choosing Trees That Will Overwhelm the House
Picture the sapling you planted at move-in. Three feet tall, so sweet, so manageable. Nobody warned you it was a silver maple that wanted to be sixty feet of canopy pressing down on your roof.
A tree that outgrows its house flips the whole relationship. The home shrinks, light stops reaching the windows, the facade you love disappears behind leaves for half the year, and the roots start arguing with your foundation and your sewer line.
Match the tree’s mature size to the yard before you dig. For a standard front lot, look at understory and medium species like serviceberry, redbud, Japanese maple, or dogwood. They stay modest, frame the house instead of swallowing it, and keep the sight lines to your gray front porch wide open.
21. Planting a Tree Directly in Front of the Main Architectural Feature
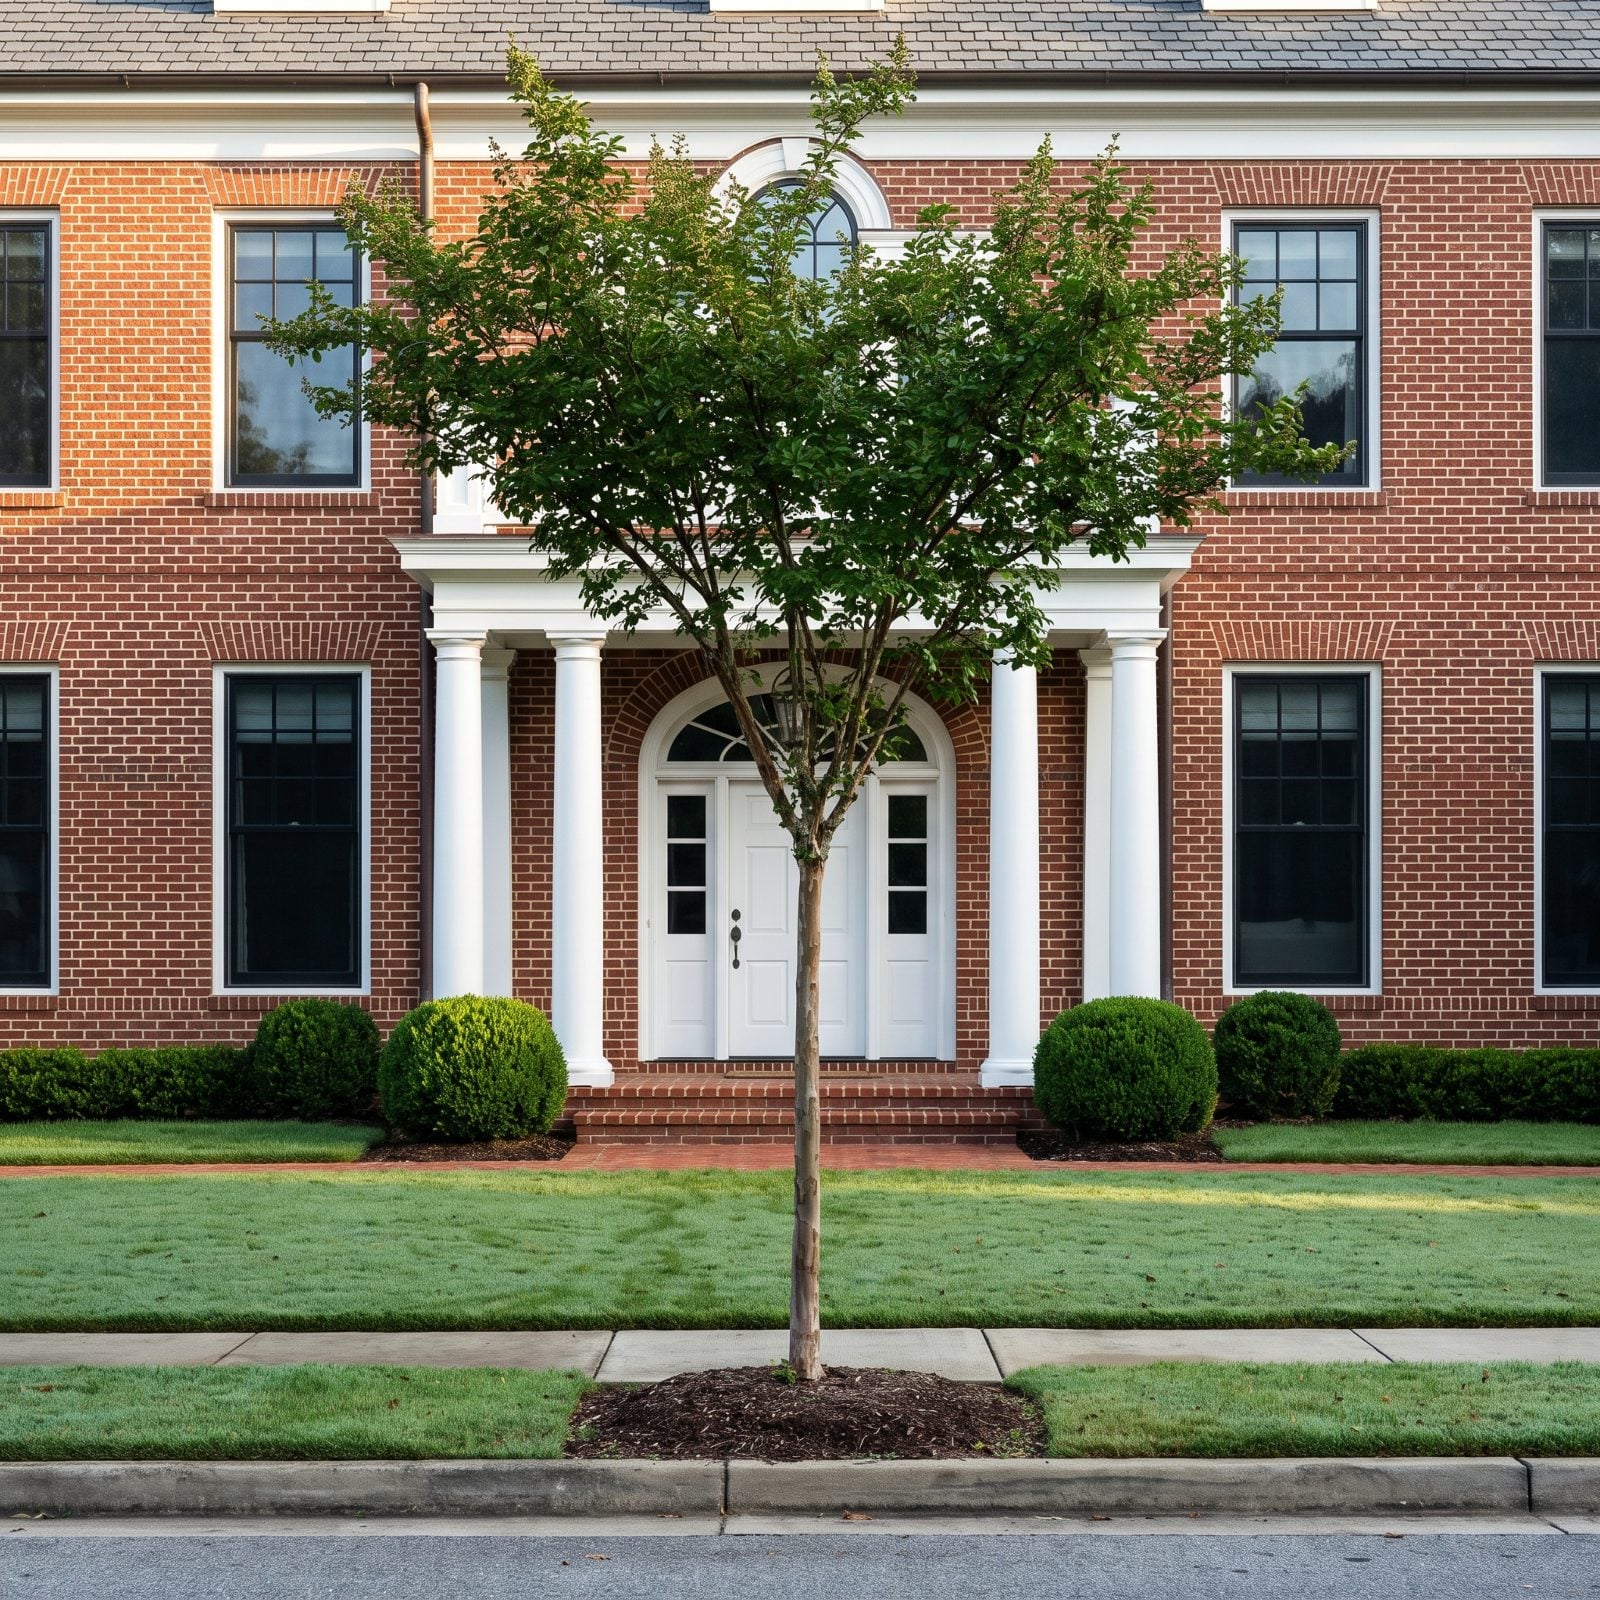
Every house has a best feature. Maybe a columned portico, a bay window, a beautiful front door with sidelights. And someone, meaning well, plants a tree square in front of it.
Now the thing your house was designed around is playing peekaboo. The eye should land on the entrance. Instead it hits a trunk. You’ve spent on the design and then hidden it behind your own landscaping.
Plant to frame, not to block. Flank the feature with a matched pair set off to either side, or offset a single specimen so the entrance stays in the clear. Stand at the curb before you dig and check the sightline to the door. If the tree touches it, move the tree.
20. Removing Every Mature Tree
🔥 Would you like to save this?
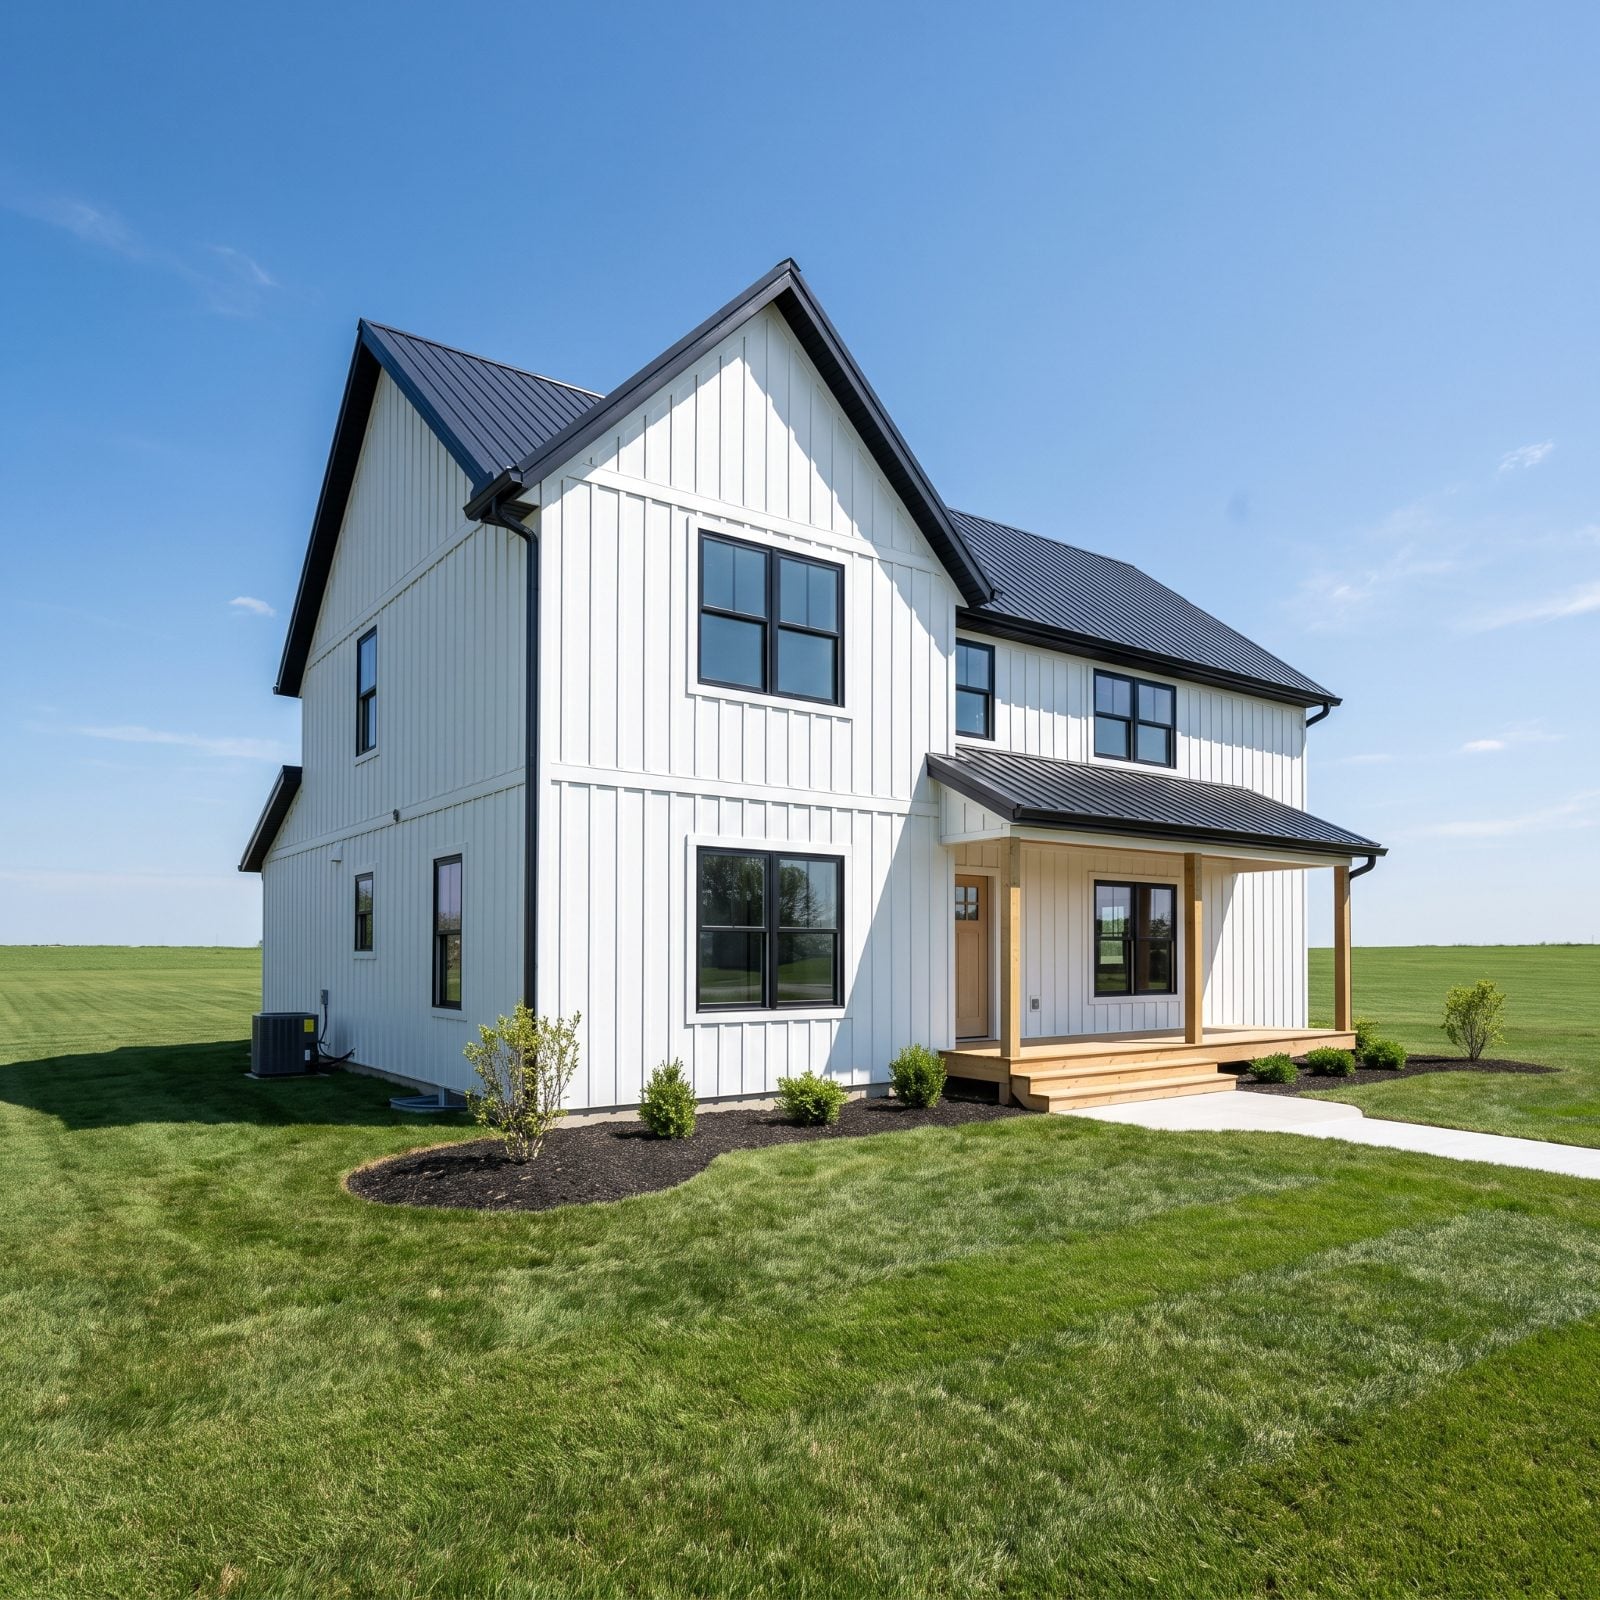
A clean slate feels like progress. Take down the overgrown trees, open the lot, start fresh. Then the first hot afternoon hits and the house bakes, the front yard glares, and the whole property feels naked.
Mature trees do more than decorate. They give the yard scale, drop the summer temperature, soften hard sun on the siding, and tell the eye the house has been here a while. Strip them all and even a lovely home looks like it landed yesterday.
Keep the healthy ones. Remove only what’s diseased, structurally failing, or genuinely crowding the house. And if the lot is already bare, plant at least one medium shade tree now and let it start earning its keep. A yard with no canopy never feels settled.
19. Topping Front-Yard Trees Into Blunt Stumps
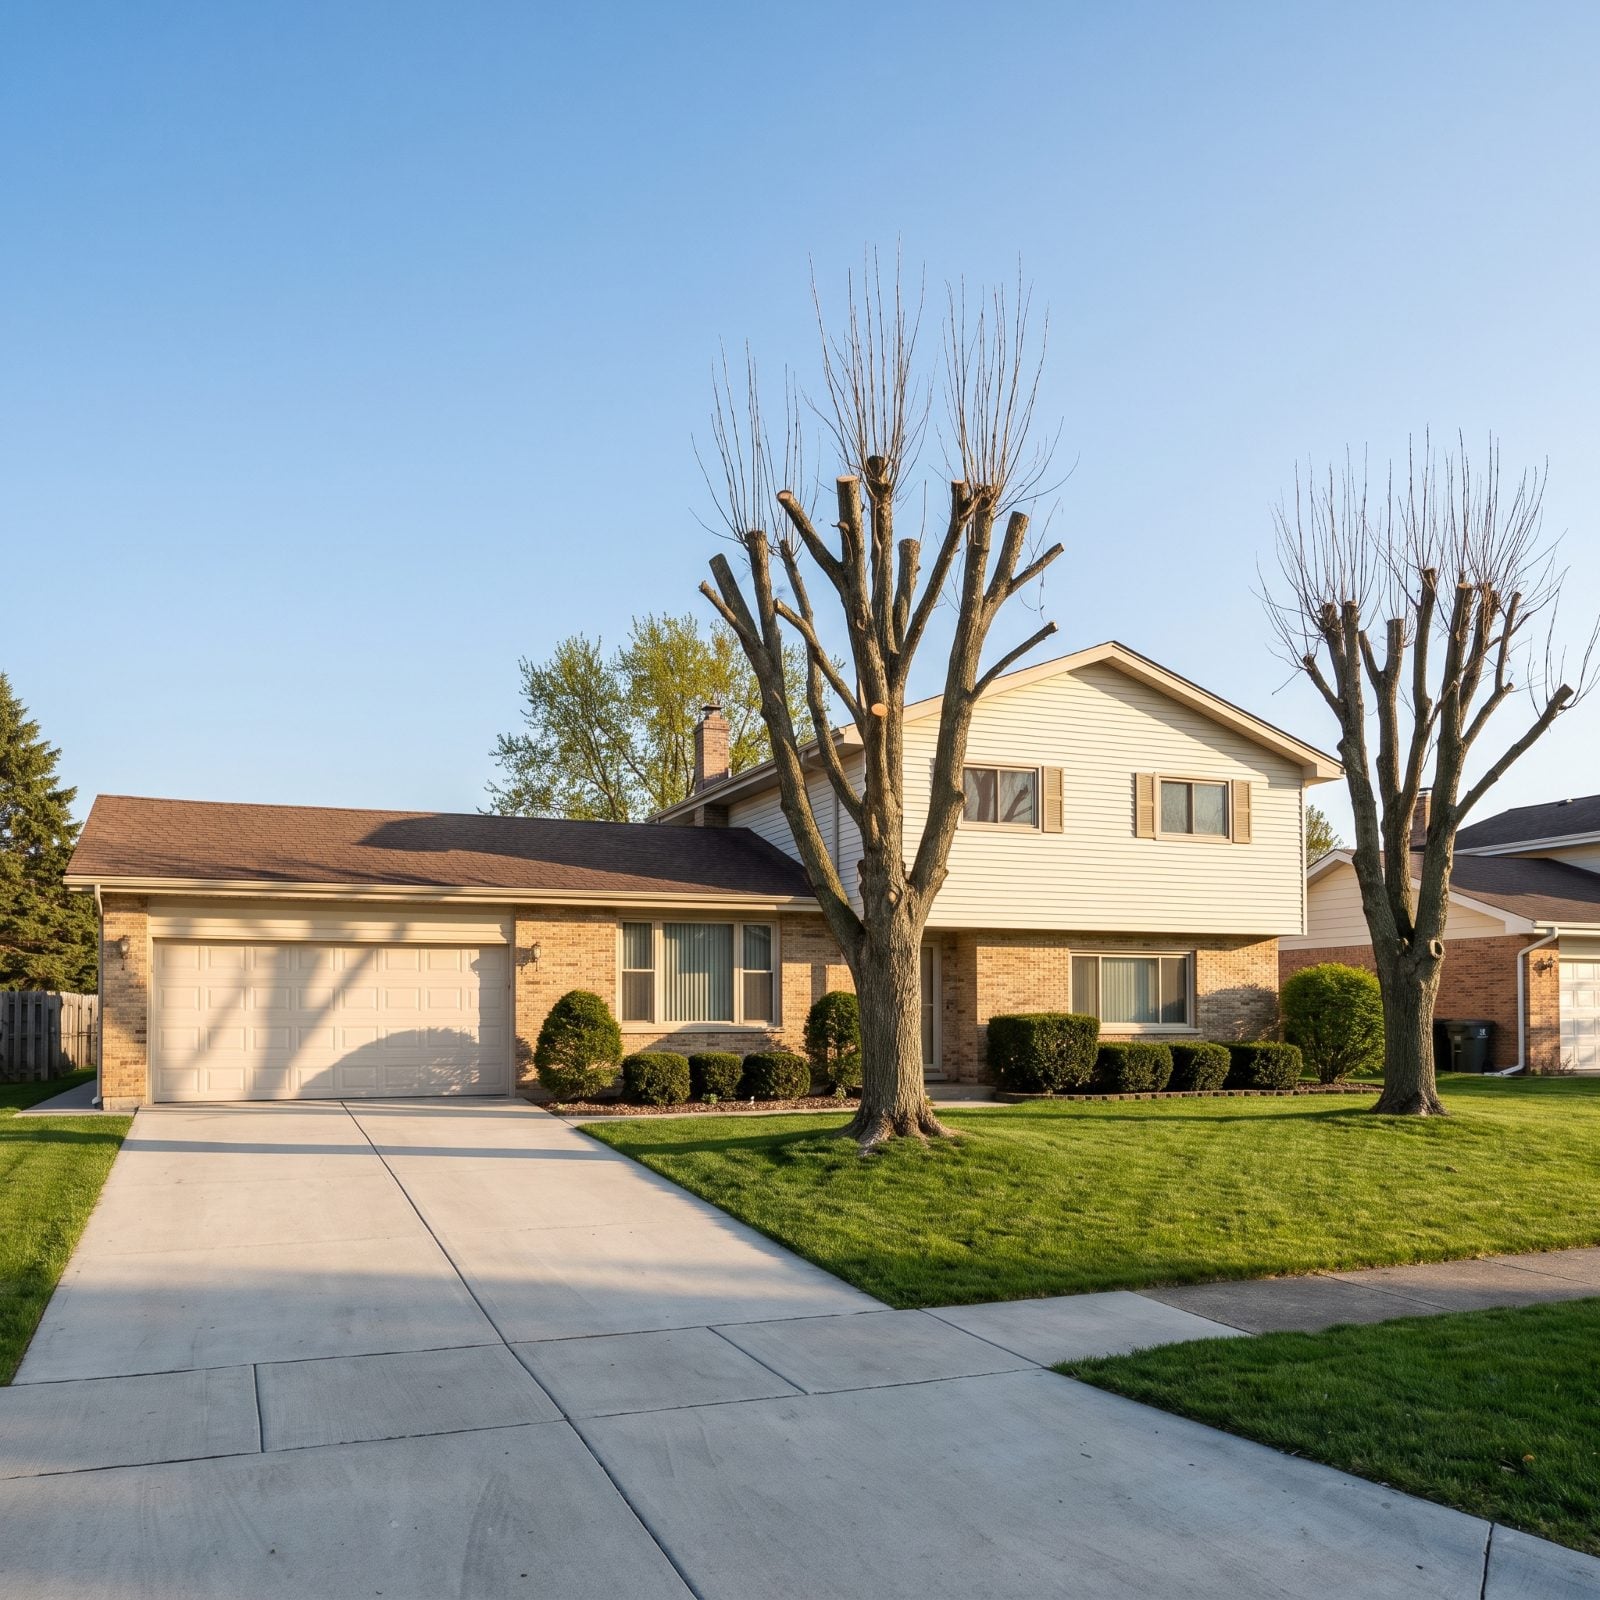
Topping is when a tree gets its whole crown sawed off flat, usually to keep it away from a power line or just to shrink it fast. The result looks like a hatrack. Thick stubs, then a frantic burst of weak vertical shoots a year later.
It’s bad for the tree and worse for the yard. Those stub cuts rarely heal, the regrowth is brittle and poorly attached, and the silhouette never recovers. A topped tree is one of the few landscaping blunders you can spot from a moving car.
Prune for shape, not for amputation. Hire an arborist to crown-raise or selectively thin, taking only a fraction of the canopy at once and cutting back to a lateral branch. If a tree is truly too big for its spot, remove it and replant the right size. Don’t turn it into a coat rack.
18. Leaving Dead Plants in Prominent Beds
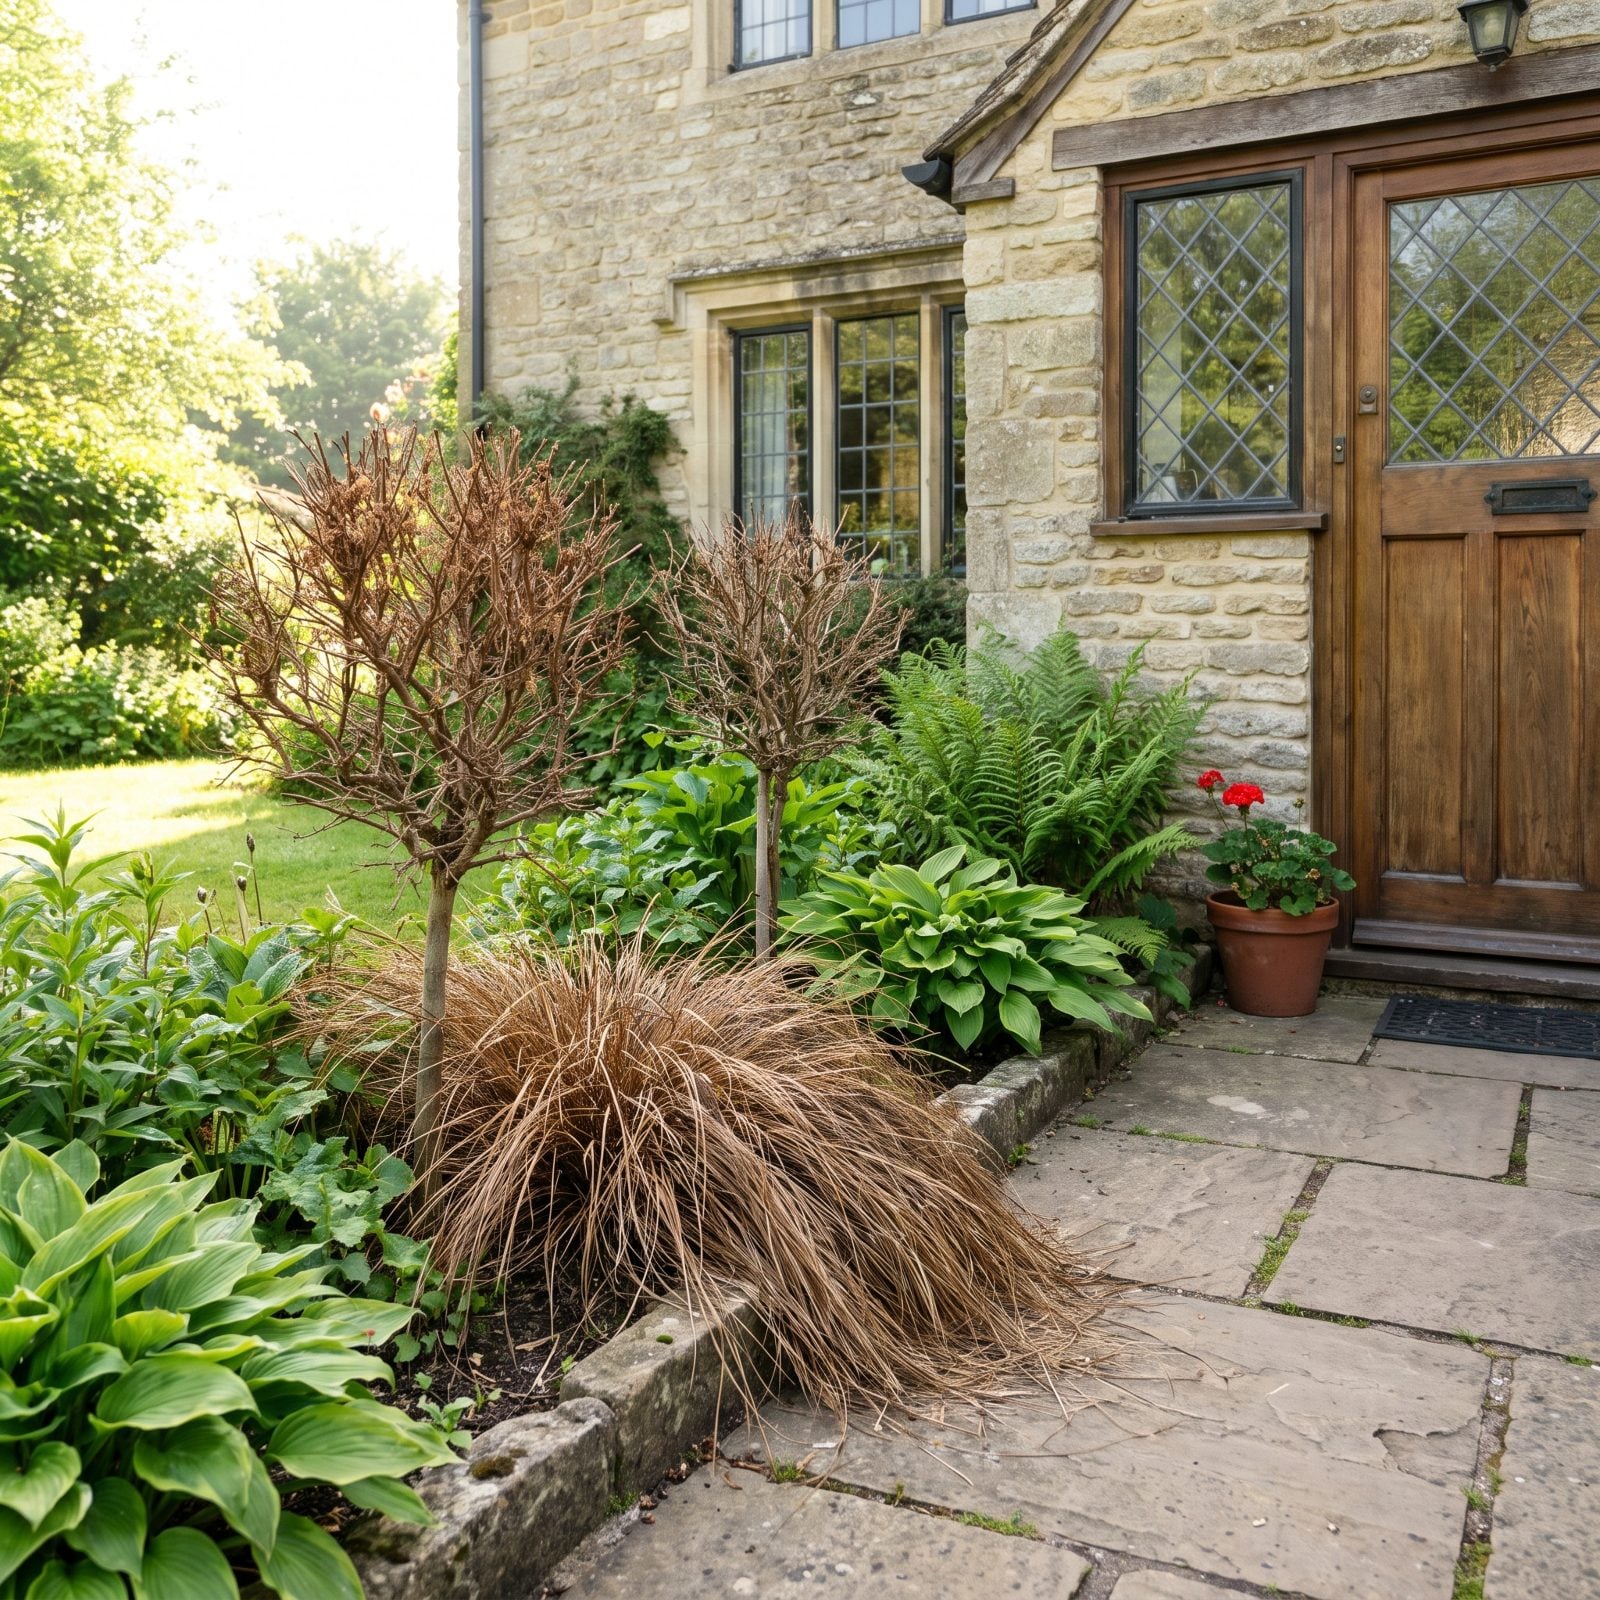
One dead shrub in the front bed does outsized damage. The eye finds it instantly, the way it finds a missing tooth in a smile. Everything else can be lush and the whole bed still reads as given up on.
Dead plants also signal that nobody’s watching, which is the opposite of what a welcoming front yard should say. A visitor clocks it before they reach the door.
Pull the dead ones the week you notice them, and don’t wait for the big spring cleanup. If a plant keeps dying in the same spot, that spot is telling you something about drainage, sun, or soil, so replace it with something that actually wants to live there. A gap in the bed looks better than a corpse in it.
17. Using Too Many Tiny, Scattered Plantings
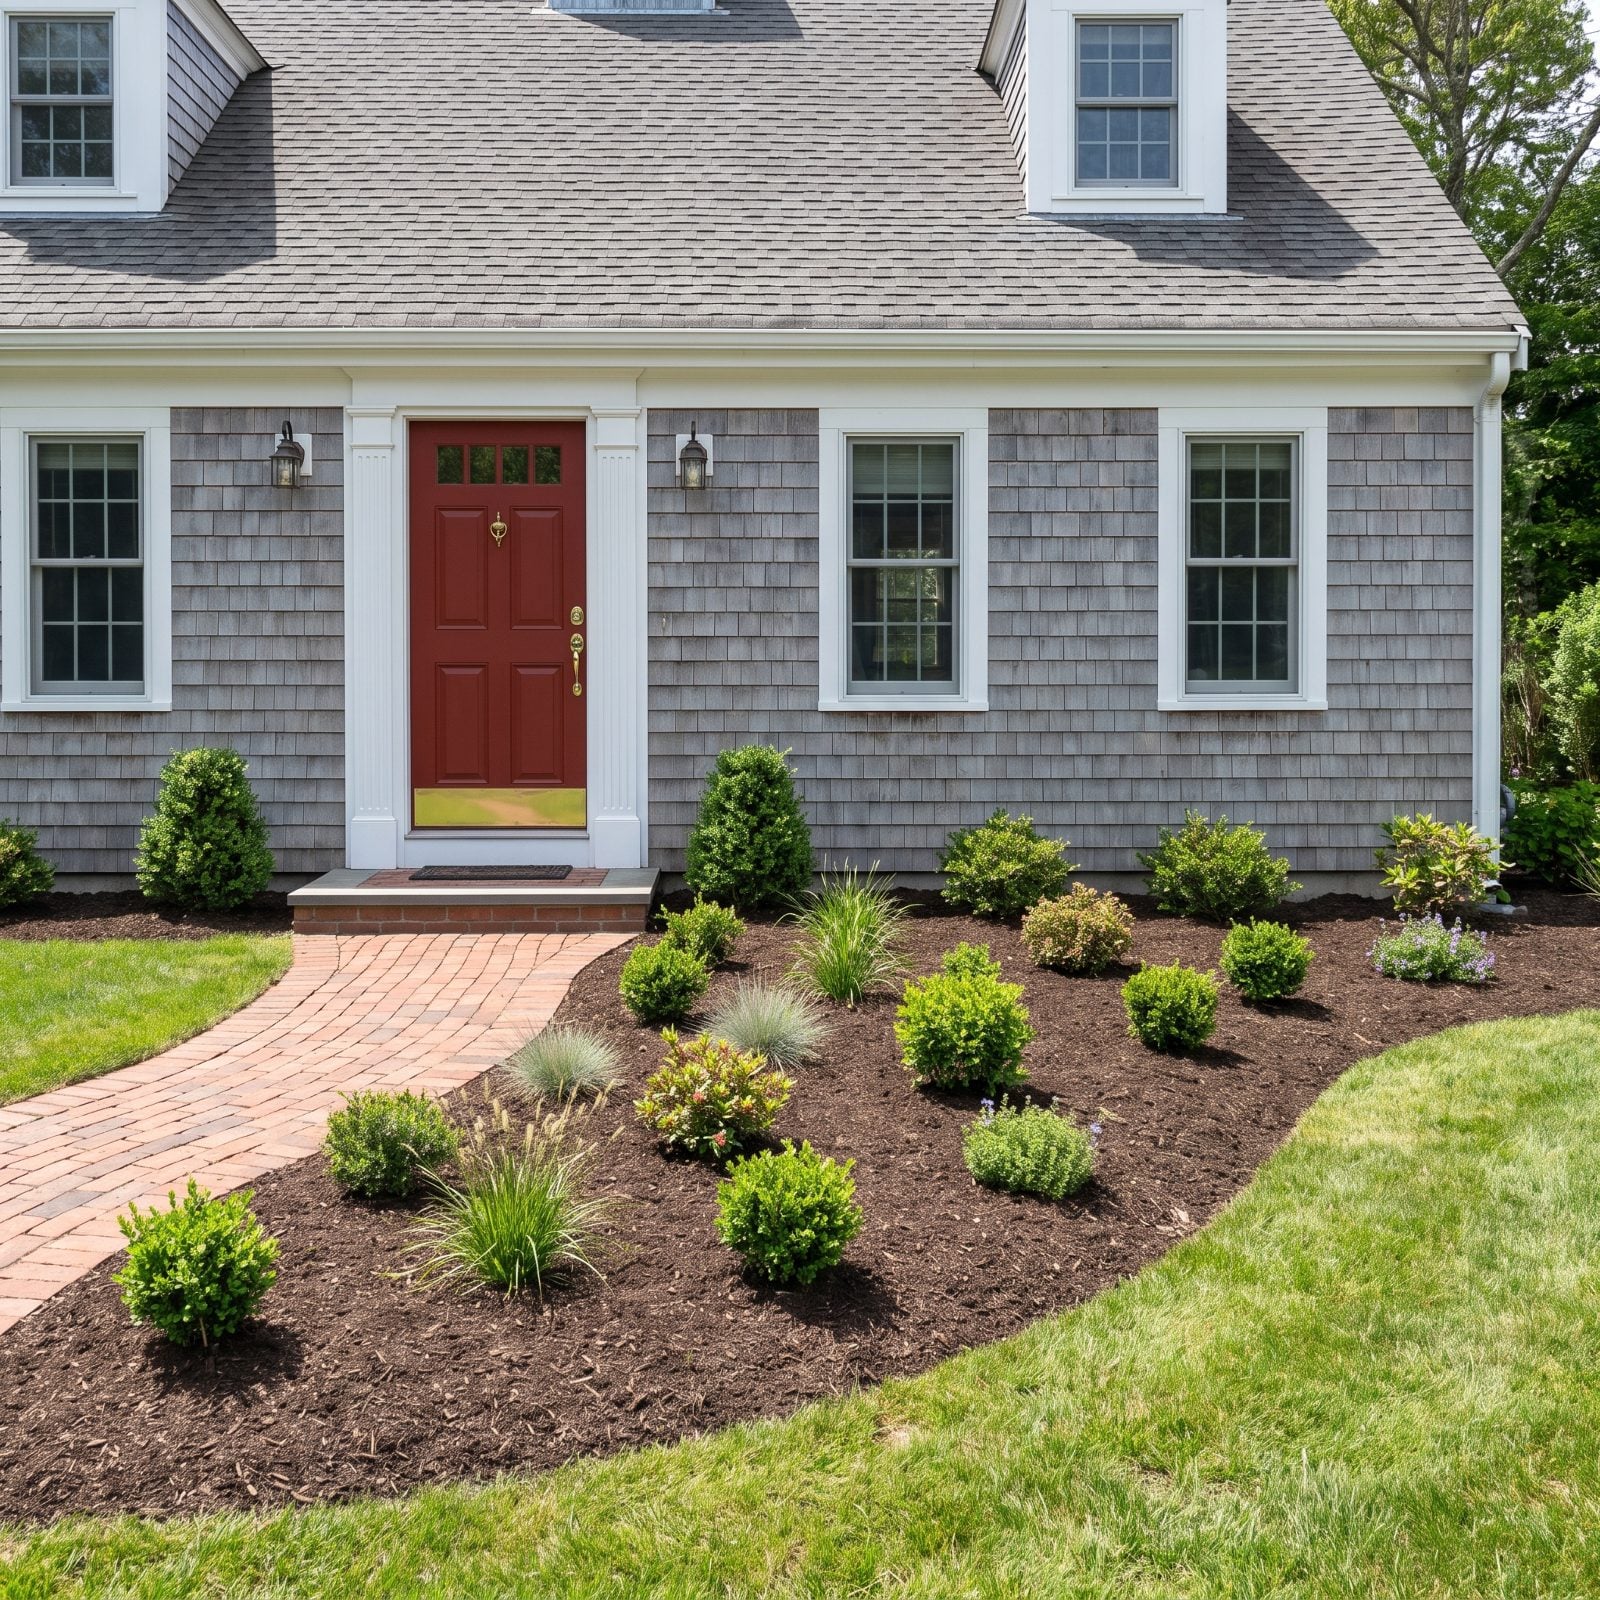
Here’s one almost everyone gets wrong. You go to the nursery, fall for one of everything, and bring home a dozen single plants. Each goes in its own little spot with a ring of mulch around it. And the bed ends up looking like a parking lot with a few plants in it.
Scattered singletons give the eye nothing to rest on. No mass, no rhythm, just dots. The bed never reads as designed because it wasn’t, it was shopped.
Plant in groups of three, five, or seven of the same thing. Odd numbers, clustered tight enough that the plants grow into one another and read as a single drift. Fewer varieties, more of each. A bed with three bold groupings looks deliberate; a bed with fifteen lonely plants looks like a holding pen.
16. Planting Identical Shrubs in a Rigid Row
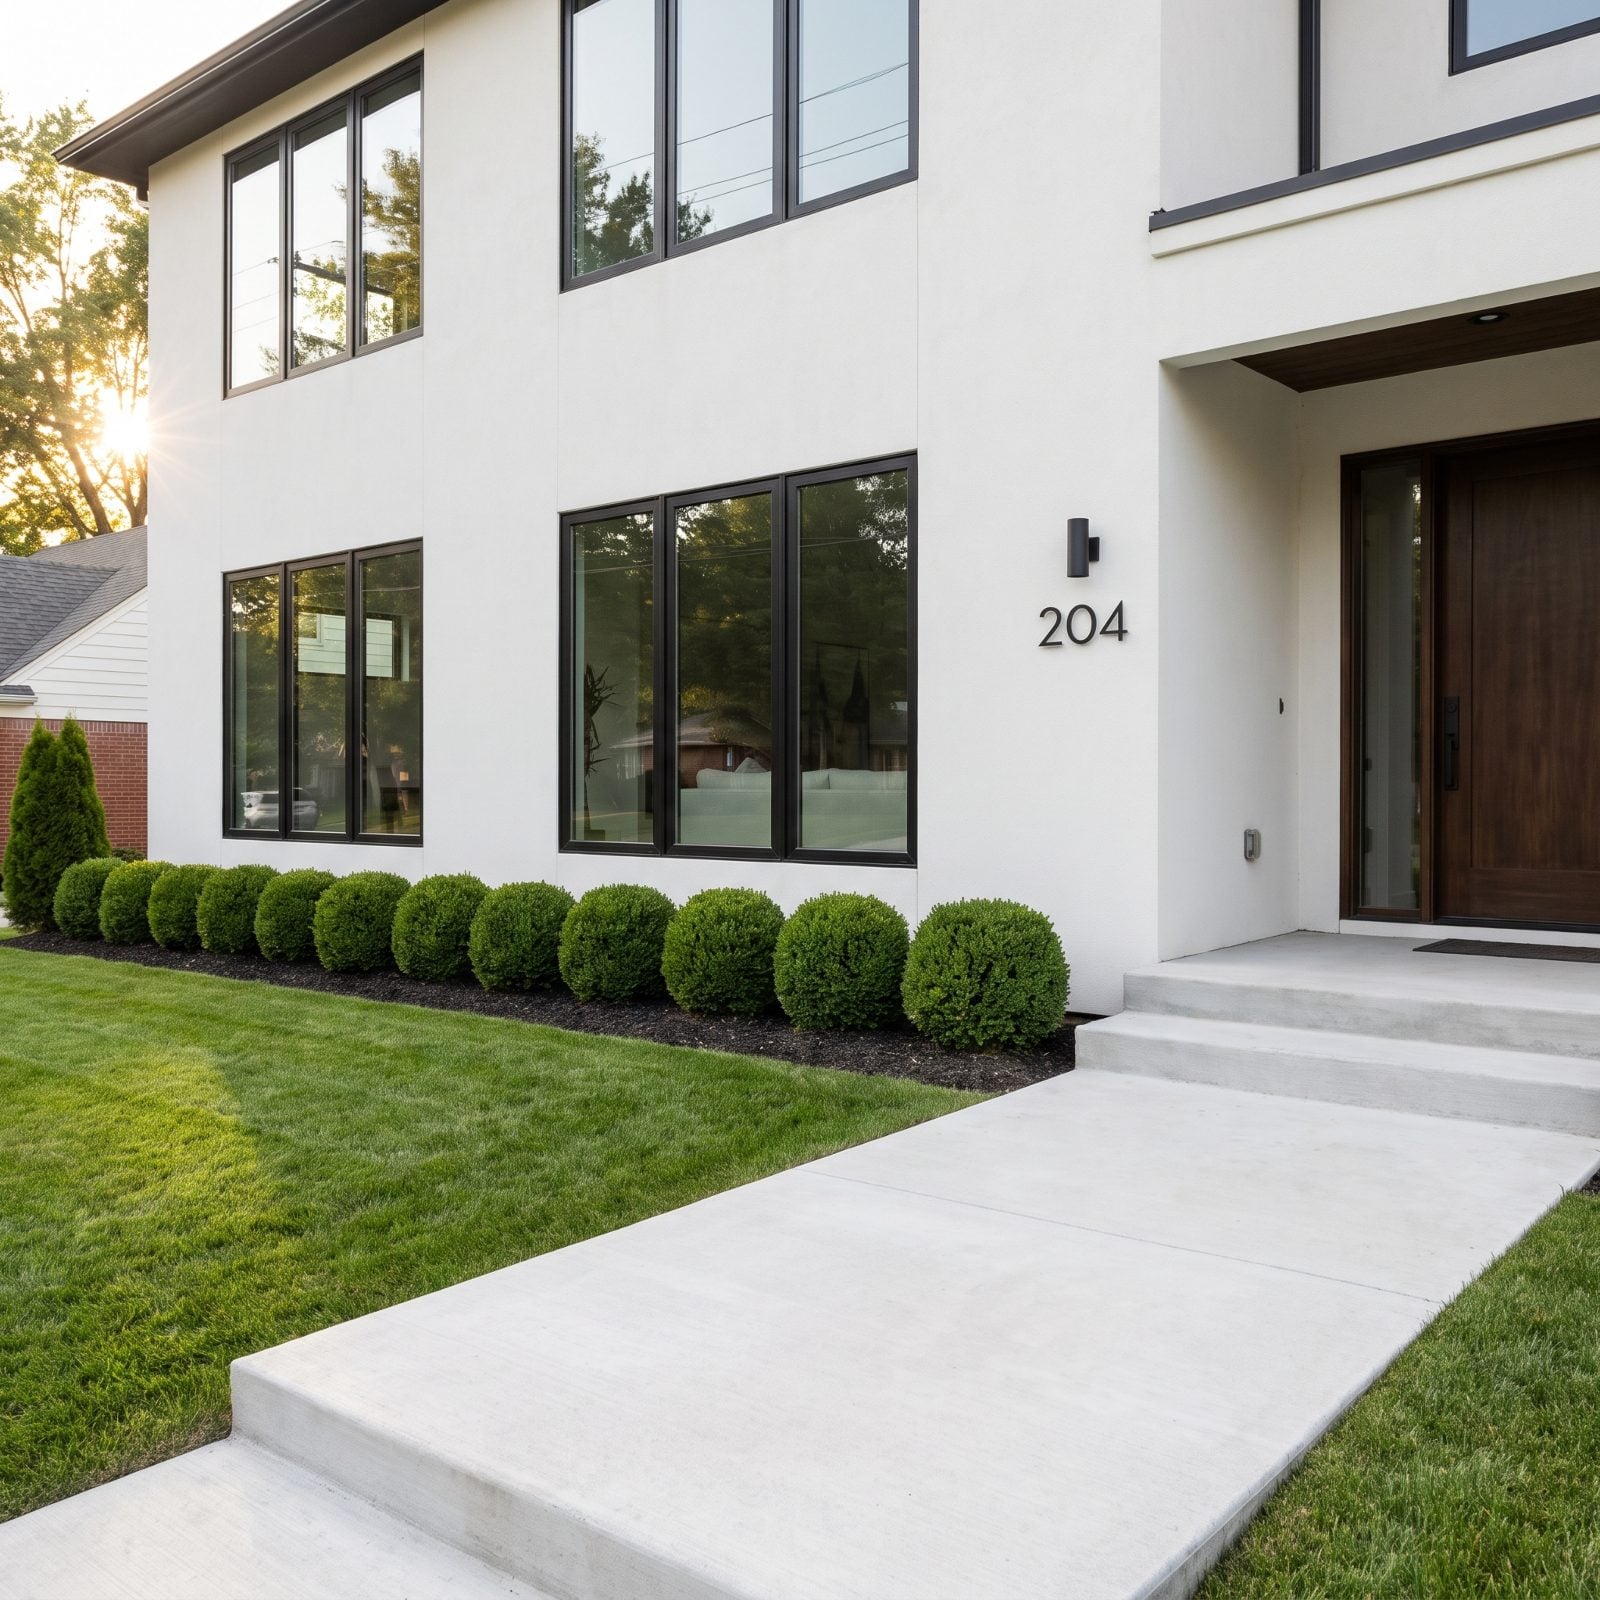
A straight line of matched shrubs feels safe. A dozen identical boxwoods, evenly spaced, soldiers at attention along the foundation. Tidy, yes. Also flat, cold, and about as welcoming as a hotel loading dock.
The rigid monoculture gives the eye one note held too long. No change in height, no shift in texture, nothing to pull you toward the door. It reads as default, the thing a builder installs and walks away from.
So break the line. Keep a low evergreen base if you like structure, then layer a taller grass or flowering shrub behind it and let a few groupings step forward and back. Vary the heights, mix two or three textures, and curve the bed line instead of ruling it straight. Structure is good. A wall of clones is not.
15. Creating Beds Too Small for Mature Plants
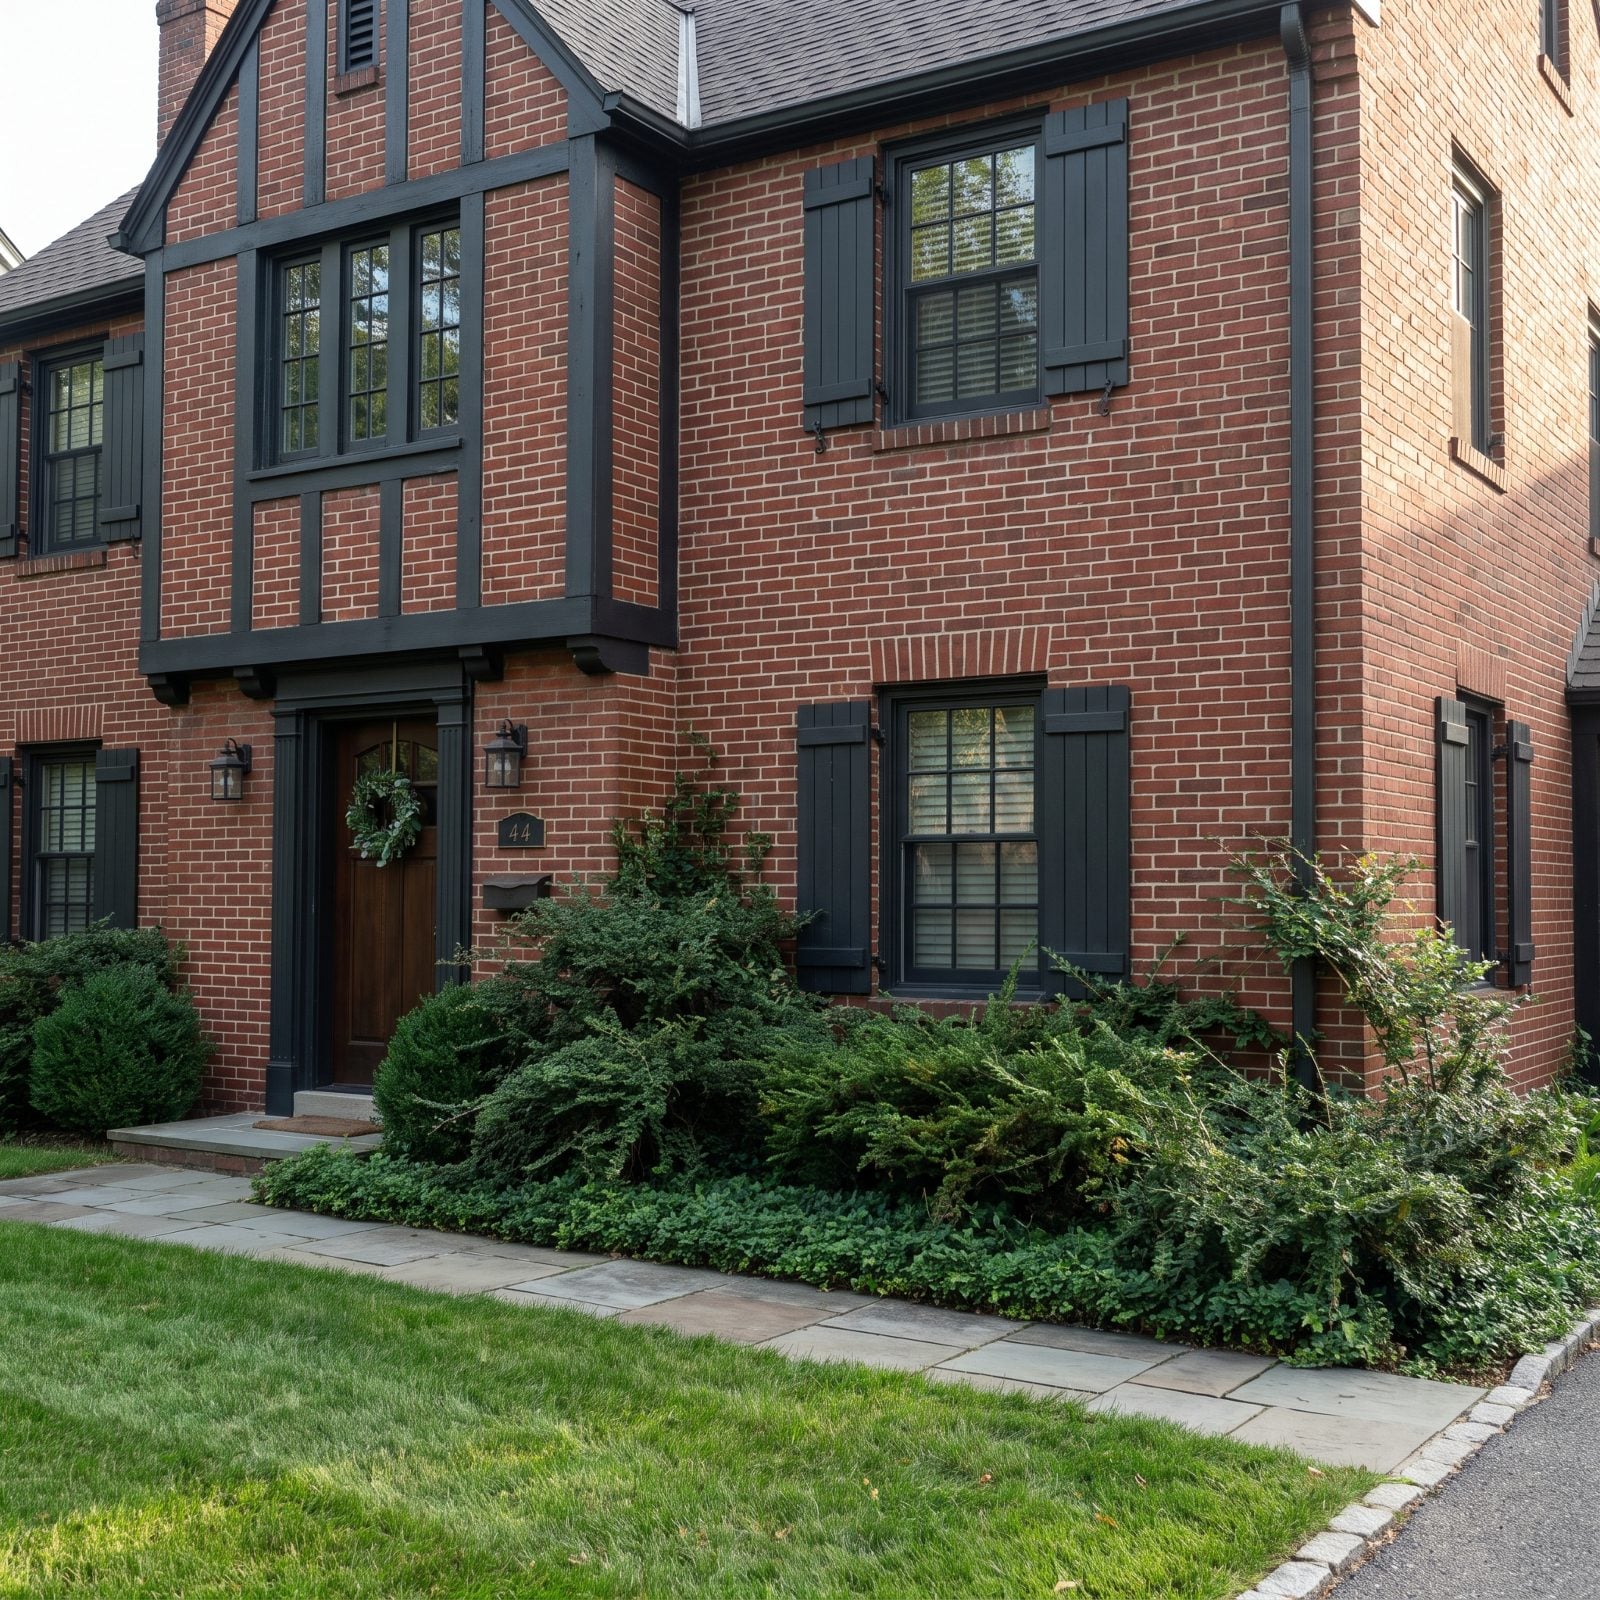
The bed looked plenty big when the plants were gallon pots. Three years on, the shrubs are mashed against the brick and flopping over the lawn edge, because a narrow strip was never going to hold something that wants to be four feet wide.
Undersized beds force you into constant hacking, and hacked shrubs lose their natural shape and look harassed all season. The planting ends up fighting the house instead of softening it.
Size the bed to the plant’s mature spread, not its nursery pot. Give yourself a bed deep enough that the shrubs have room, and keep the plants far enough off the wall that air can move behind them. Generous beds let plants grow into themselves, which is the whole point of planting them.
14. Planting for Only One Brief Season
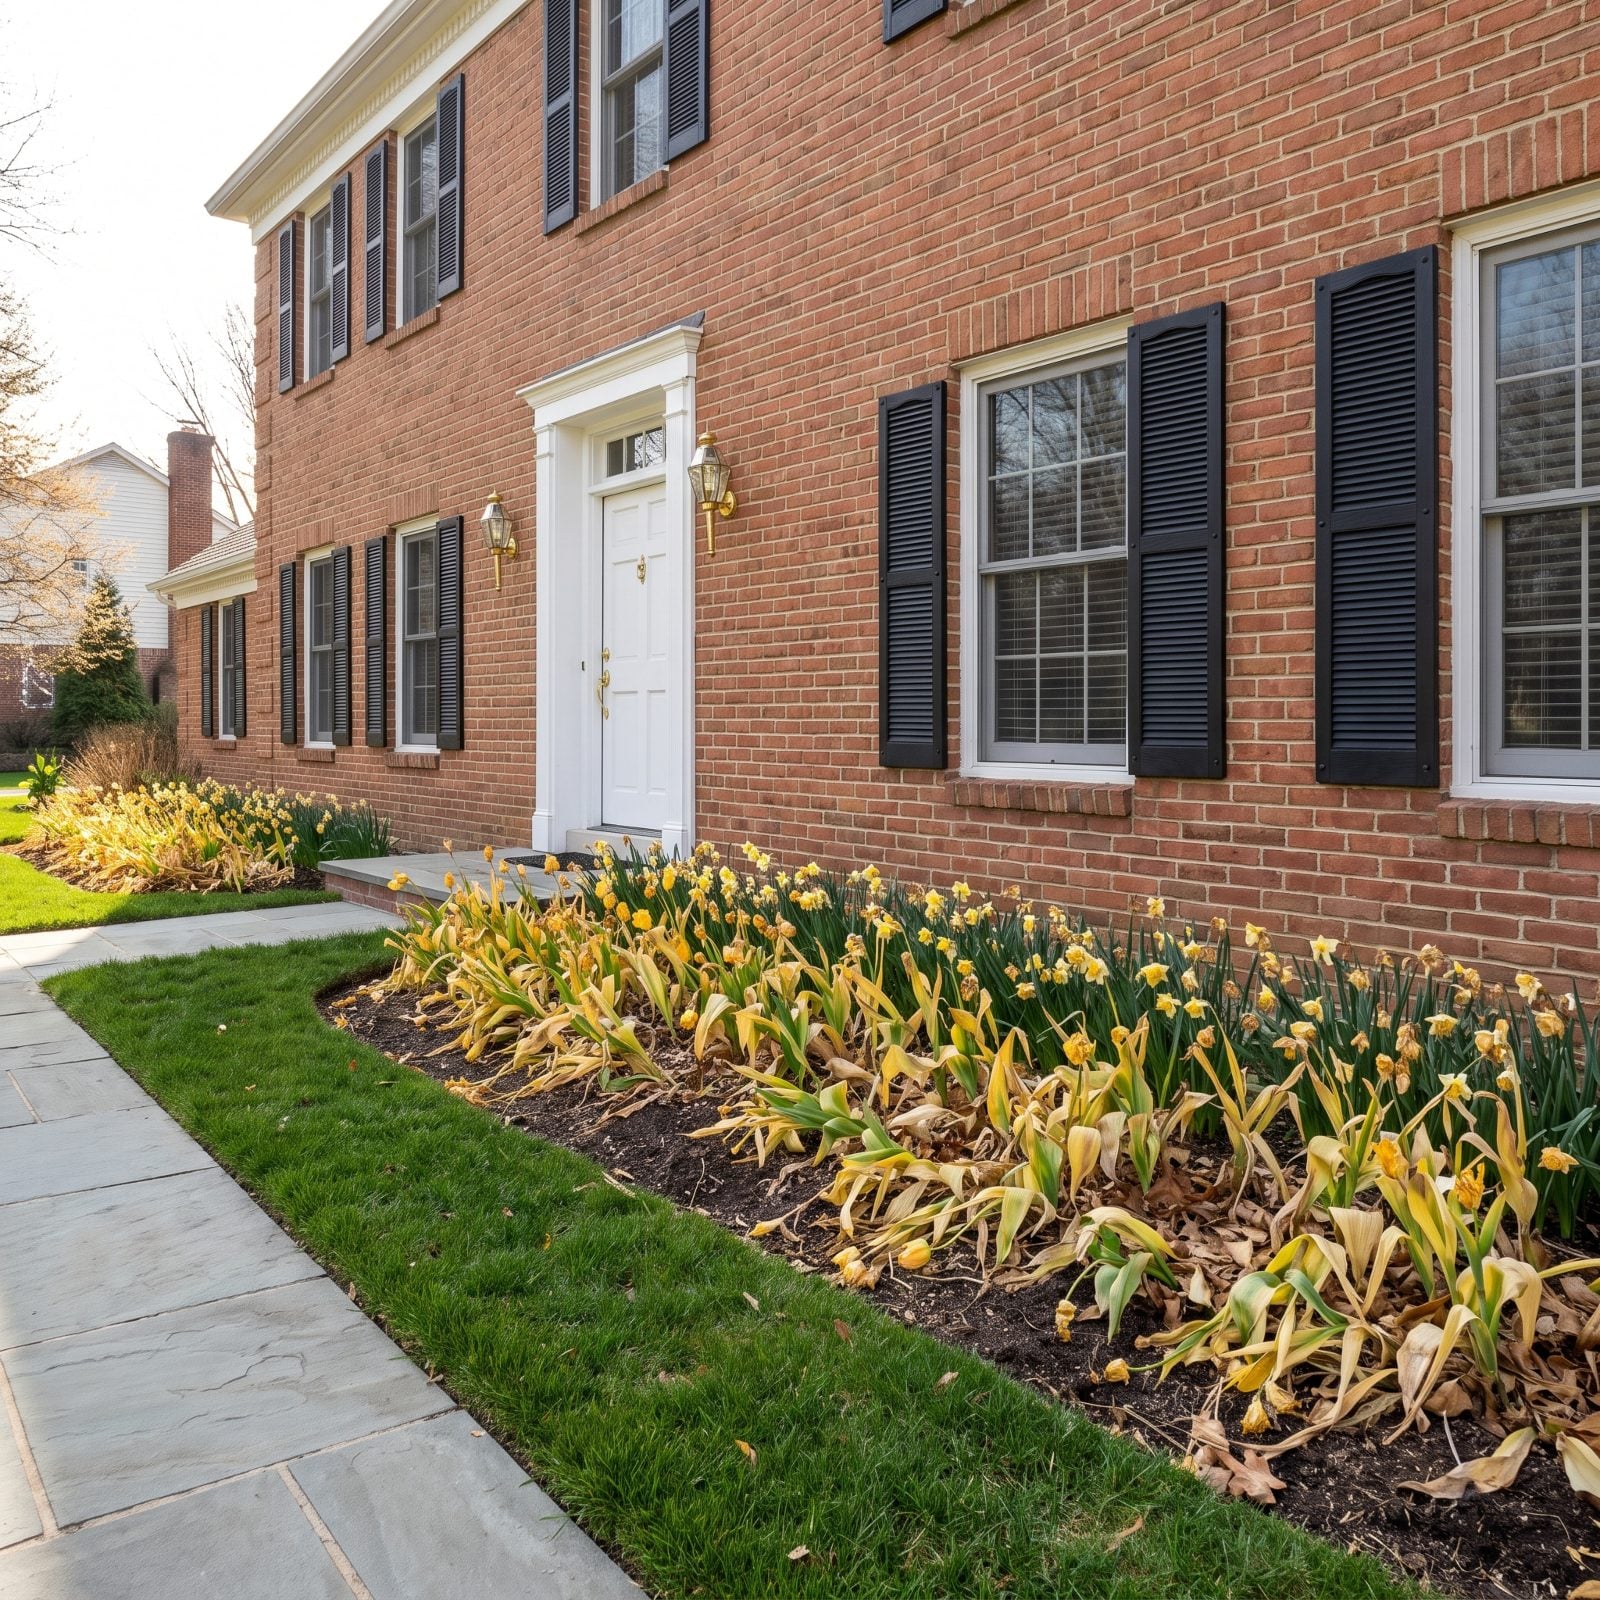
You’ve seen the house that peaks for two weeks in April. A wall of tulips, then nothing. By June the beds are a flat stretch of tired foliage and bare dirt, and the whole front reads as an afterthought for the other eleven months.
A yard that performs in one short window leaves the home looking neglected most of the year, so the fix is layering. Build the bones with evergreens like boxwood or dwarf conifers, then plant in waves: spring bulbs, summer perennials, fall grasses, winter berries. Something should always be earning its spot.
13. Leaving Bare Soil Visible Between Plants
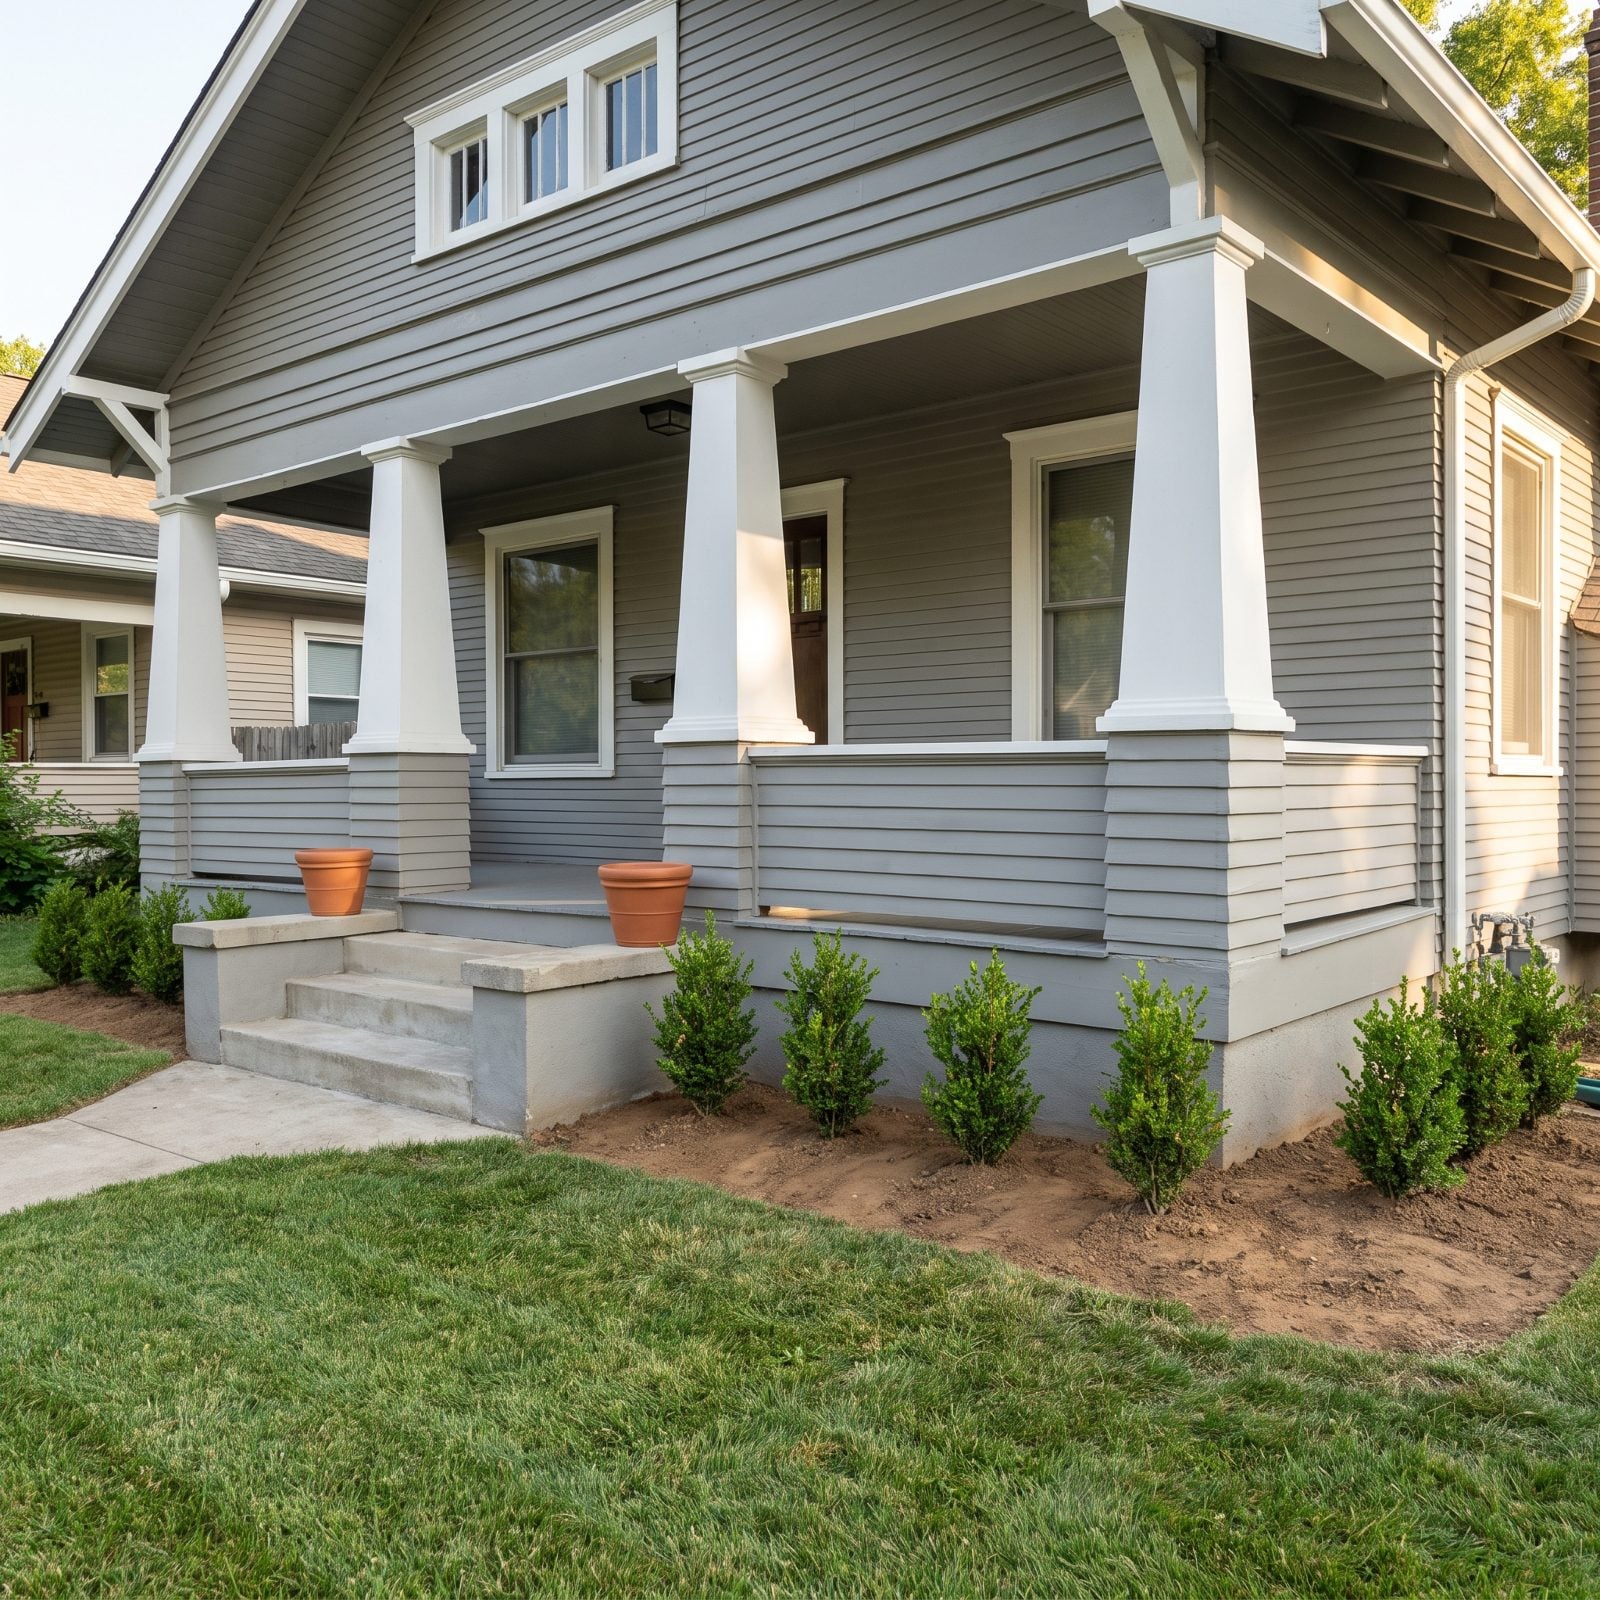
New plantings always look sparse, and that’s fine for a season. What reads as unfinished is the bare dirt left showing for years because nobody filled the space between.
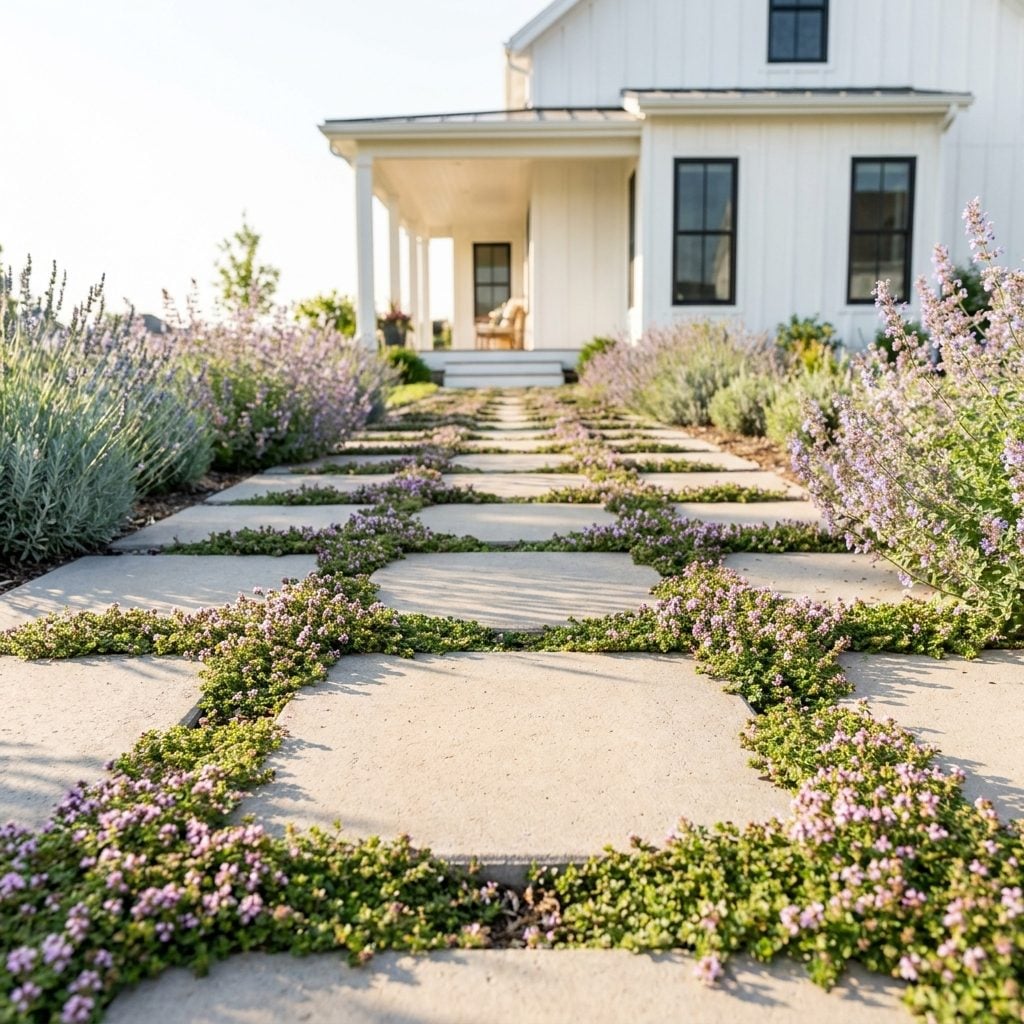
Exposed soil does two unkind things. It makes beds look thin and temporary, and it hands the weeds an open invitation. Close the gaps with a groundcover like creeping thyme, ajuga, or sweet woodruff, and mulch everything else to a two-inch depth. A low carpet of green between the shrubs reads intentional instead of half-finished.
Want a faster result? Plant your perennials closer than the tag suggests. Tags assume a plant’s maximum spread, so you can cheat the fullness now and divide later.
12. Using Mulch in a Jarring, Dyed Color
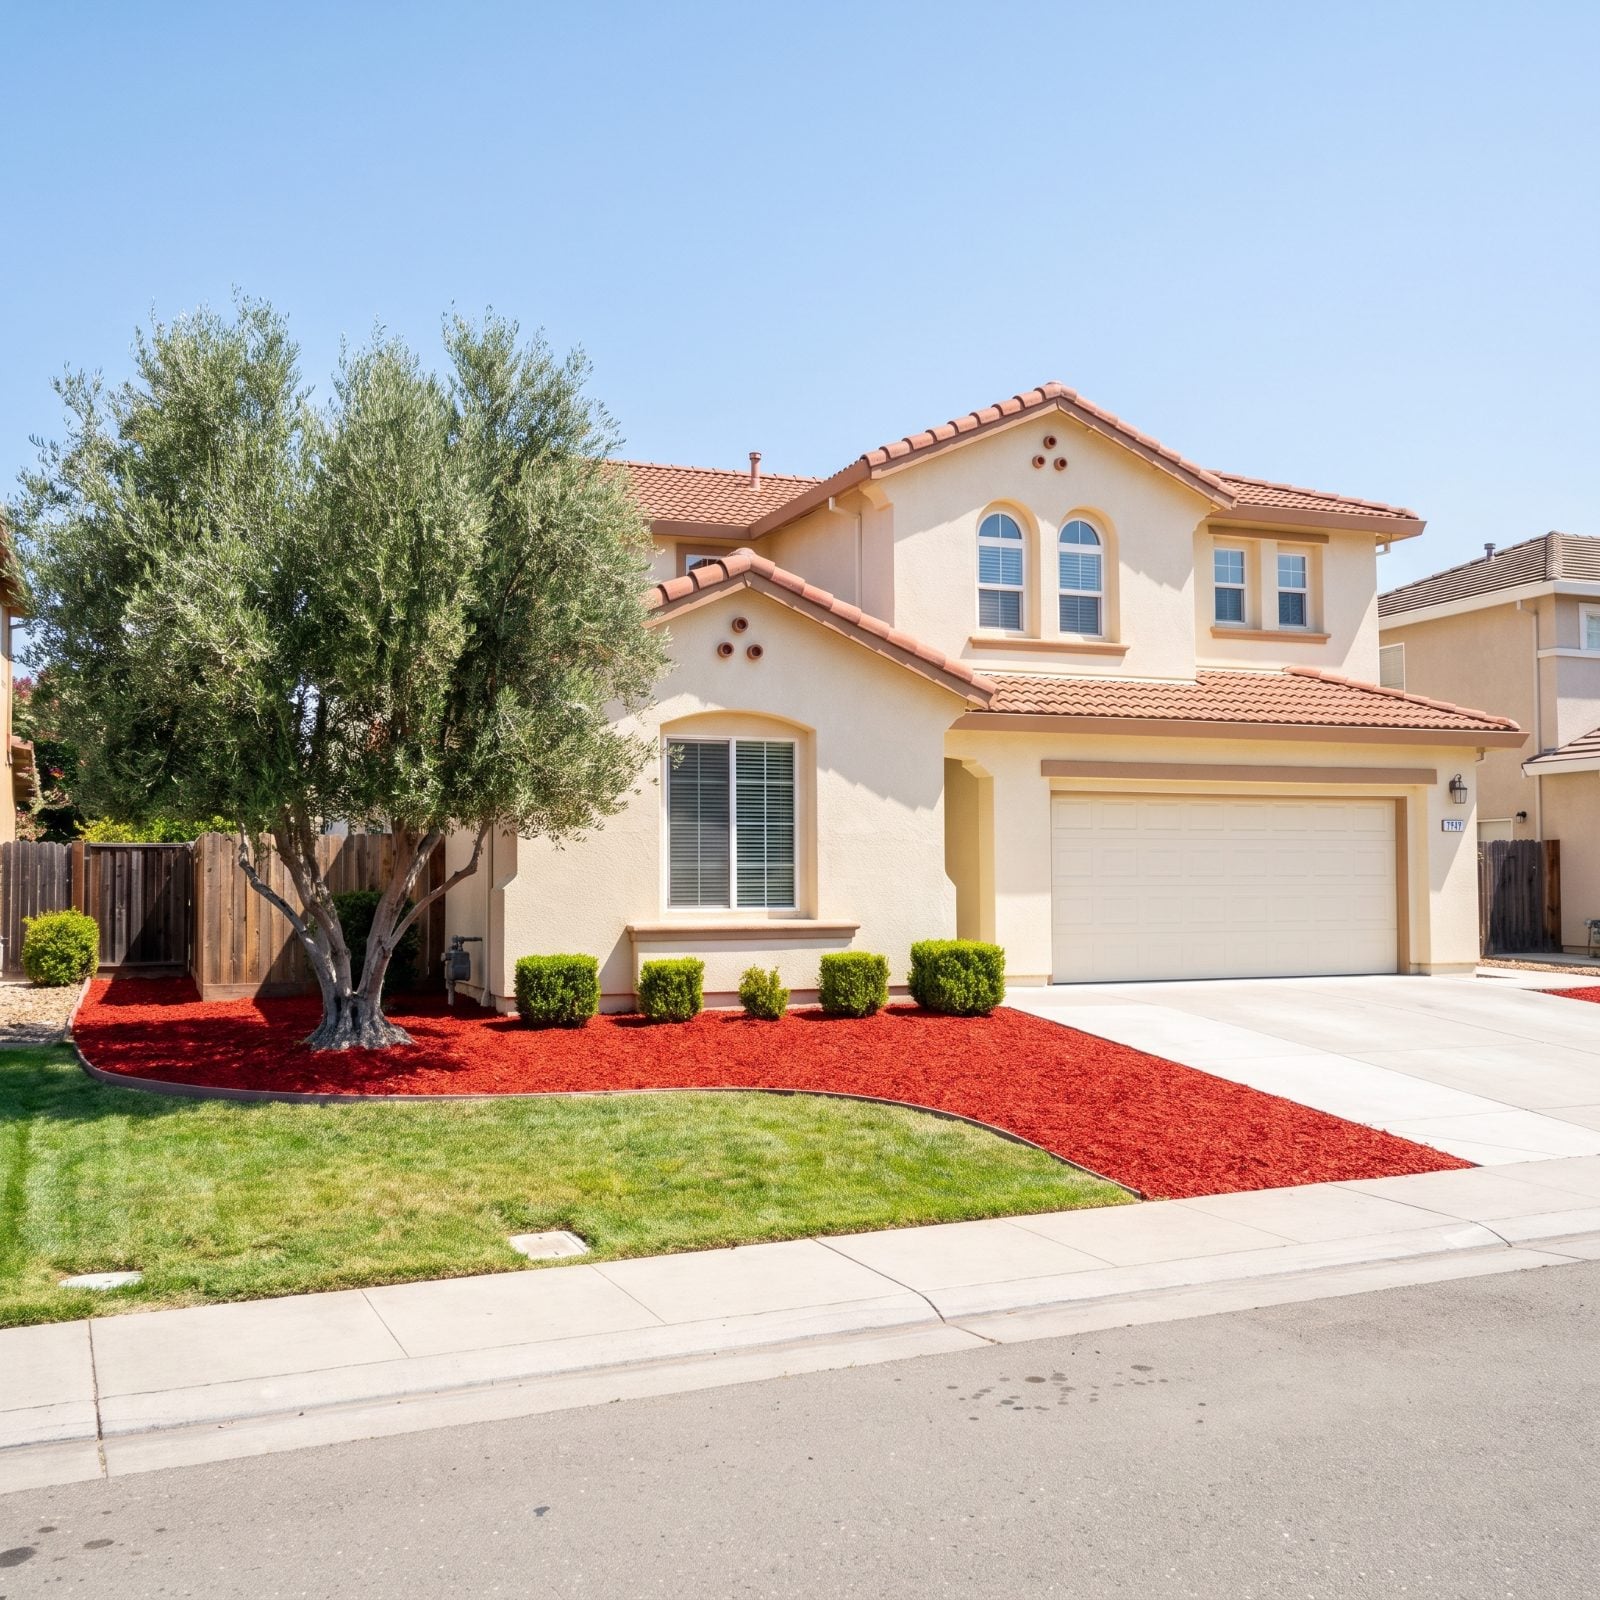
The red mulch. You know the one. It shows up at the home center dyed the color of a cherry popsicle, and against green plants and neutral siding it practically vibrates.
Dyed mulch pulls every ounce of attention down to the ground, where you least want it. The plants disappear and the dirt becomes the headline. Switch to natural shredded hardwood or pine fines in a soft brown-black. It recedes, which is exactly what mulch is supposed to do. The bed should frame the plants, not shout over them.
11. Mixing Too Many Hardscape Materials
🔥 Would you like to save this?
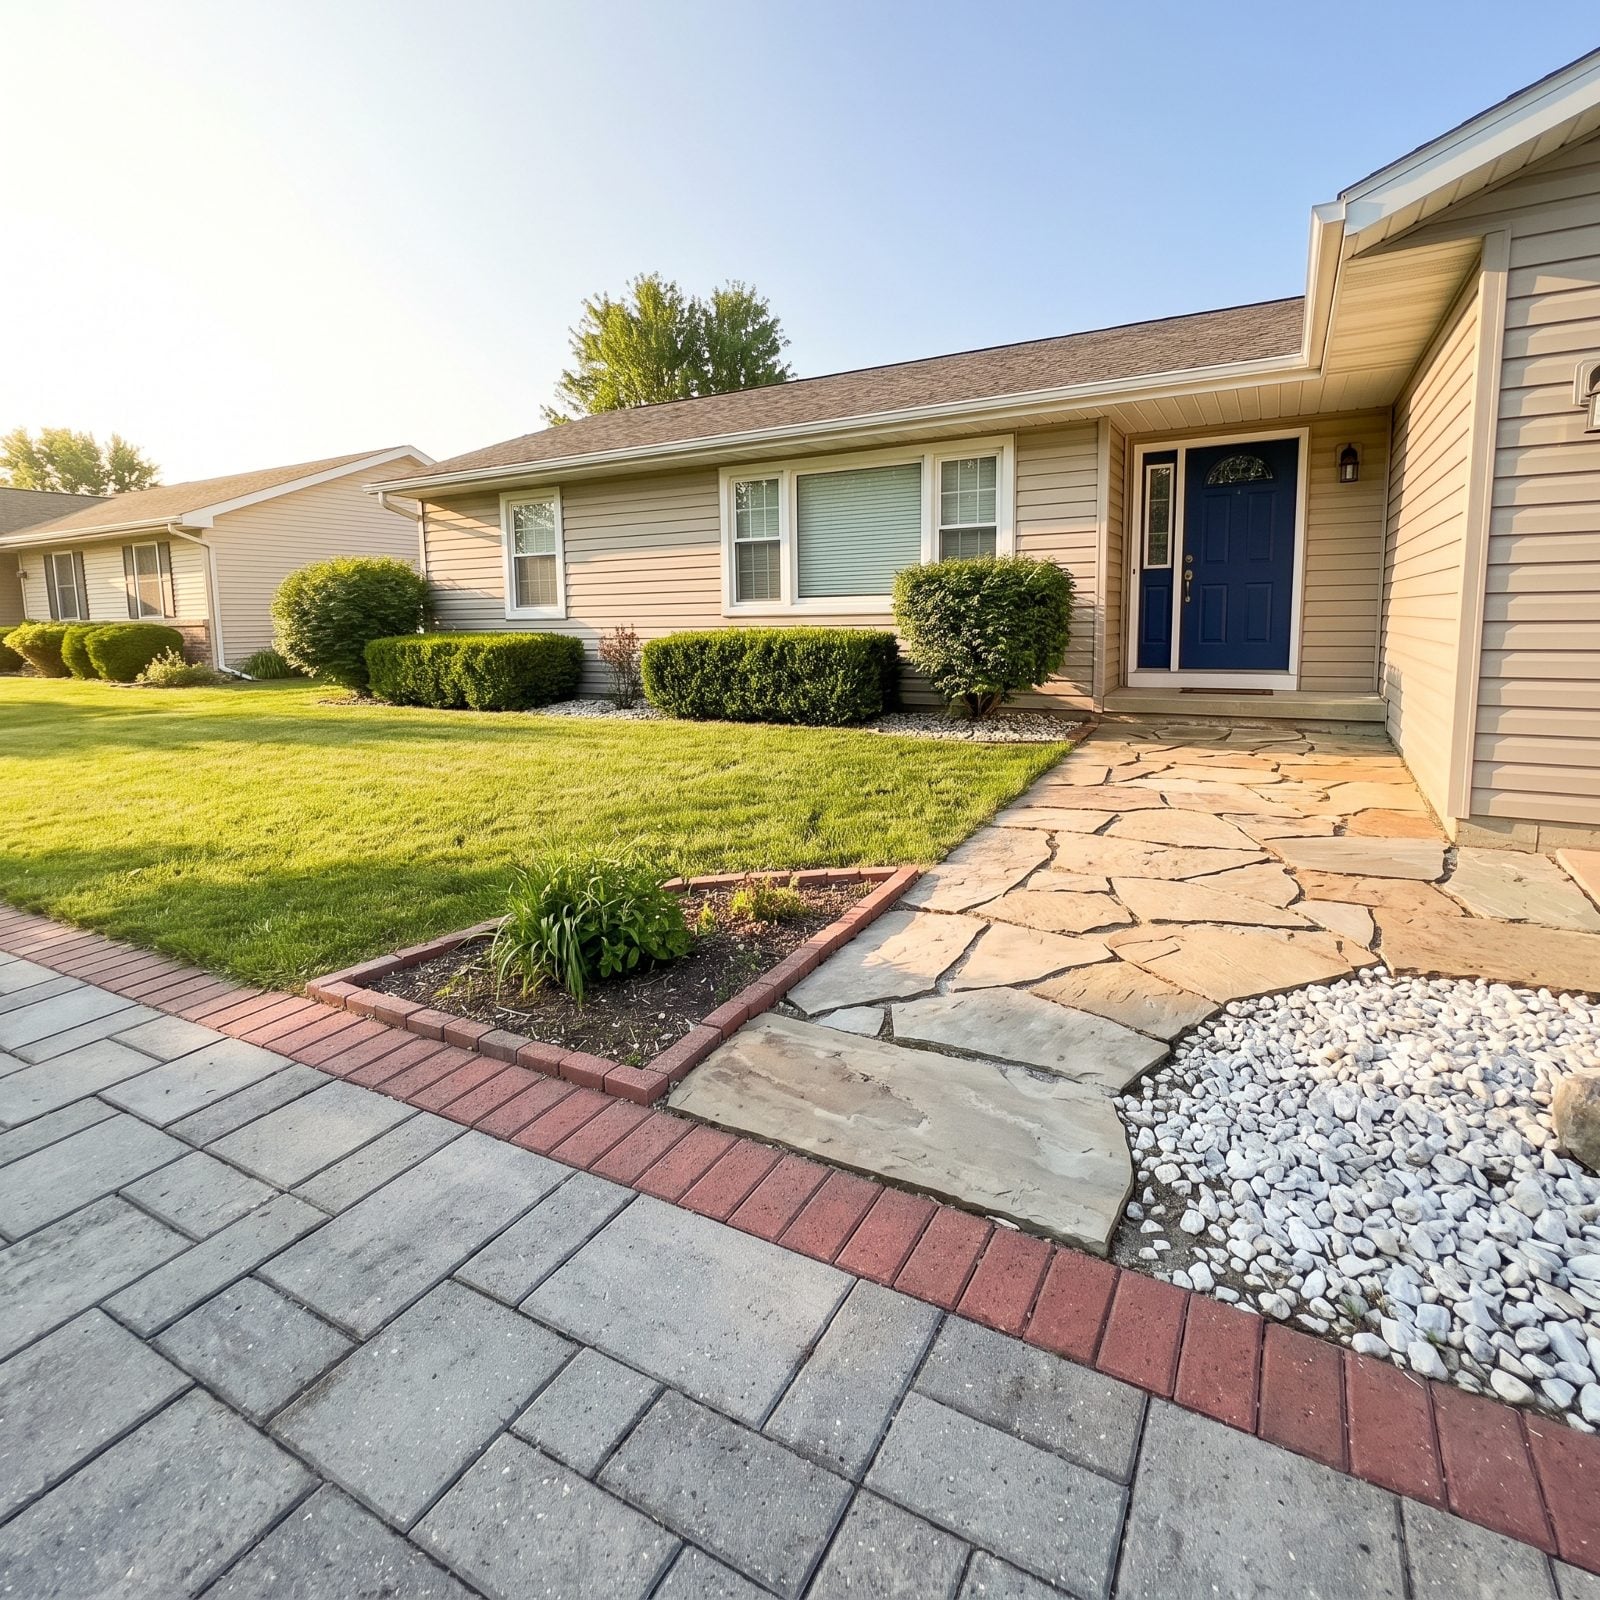
Gray pavers running into red brick running into flagstone running into white rock. Each piece was probably added in a different year with good intentions, and together they turn the front yard into a sample board.
Too many competing materials fracture the eye and make even a generous lot feel busy and small. Pick two and repeat them. A stone and a complementary edging, maybe, or a paver and a gravel. Let one dominate and the other play support.
10. Creating a Lawn With No Defined Edges
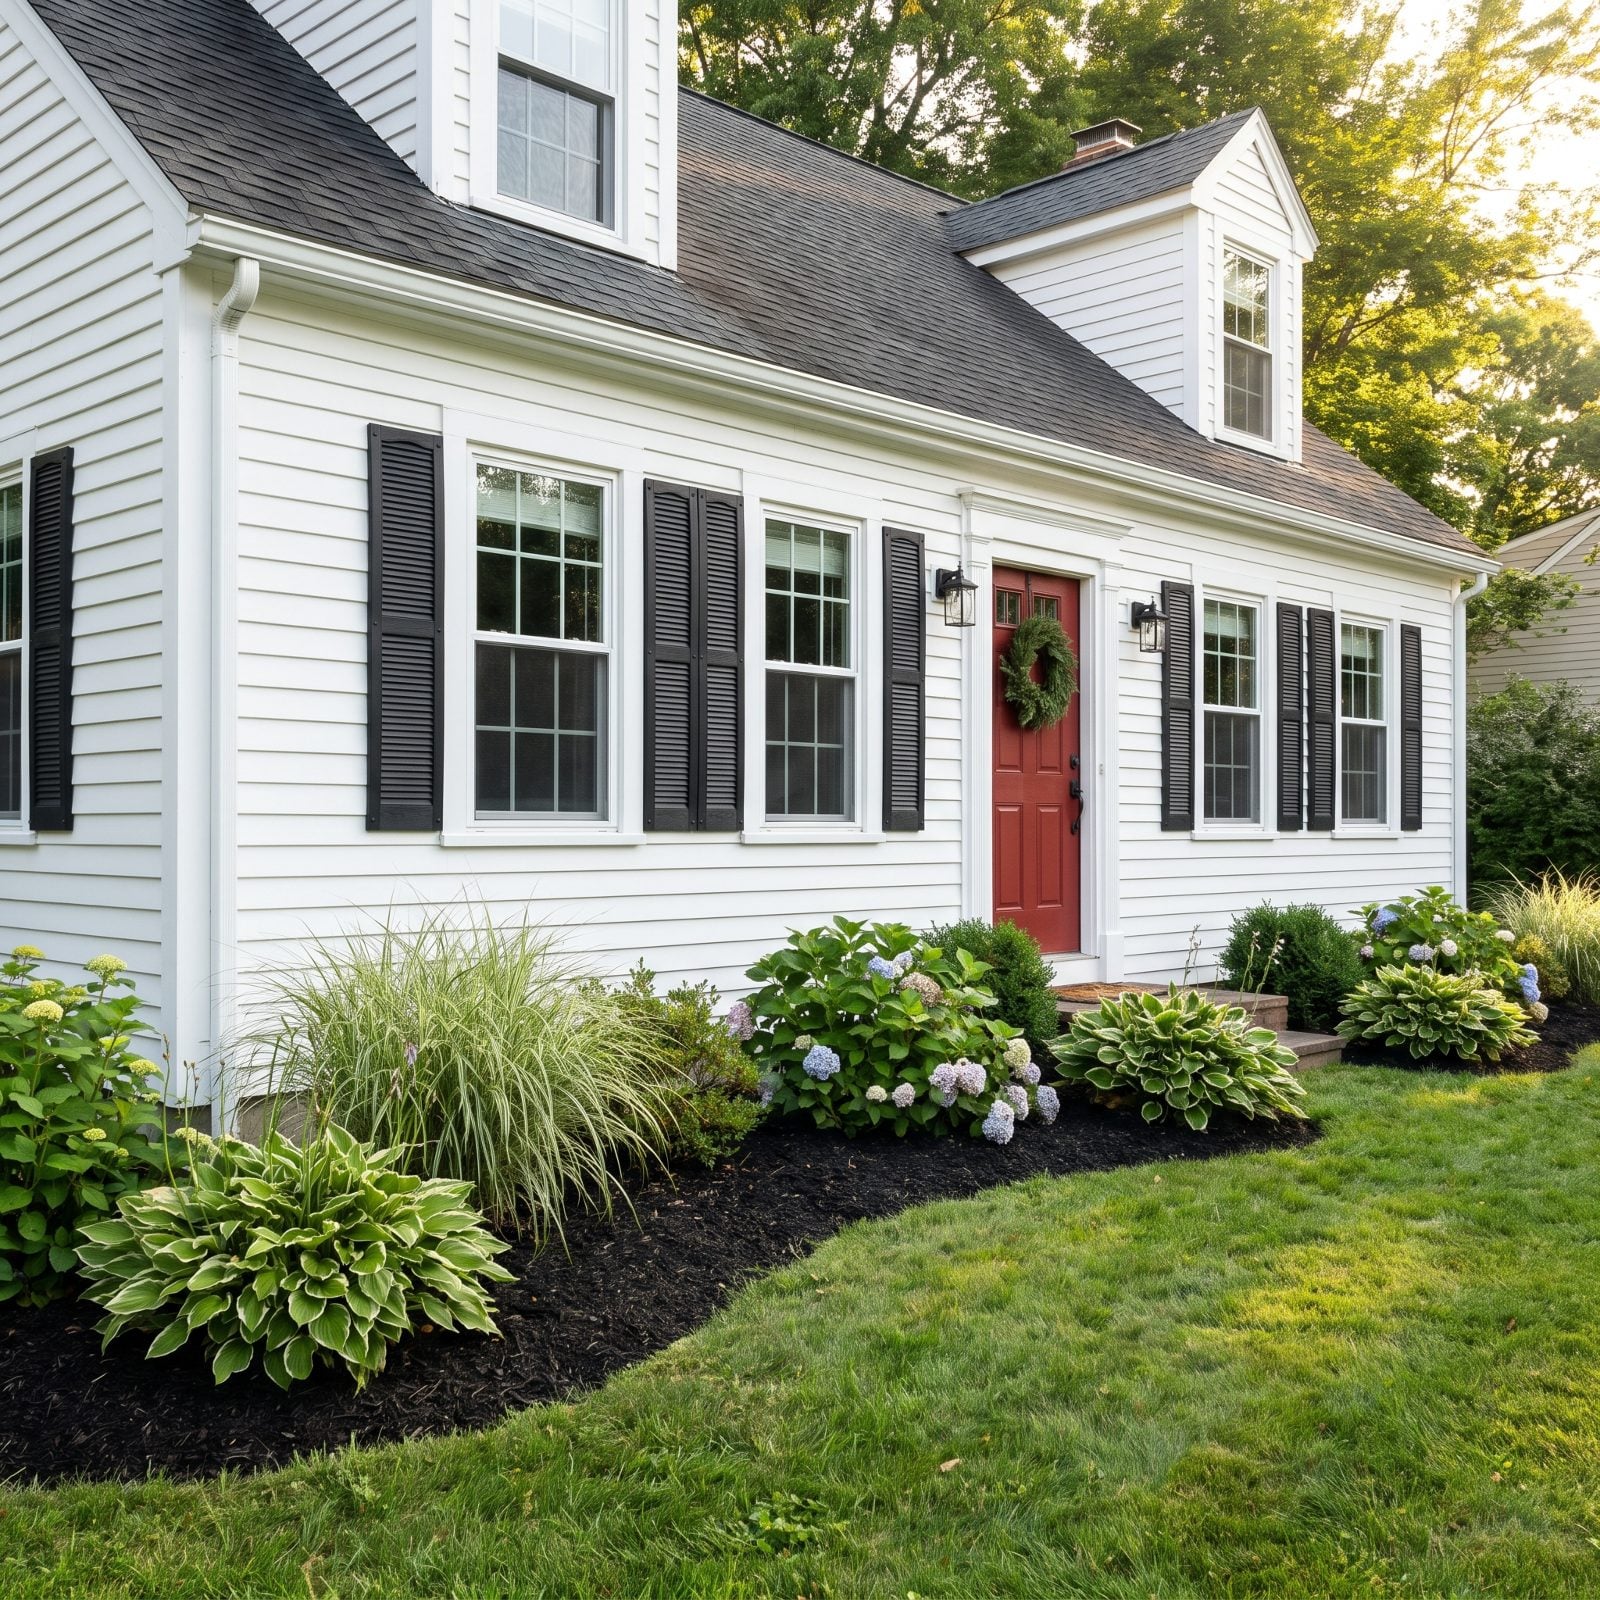
Here’s a free upgrade that costs an afternoon. Cut a clean edge where the lawn meets the beds.
Look at how the lawn here meets the freshly mulched bed along one smooth, clean curve, with no grass creeping into the mulch. Let that line blur and the whole yard would read soft and unkempt even with every hydrangea and hosta thriving. A crisp line like this does the opposite — it’s the landscaping equivalent of a sharp haircut. Use a half-moon edger to carve a shallow trench, or install a low steel or stone border. Either way you get a line the eye can follow, and suddenly the same plants look deliberate.
9. Ignoring the Strip Between the Sidewalk and Street
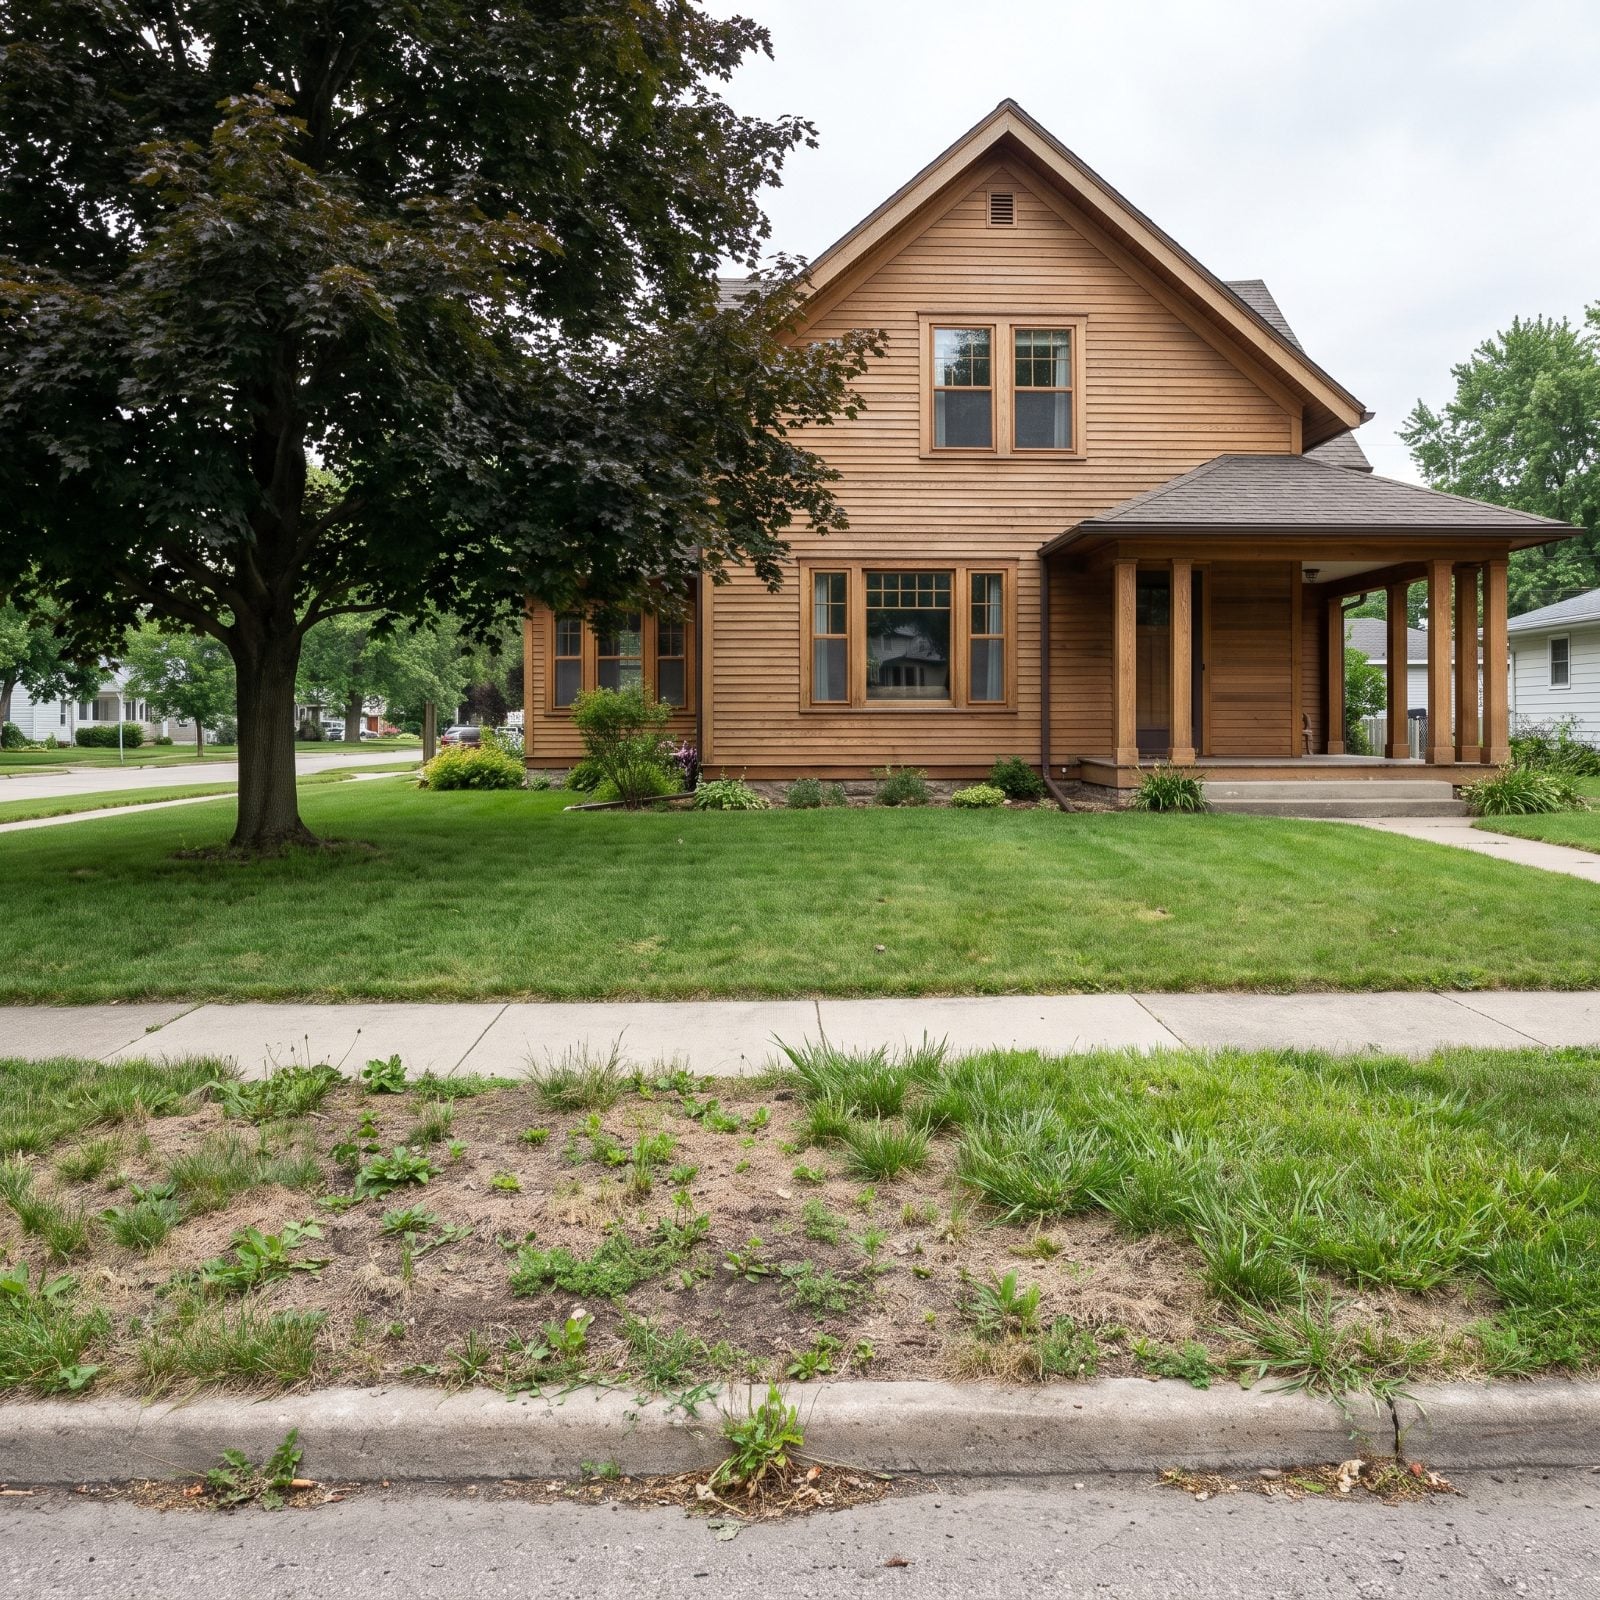
The hell strip. That narrow band between the sidewalk and the curb, baked by road heat and ignored by almost everyone. It’s often the first thing a visitor actually walks past, and it usually looks like a forgotten field.
A patchy, weedy strip undercuts everything behind it — the first impression before the first impression. Plant it with tough, low things that shrug off heat and road salt: creeping sedum, ornamental grasses, catmint, or a tidy row of liriope. Keep it low so you don’t block sightlines or car doors. And check your local rules first, since some towns cap height and plantings in that zone.
8. Using Artificial Turf That Looks Unnaturally Uniform
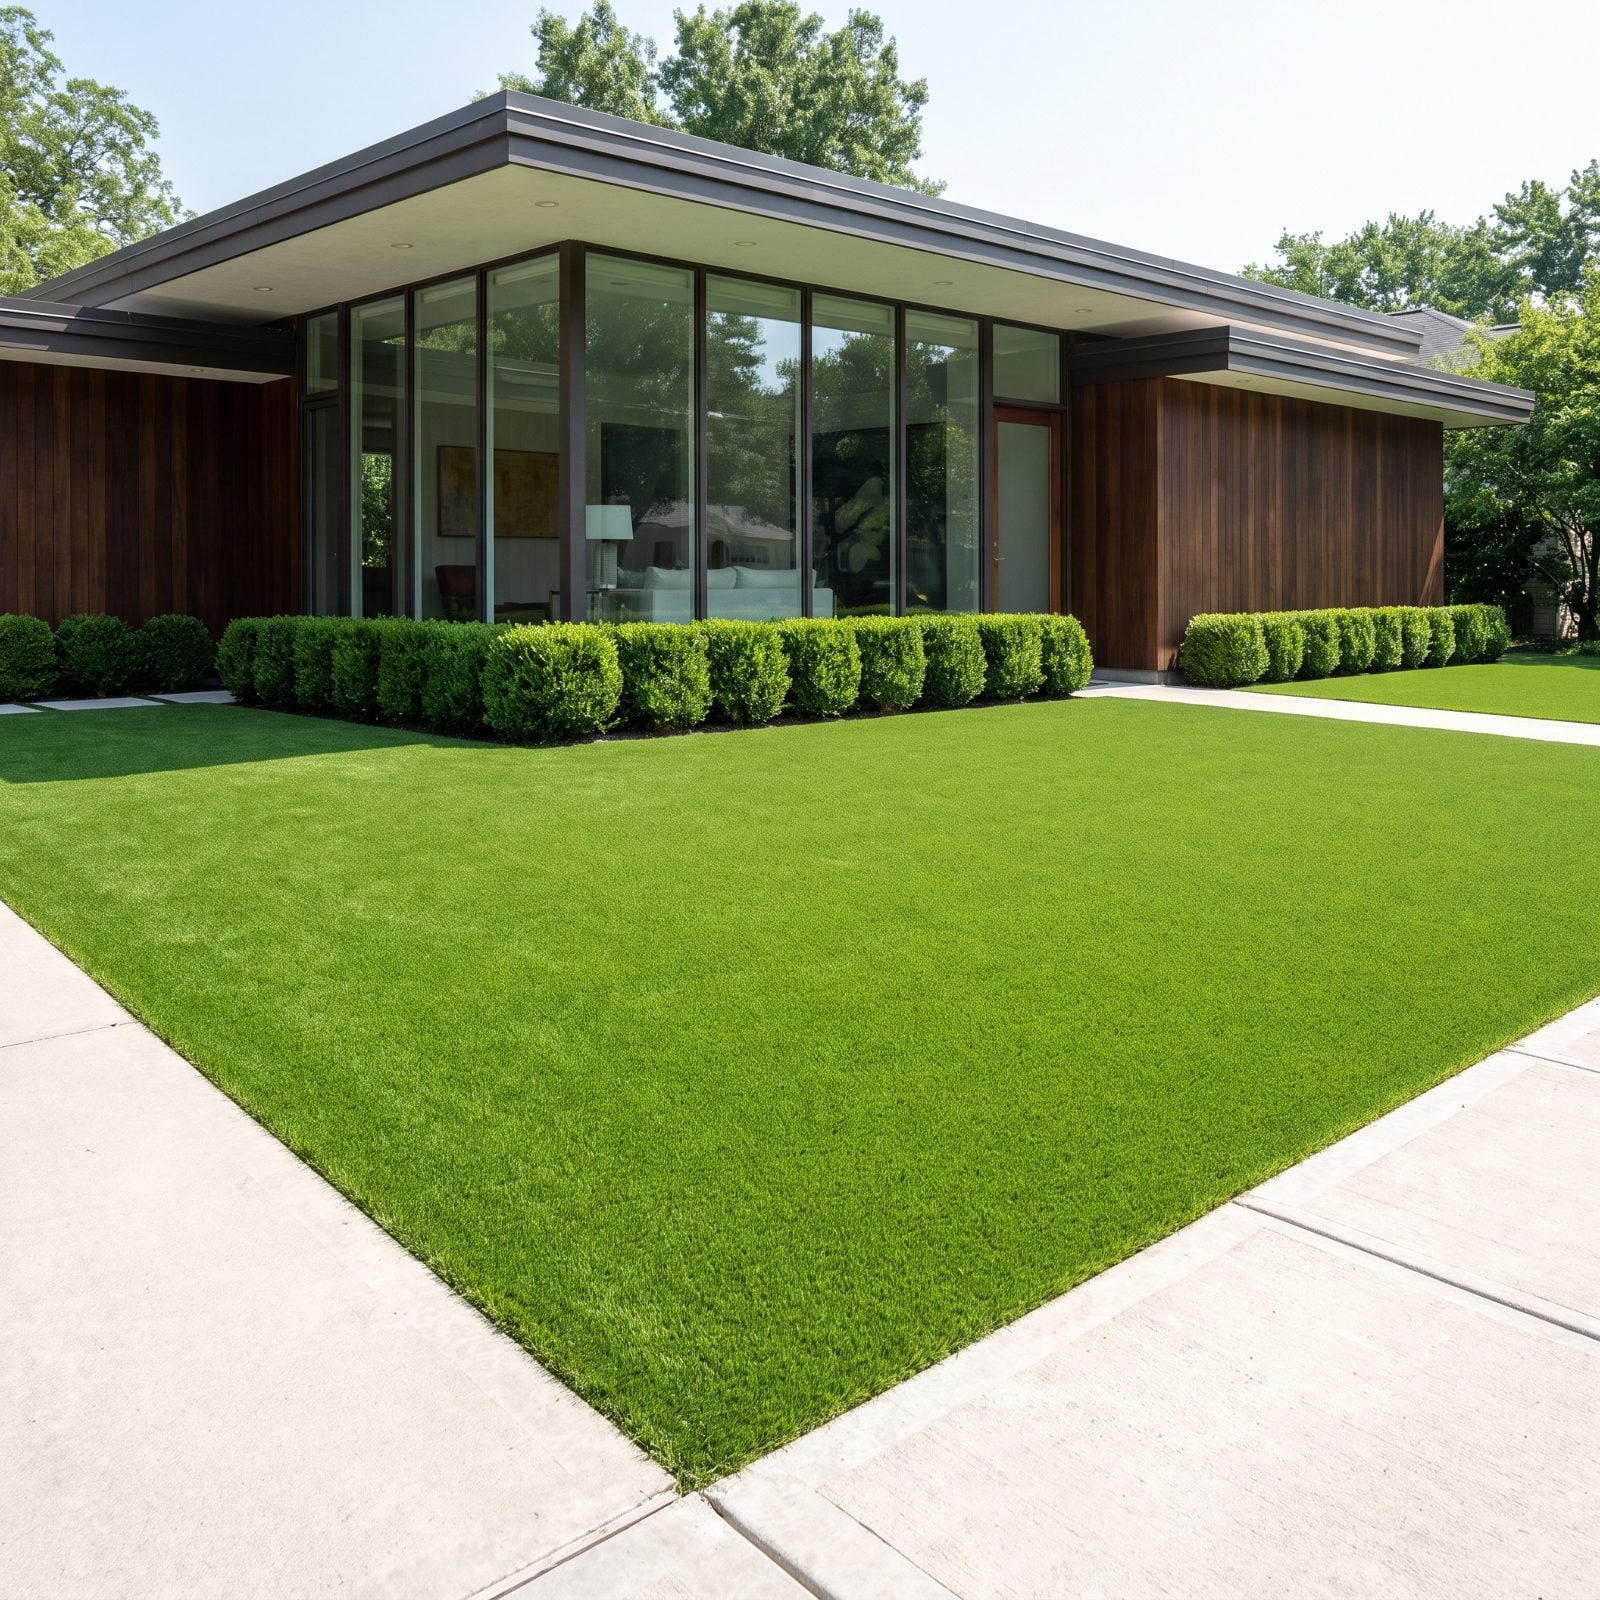
Good artificial turf exists. The trouble is the version that’s one flat shade of green with a plastic sheen, mowed to an impossible uniformity no real grass ever achieves. The eye clocks it instantly.
Uniformity is the tell. Real lawns have slight color shifts, varied blade lengths, a little honest imperfection, while the cheap turf reads as a putting green bolted to the front of a house. If you go synthetic, buy a multi-tone product with mixed blade heights and a brown thatch layer underneath, then break up the expanse with real planted beds so it isn’t one unbroken plastic plane.
7. Placing Trash Bins in Full View
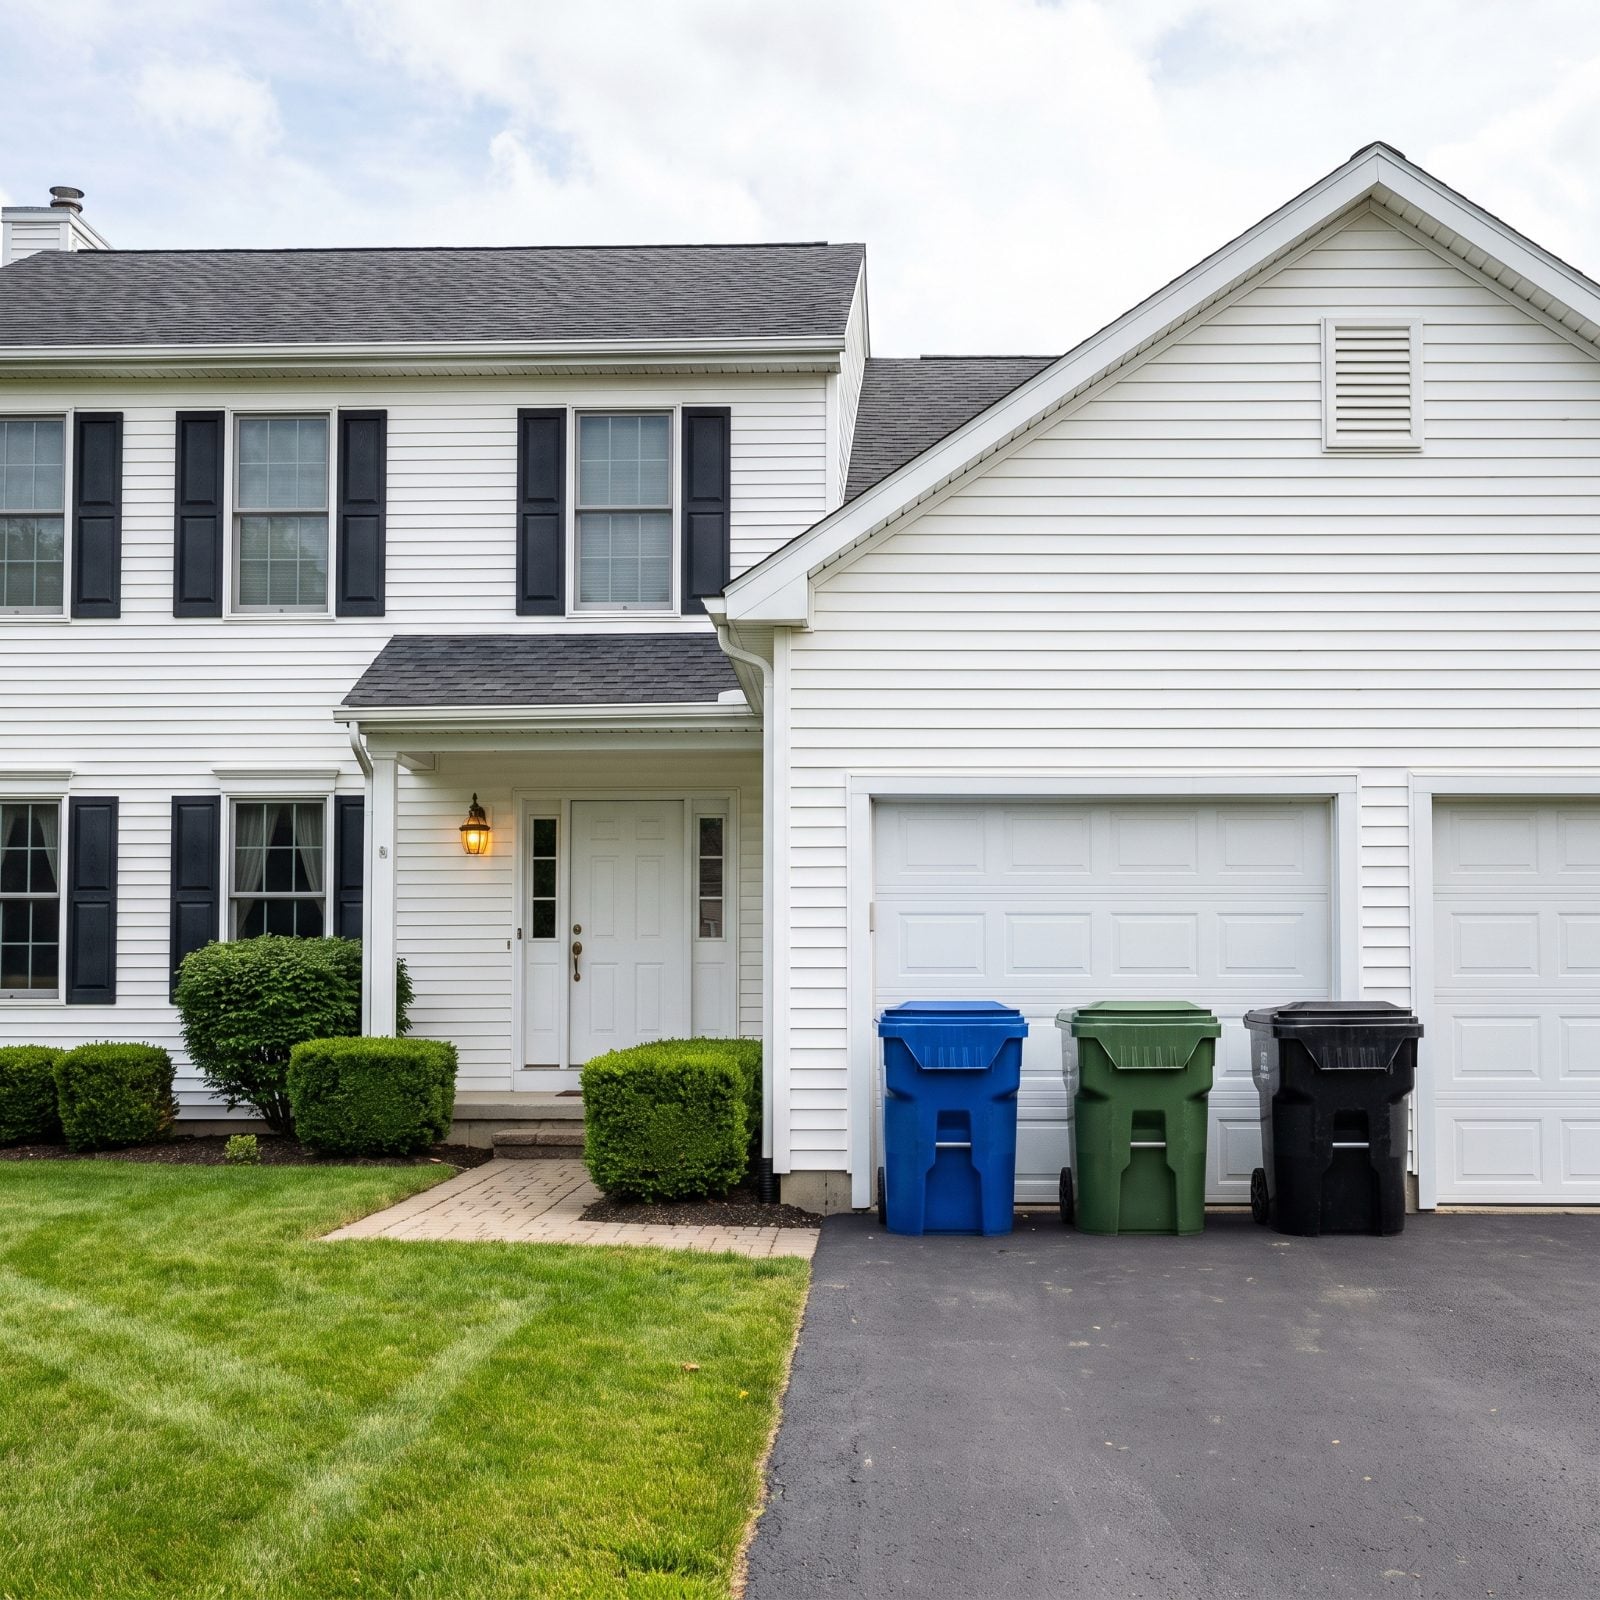
Three wheeled bins parked against the garage, right in the sightline from the street to the front door. Everyone has them. The real question is whether yours are the first thing a guest sees.
Bins in the open become the focal point whether you want them to or not, and a focal point made of plastic isn’t doing your home any favors. Tuck them behind a simple screen: a cedar enclosure, a section of louvered fence, or a cluster of upright shrubs like arborvitae. Even a trellis with climbing vine hides a lot. Just keep access easy so you actually use the screen instead of parking the bins in front of it.
6. Leaving Utility Boxes and HVAC Equipment Exposed
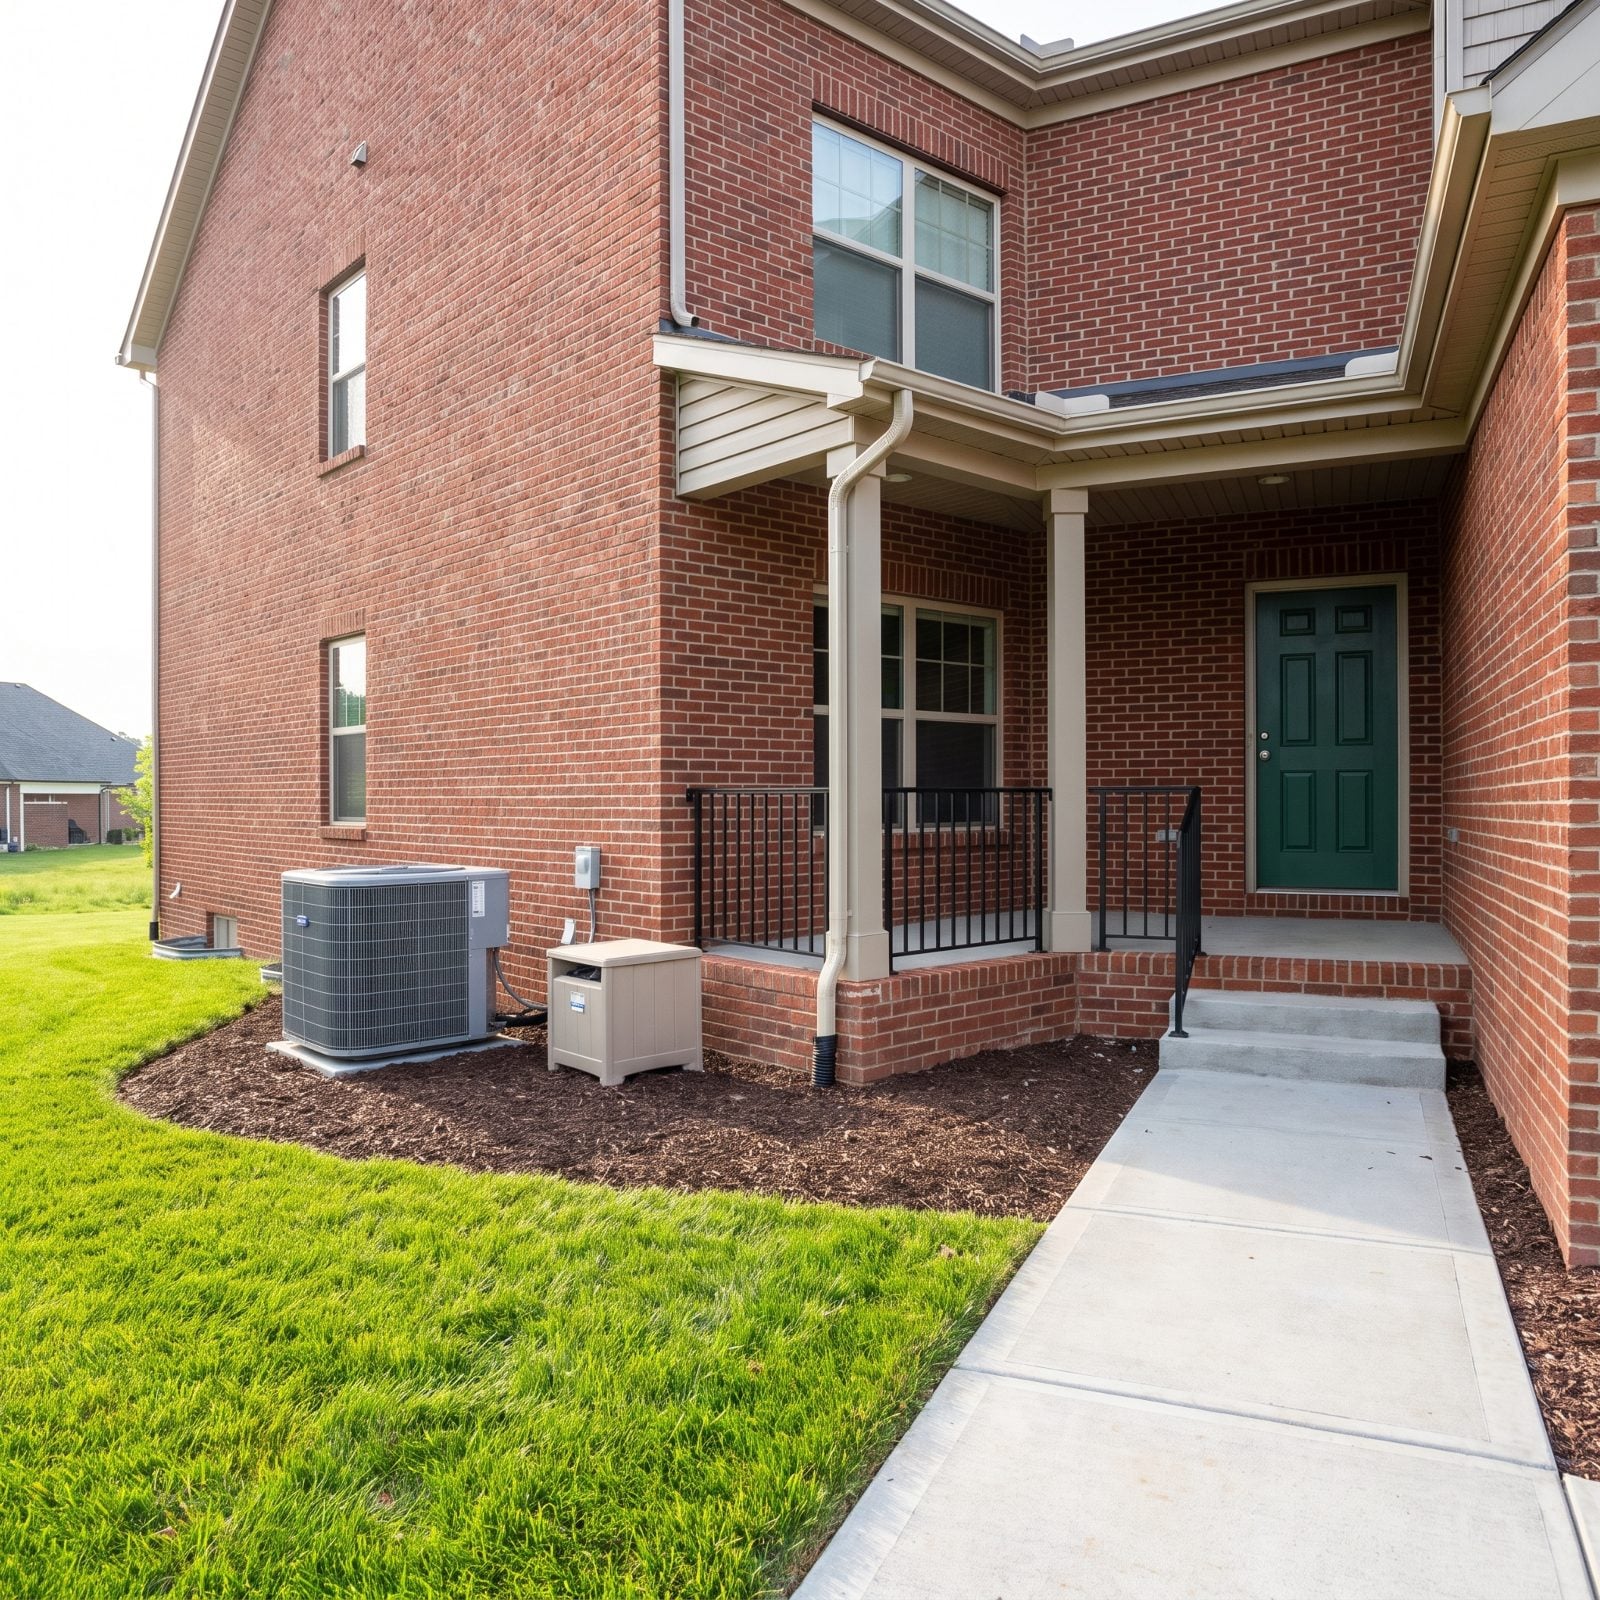
The beige utility box and the gray condenser humming away in the side bed. Functional, necessary, and about as charming as a parking meter.
Exposed equipment reads as a maintenance zone, which drains the welcome right out of an otherwise handsome facade. Soften it with a loose screen of shrubs or a removable lattice panel, keeping at least two or three feet of clearance so the unit breathes and the technician can reach it. Ornamental grasses work especially well because they sway and never look like a deliberate cover-up. Never box equipment in tight — you’ll choke the airflow and void the warranty.
5. Leaving Garden Hoses Tangled Near the Entrance
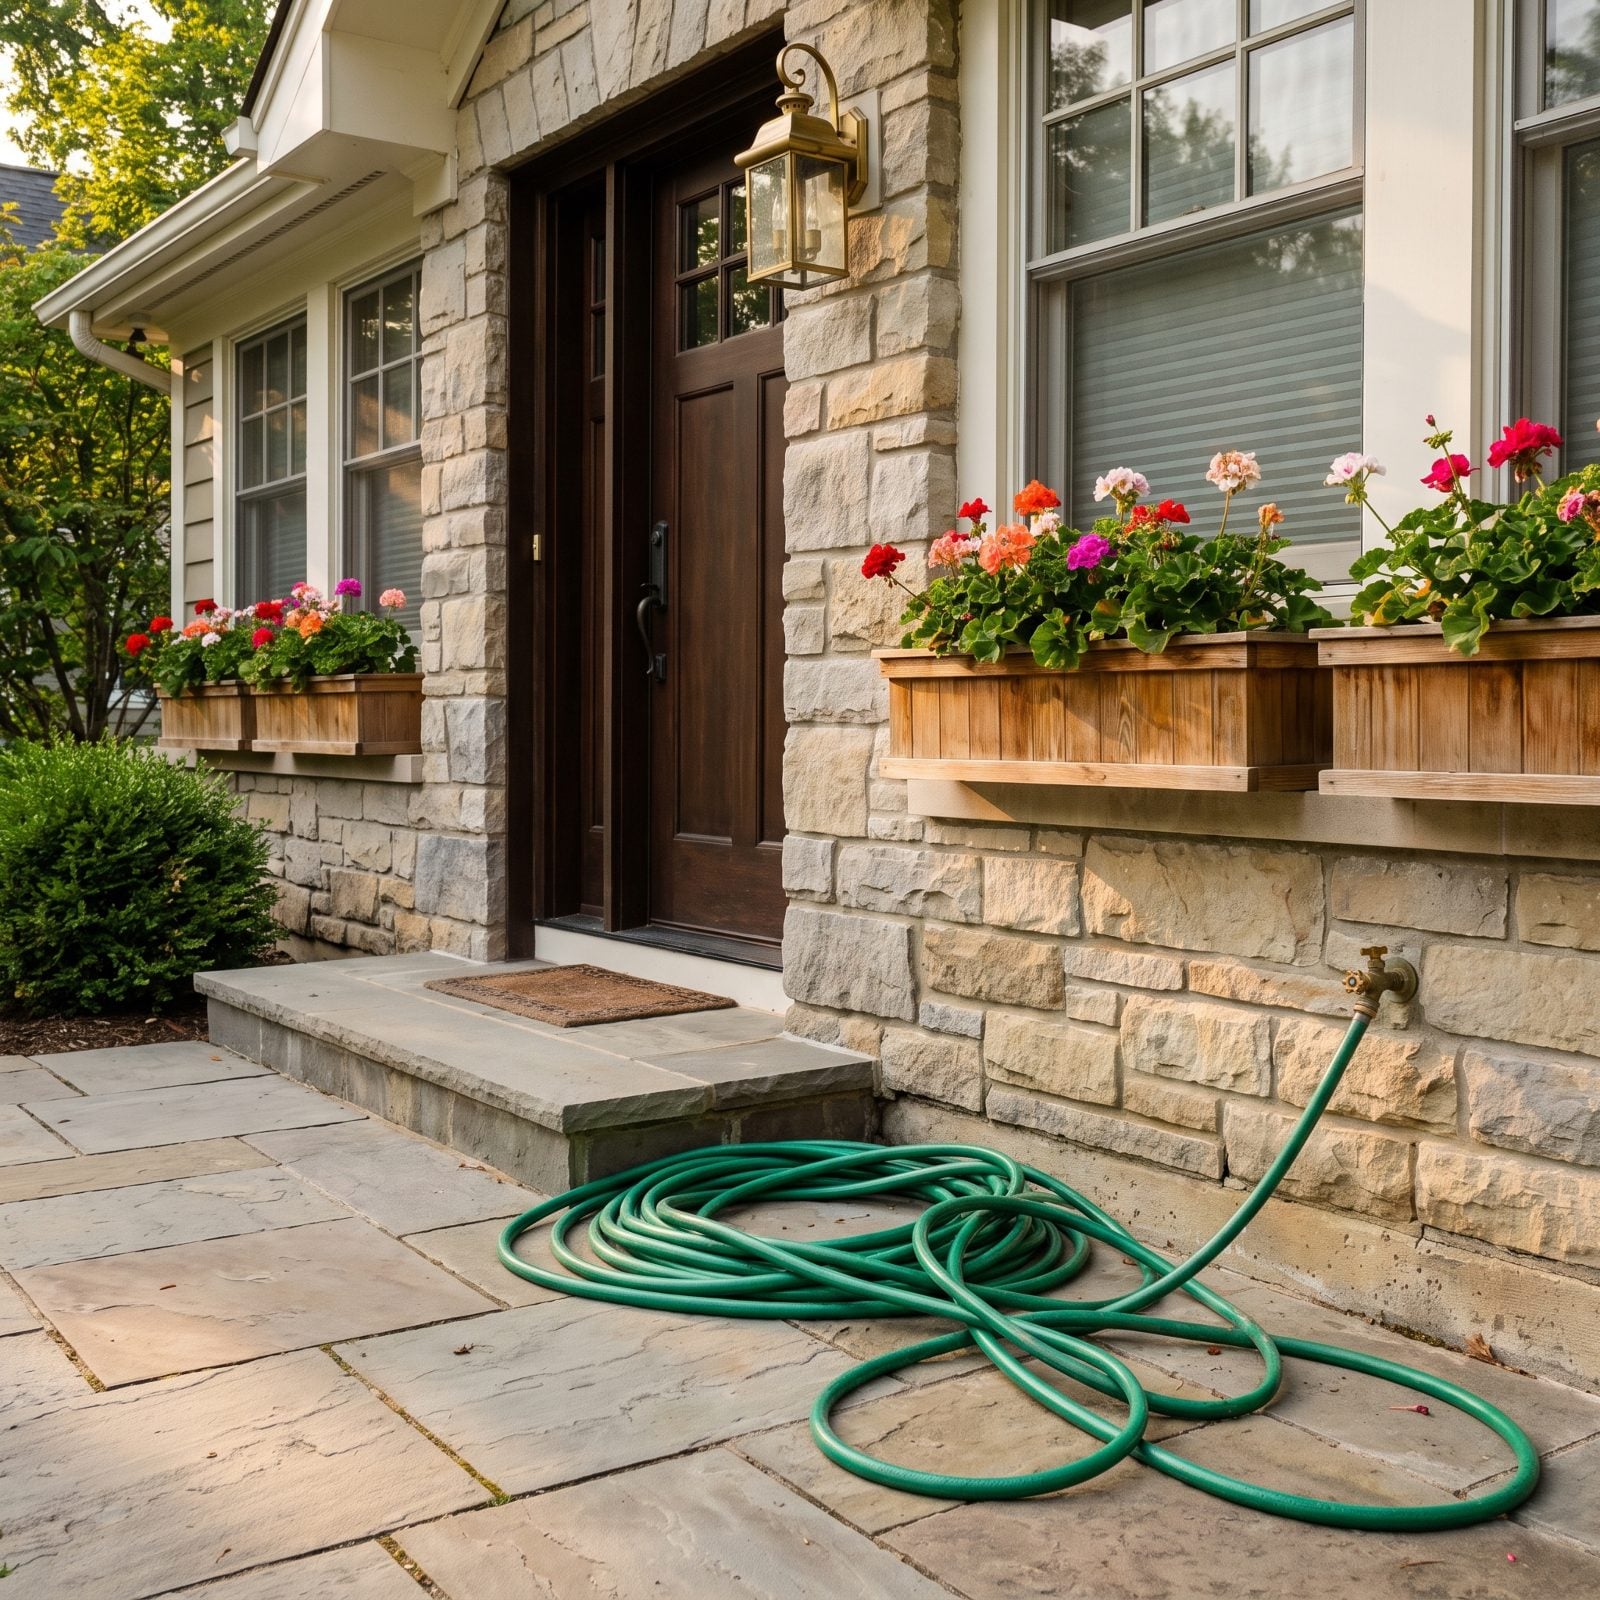
A hose sprawled across the ground by the front steps, half-coiled, trailing back to the spigot like something that slipped loose. Small thing. It also happens to sit exactly where guests arrive, which gives it outsized power to make a tidy home feel careless.
Loose hoses signal that nobody quite finished. Mount a wall reel or a decorative hose pot near the spigot and put the hose away every time you’re done. A copper or galvanized pot by the door looks almost intentional. For a side spigot, a hideaway reel keeps the whole mess out of the entry sightline entirely.
4. Cluttering Flower Beds With Too Many Lawn Ornaments
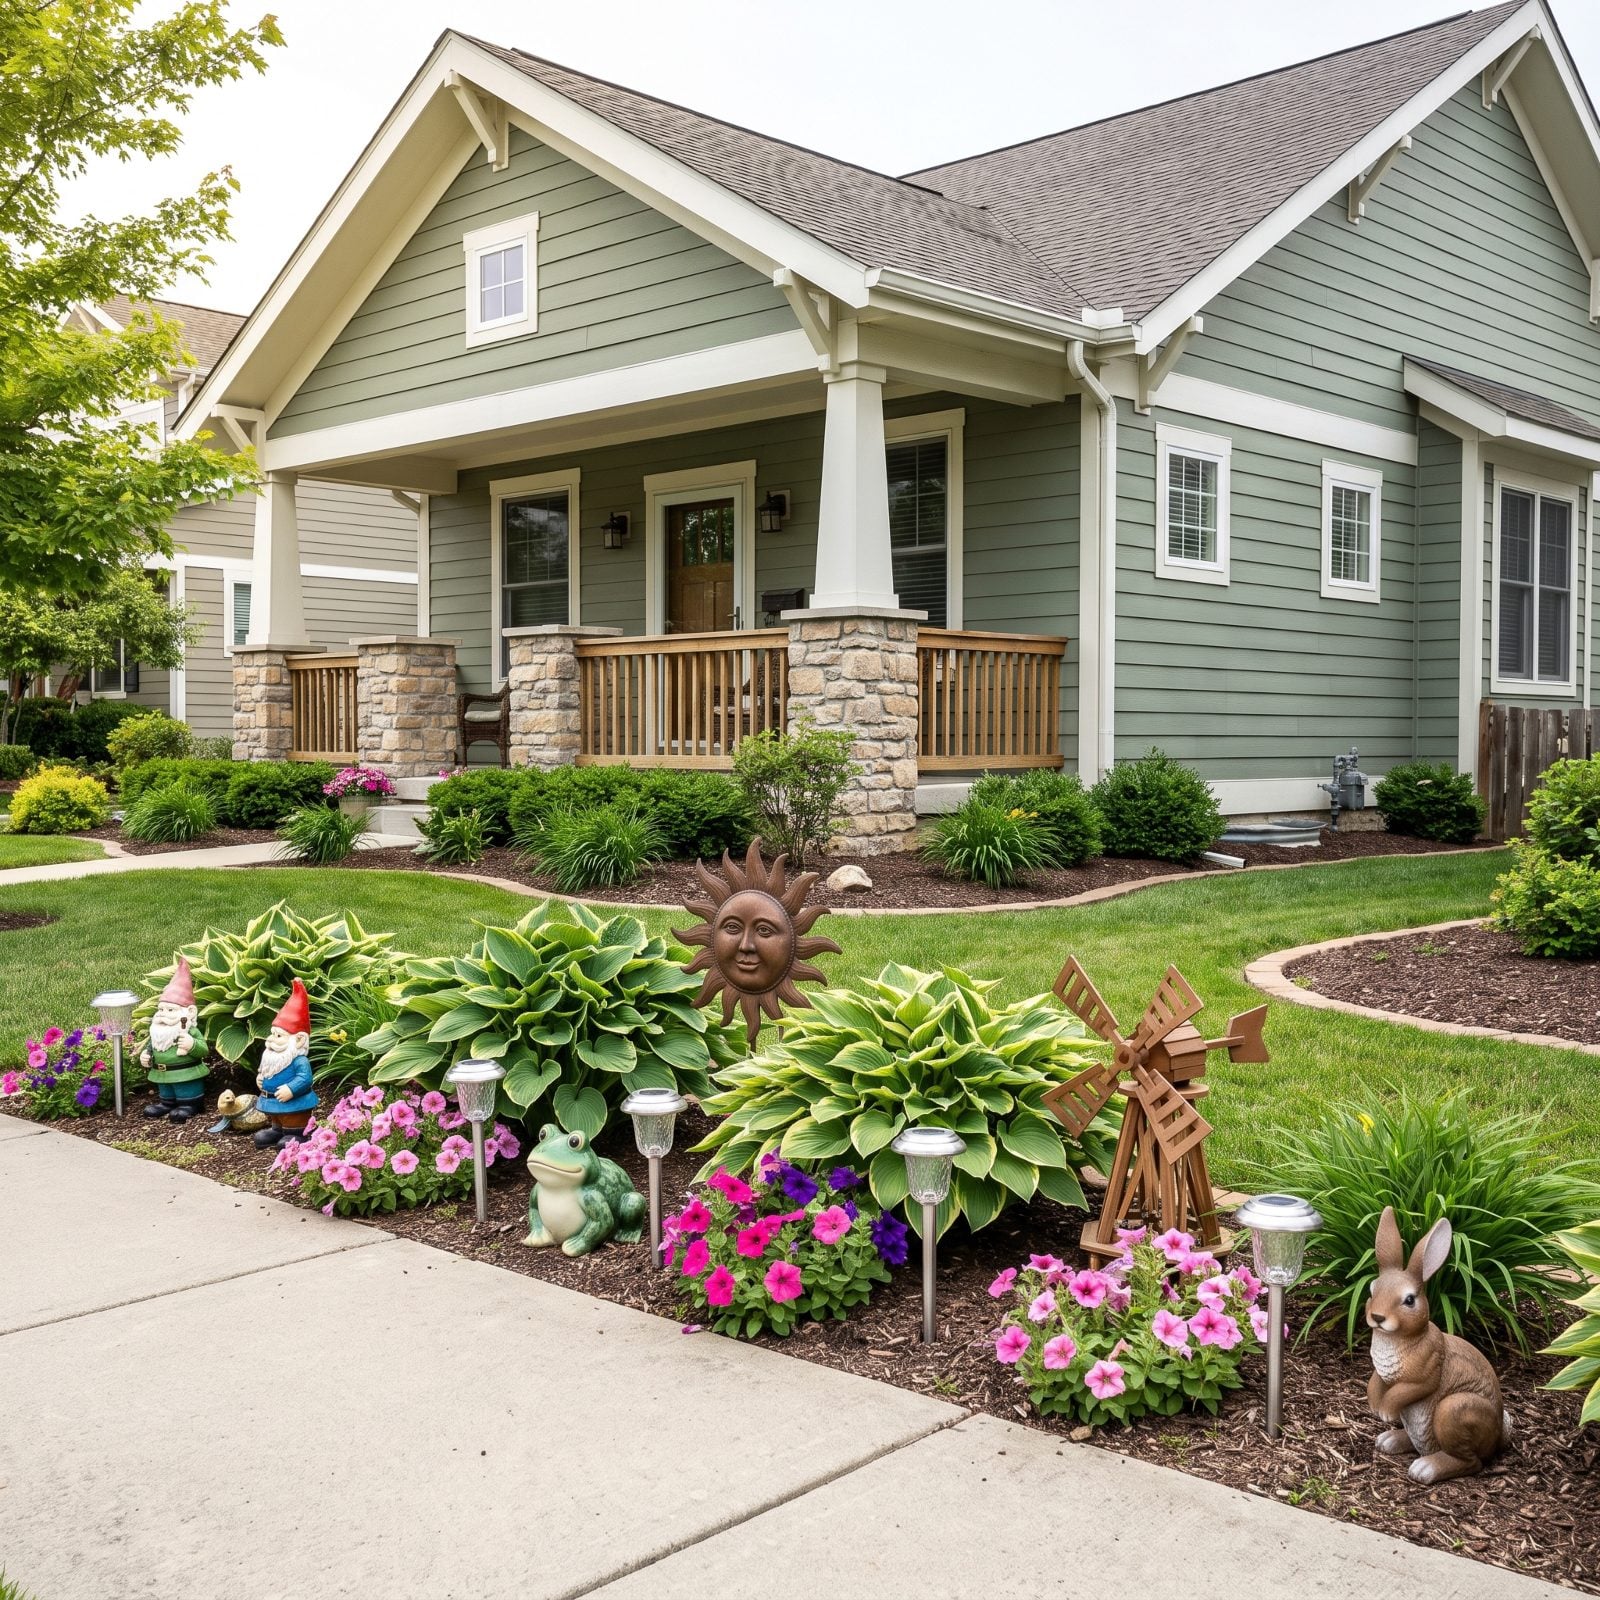
You’ve walked past the yard where every ornament the garden center ever sold found a home. A gnome here, a ceramic frog there, three solar stakes and a little windmill crammed in between. Each one was charming on its own, but together they read as visual noise and your eye never settles.
The trouble is competition. When everything is a focal point, nothing is, and the plants stop being the show to become background for a crowd of trinkets. So pull all but one or two pieces. Pick the thing you actually love, give it room to breathe, and let the sage ceramic planter or the sculptural piece stand alone. Empty space counts as decoration too.
3. Using Pots Too Small for the Entry’s Scale
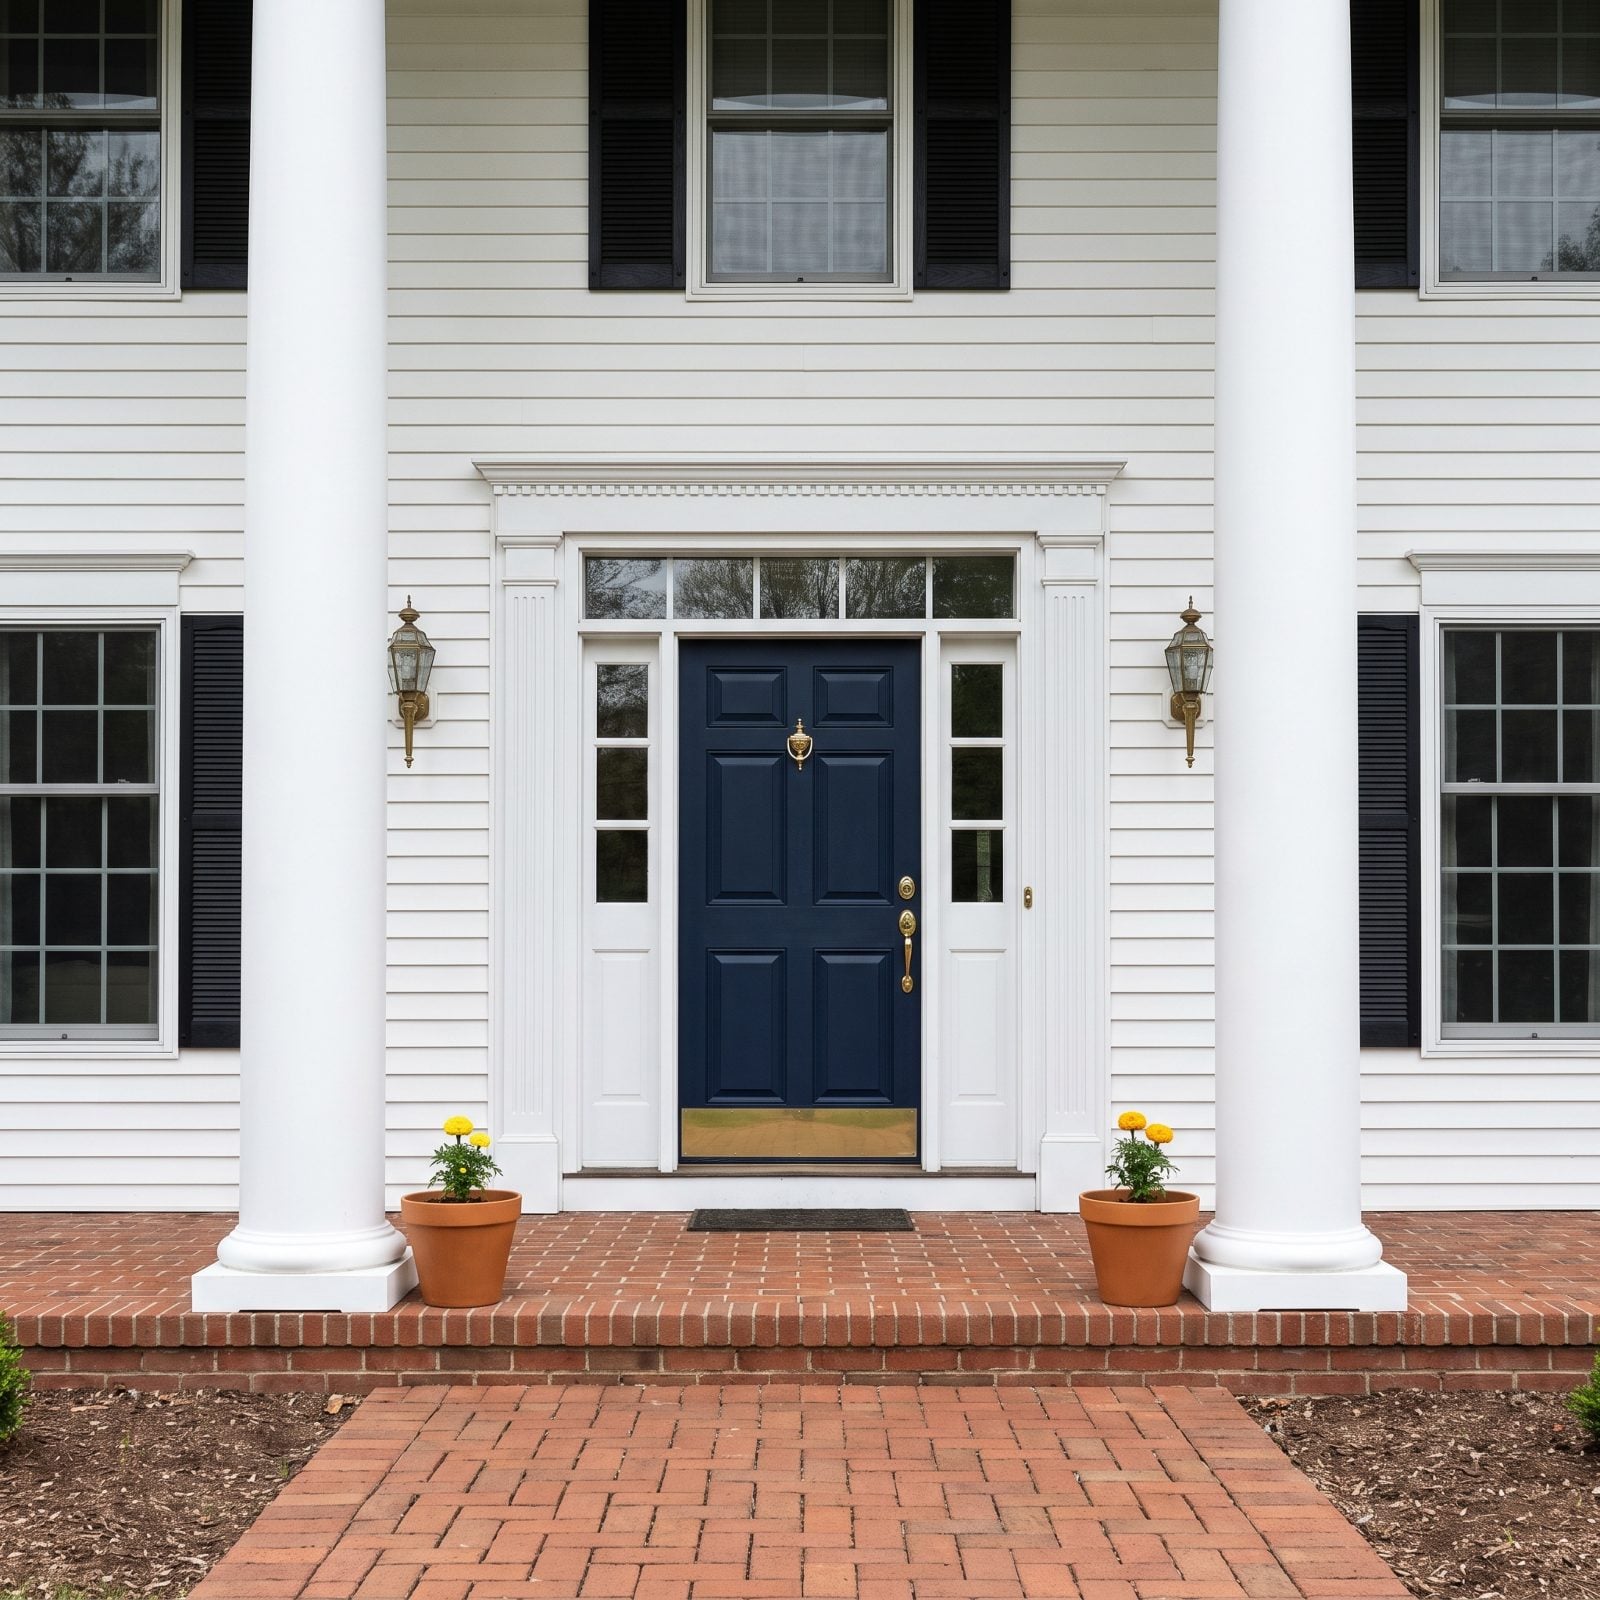
Tiny pots at a big door look like shoes two sizes too small. The entrance has height, width, maybe a pair of columns, and then two ten-inch terracotta pots sit at the base like someone forgot to finish the thought. The scale is off, and your brain clocks it before you can name why.
Big entries need big anchors. For a standard front door, planters in the 18 to 24 inch range hold their own, and a boxwood or fern that reaches toward the handle adds the height you’re missing. A matched pair of large black planters frames the entrance and tells a visitor exactly where to walk. Scale the pot to the opening, not to the plant you grabbed at the register.
2. Letting the Mailbox Lean or Rust
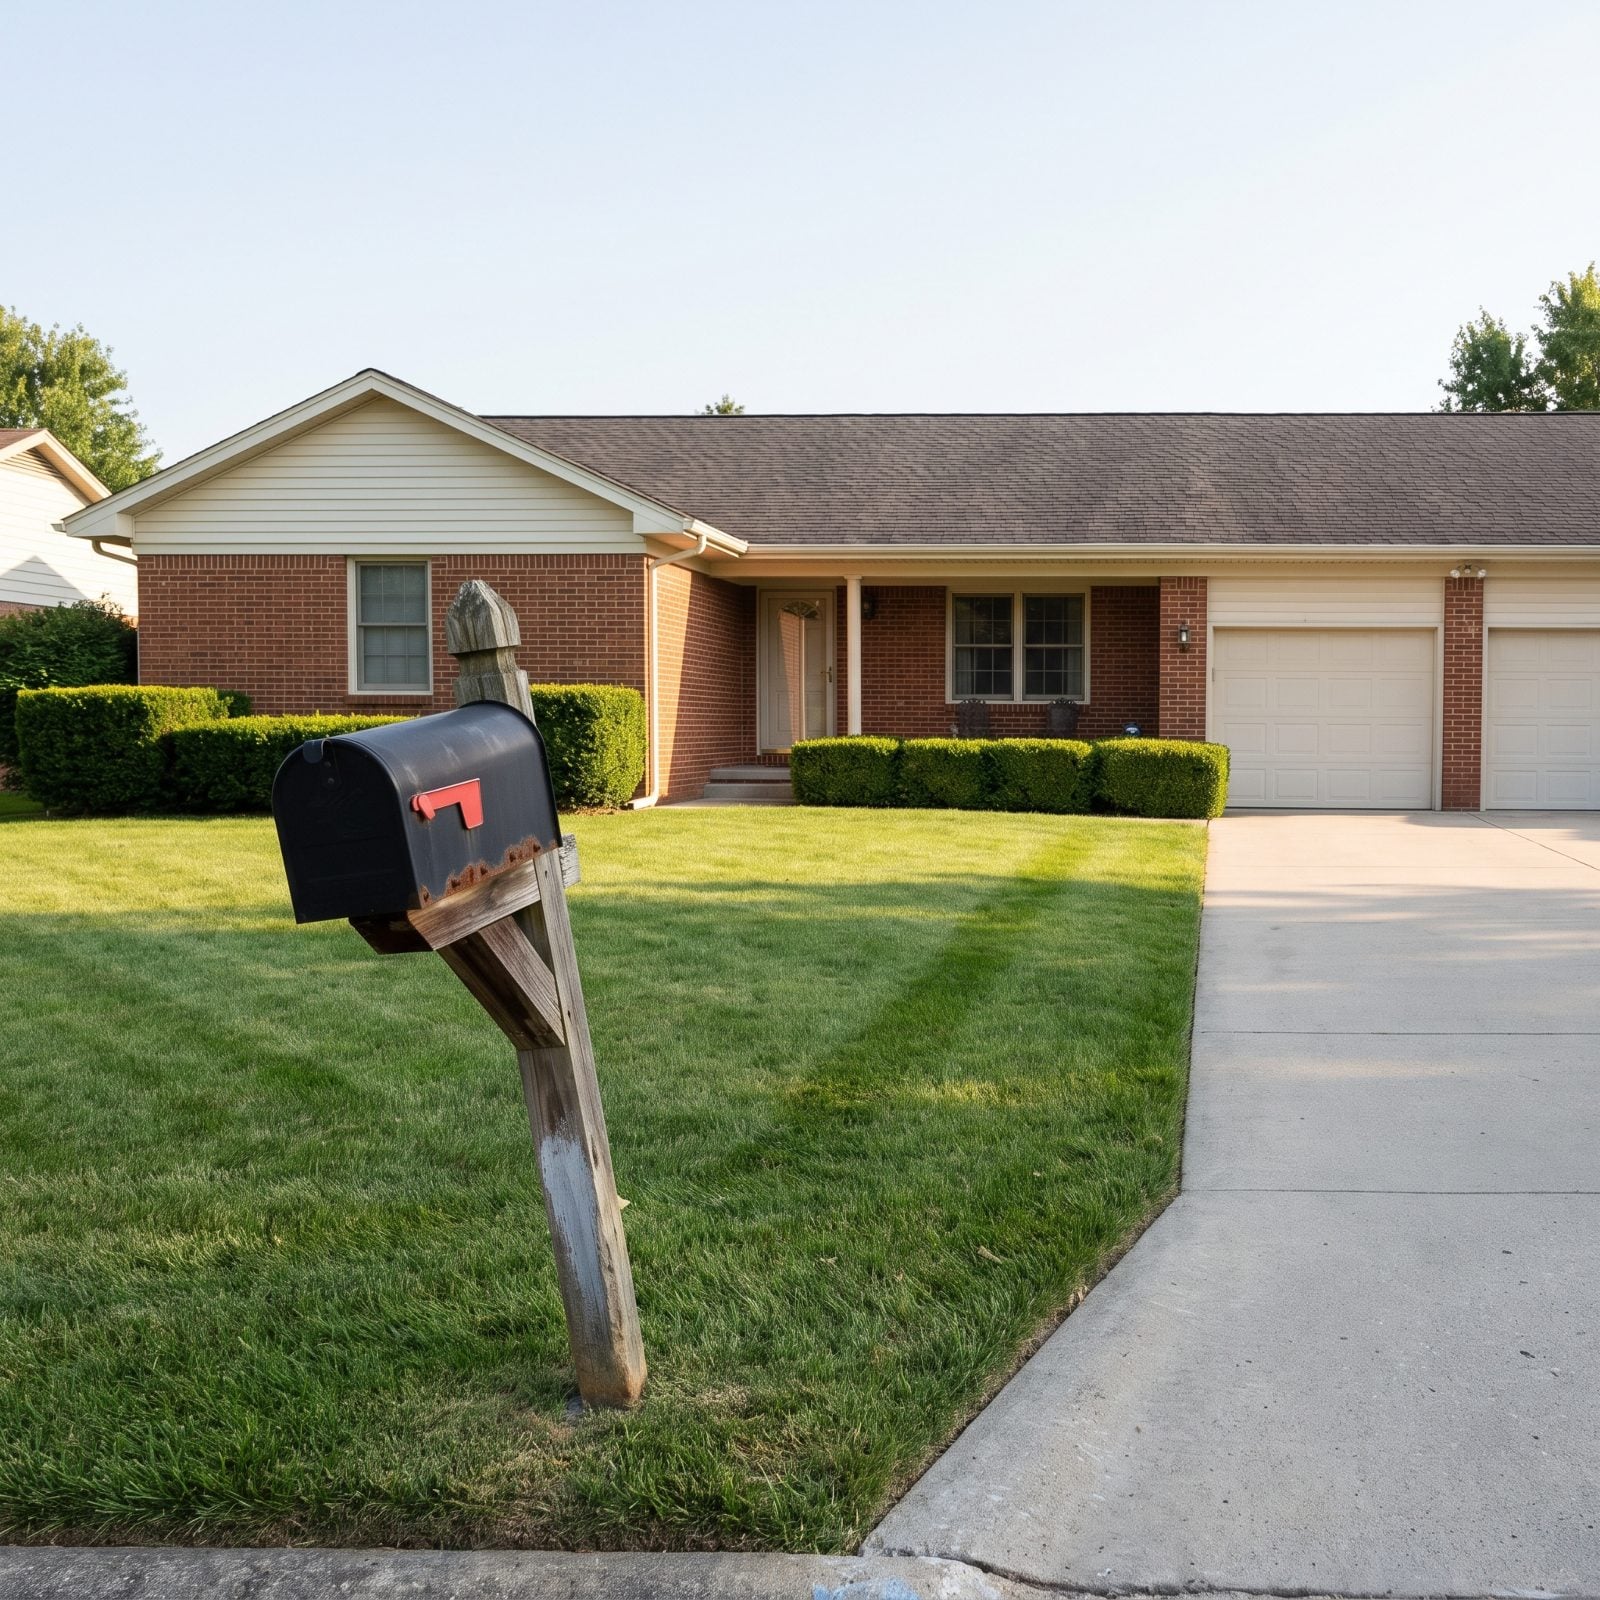
The mailbox is the first thing a visitor sees and the last thing anyone remembers to fix. Everything behind it is sharp — mowed lawn, trimmed shrubs, clean driveway — and then there’s the box at the curb, leaning fifteen degrees, flag spotted with rust, post gone gray and soft at the base.
It undercuts the whole picture. A guest’s eye hits the curb first, and a crooked box quietly tells them nobody’s minding the details. The fix costs an afternoon: reset the post plumb in fresh concrete, swap the box for a matte black one, add a solar cap light so it reads at night. A thirty-dollar mailbox can do more for a street view than a whole weekend of mulching.
1. Leaving a Chain-Link Gate as the Main Focal Point
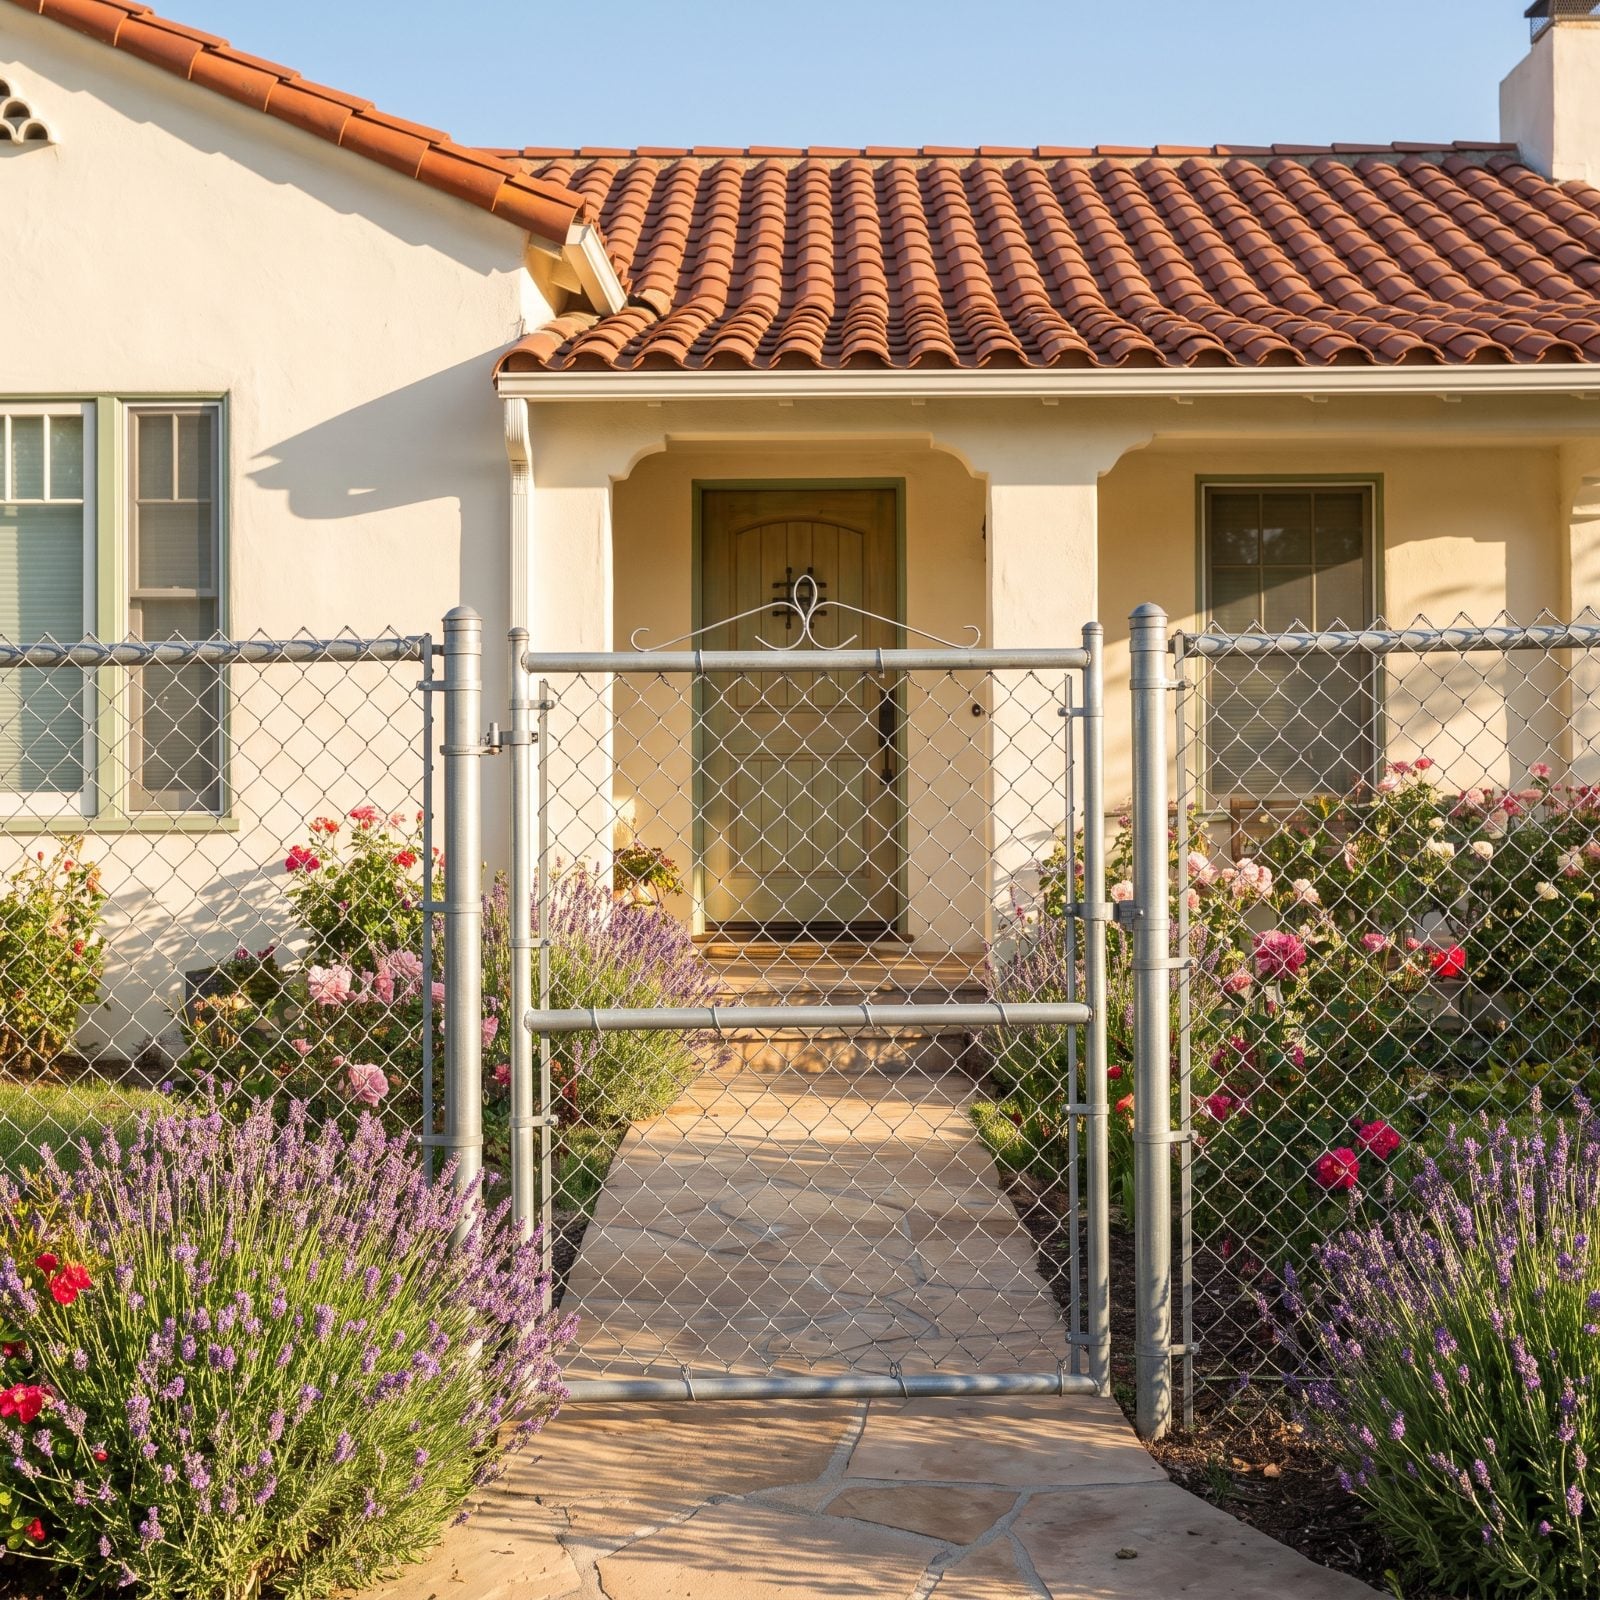
Chain-link has one job: keep the dog in. Nobody designed it to be the thing you frame a front door through, yet there it stands, dead center on the walkway, galvanized and gray, the first thing every visitor meets before they ever reach the bungalow behind it.
So the gate becomes the headline when it should be a footnote. Industrial mesh against lavender and roses reads as unfinished, and it pulls the welcome straight out of the entrance. You don’t always have to tear it out, though. Swap the chain-link for a wood or black steel gate, run a climbing rose or clematis up the posts, or just brush a coat of matte black paint on the frame to soften it enough for the garden to take the lead again. Make the gate disappear and the house gets to speak.