
A fresh evergreen wreath does something a store-bought one never quite manages. It smells like a walk through the woods every time the door opens, it looks fuller and more natural, and it costs a fraction of what a designer version runs at a garden center. Better still, it takes about an afternoon, and most of the work is repetitive and oddly relaxing once you find your rhythm.
The method below is the classic florist’s approach: small bundles of greenery wired one after another onto a metal frame, each one tucked over the stems of the last. It works with almost any greenery you can get your hands on, from grocery-store fir bundles to clippings from your own yard. We walk through every step in detail, and there’s a printable at-a-glance version of the whole tutorial at the bottom of the page.
In order to come up with the very specific design ideas, we create most designs with the assistance of state-of-the-art AI interior design software. Also, assume links that take you off the site are affiliate links such as links to Amazon. this means we may earn a commission if you buy something.
Before You Start: Choosing Your Greenery
The greenery you pick decides how good the wreath looks and how long it lasts. A mix of two or three types gives the richest texture, but it’s worth building around one sturdy base green.
- Fir (Fraser, noble or balsam) makes the best base. The needles are soft, they hold on for weeks, and balsam has the classic Christmas scent.
- Cedar adds flat, lacy, drapey texture and smells wonderful, though it dries a little faster than fir.
- White pine brings long, soft needles that make a wreath look full and wild.
- Boxwood, juniper, eucalyptus and holly are all good accent greens in small amounts.
- Spruce is fine outdoors in the cold but drops needles quickly in a warm house, so skip it for an indoor wreath.
Tree lots often give away trimmed branches for free or sell bundles cheaply. If you’re cutting from your own yard, cut in the morning when the branches are full of moisture. Either way, soak the greens in a tub of cool water overnight before you start. Well-hydrated greens stay fresh noticeably longer.
What Our Readers Say
- Asked about front doors, just over half of Home Stratosphere readers picked a bold colour, with wood and black each well behind, so plenty of wreaths end up hanging against a statement shade.
From Home Stratosphere reader polls and votes.
Step 1: Gather Your Supplies
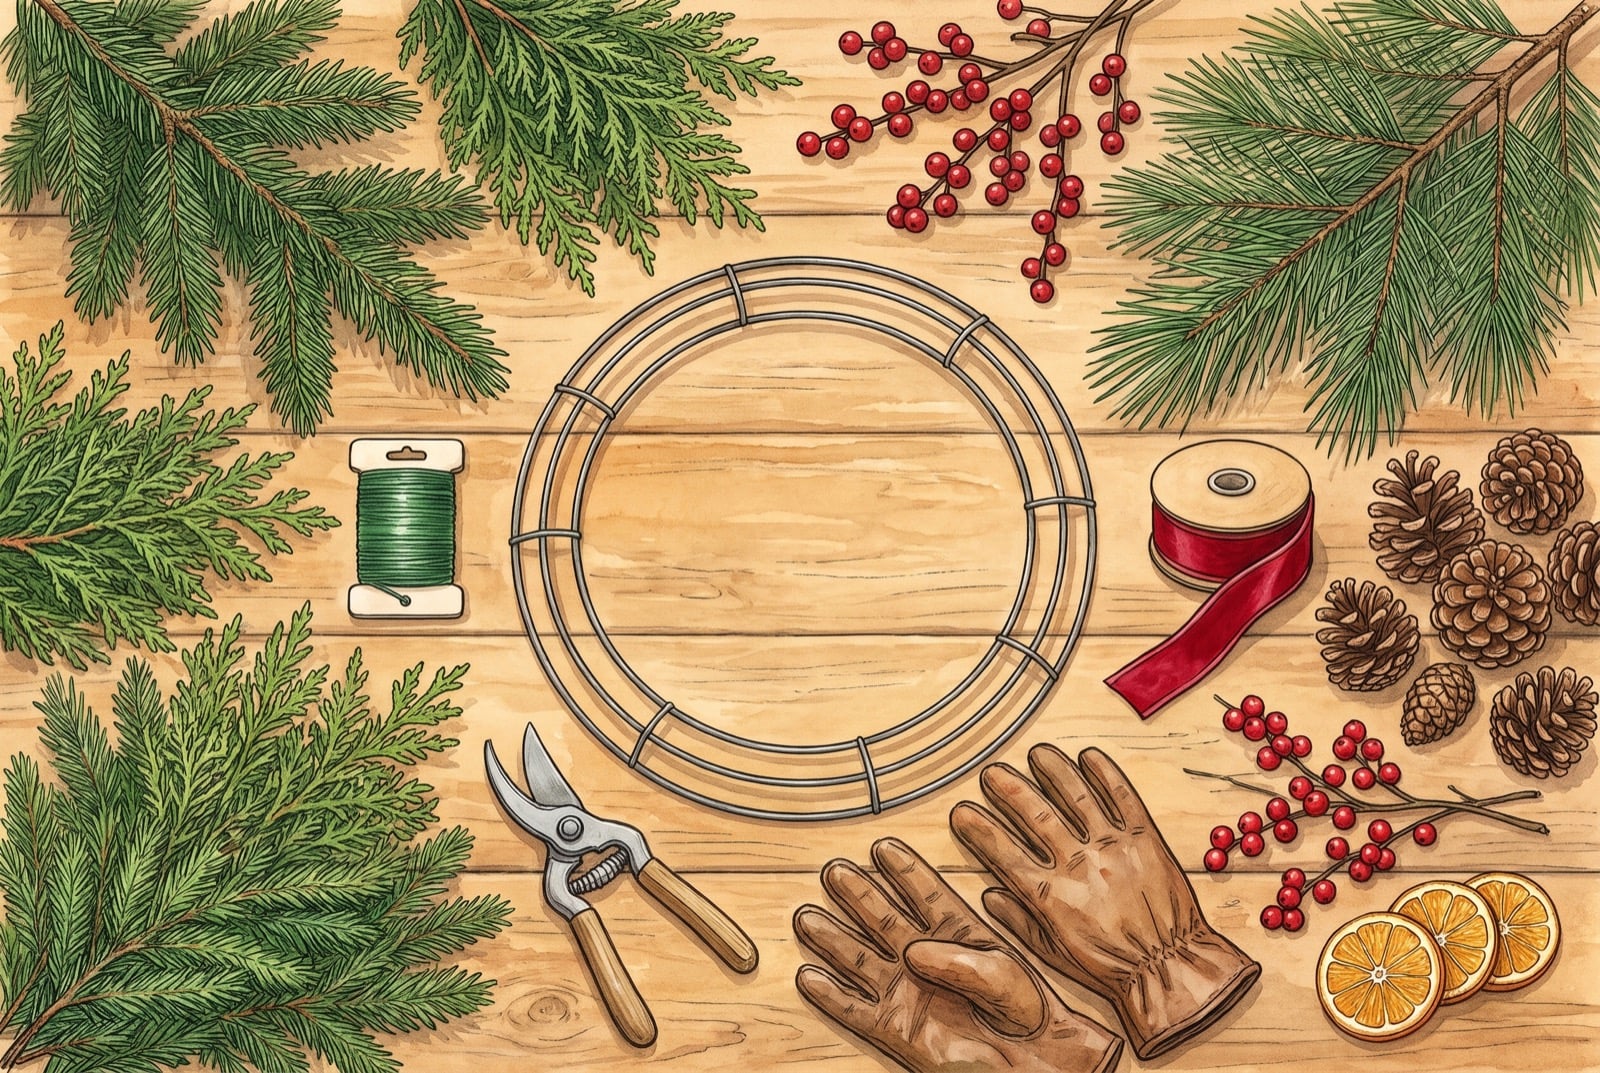
Having everything laid out before you start makes a big difference, because once you begin wiring you won’t want to set the frame down. Cover your work surface with an old sheet or a drop cloth, since fresh greens leave sap and needles everywhere.
- A 14-inch double-ring wire wreath frame. The frame is the skeleton of the wreath. A 14-inch frame finishes at roughly 22 to 24 inches across once the greenery is on, which suits a standard front door.
- Fresh greenery. Plan on two generous armloads of branches, enough for 25 to 30 small bundles.
- Green paddle wire or floral wire (22 to 24 gauge). Paddle wire comes wound on a flat spool, so you can keep wrapping without cutting.
- Sharp pruning shears. Clean cuts keep the stems tidy and easier to bundle.
- Gardening gloves. Sap is sticky and some greens are prickly.
- Wired ribbon, about 3 yards of 2.5-inch velvet or plaid for a full bow.
- Accents: pinecones, faux or real berries, dried orange slices, and wired wood floral picks to attach them.
- Optional: a low-temperature glue gun for dried accents and a wreath hanger for the door.
Step 2: Cut the Greenery into Short Pieces
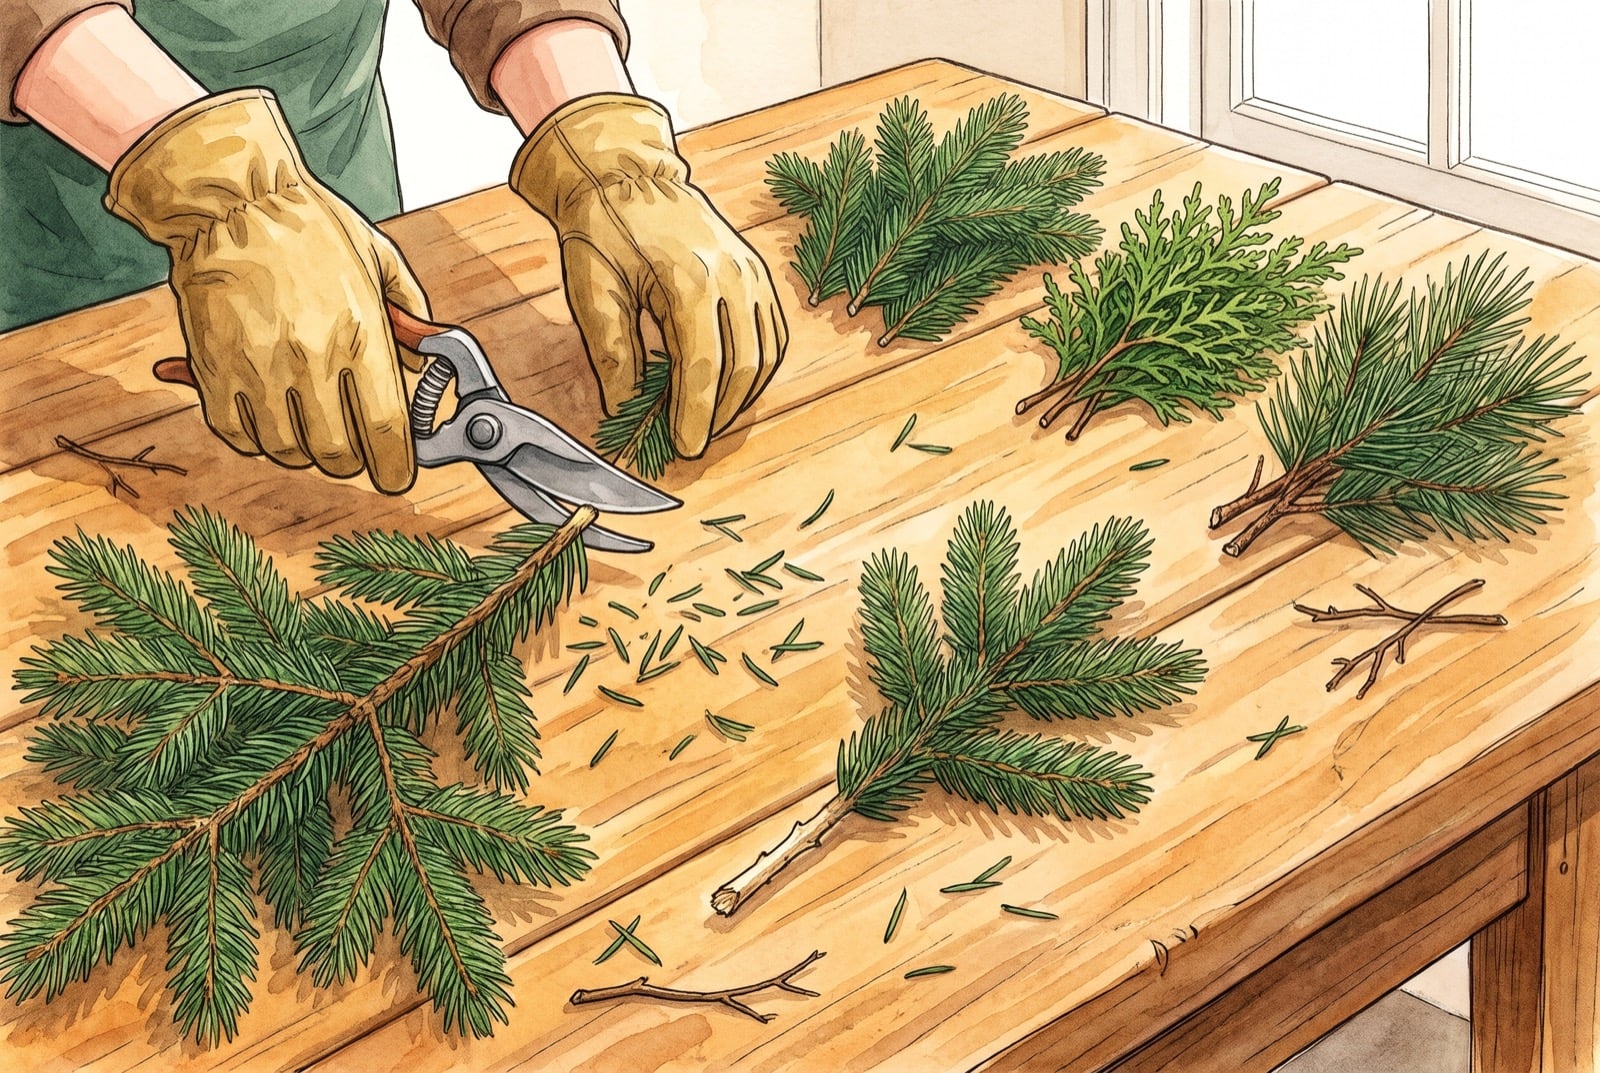
Working with gloves on, cut the branches into pieces about 6 to 8 inches long. Short pieces are the secret to a full, round wreath. Long branches stick out unevenly and make the wreath look shaggy and lopsided.
Cut each piece so it has a bare stem of an inch or two at the bottom, stripping off any needles in that section with your fingers. That bare stem is where the wire will go, and needles caught under the wire make bundles slip. Sort the pieces into piles by type as you go. It makes building balanced bundles much faster in the next step.
Tip: Save the fluffiest, best-shaped tips for the top layer. Fuller, flatter pieces work well as the base of each bundle.
Step 3: Make Mini Bundles
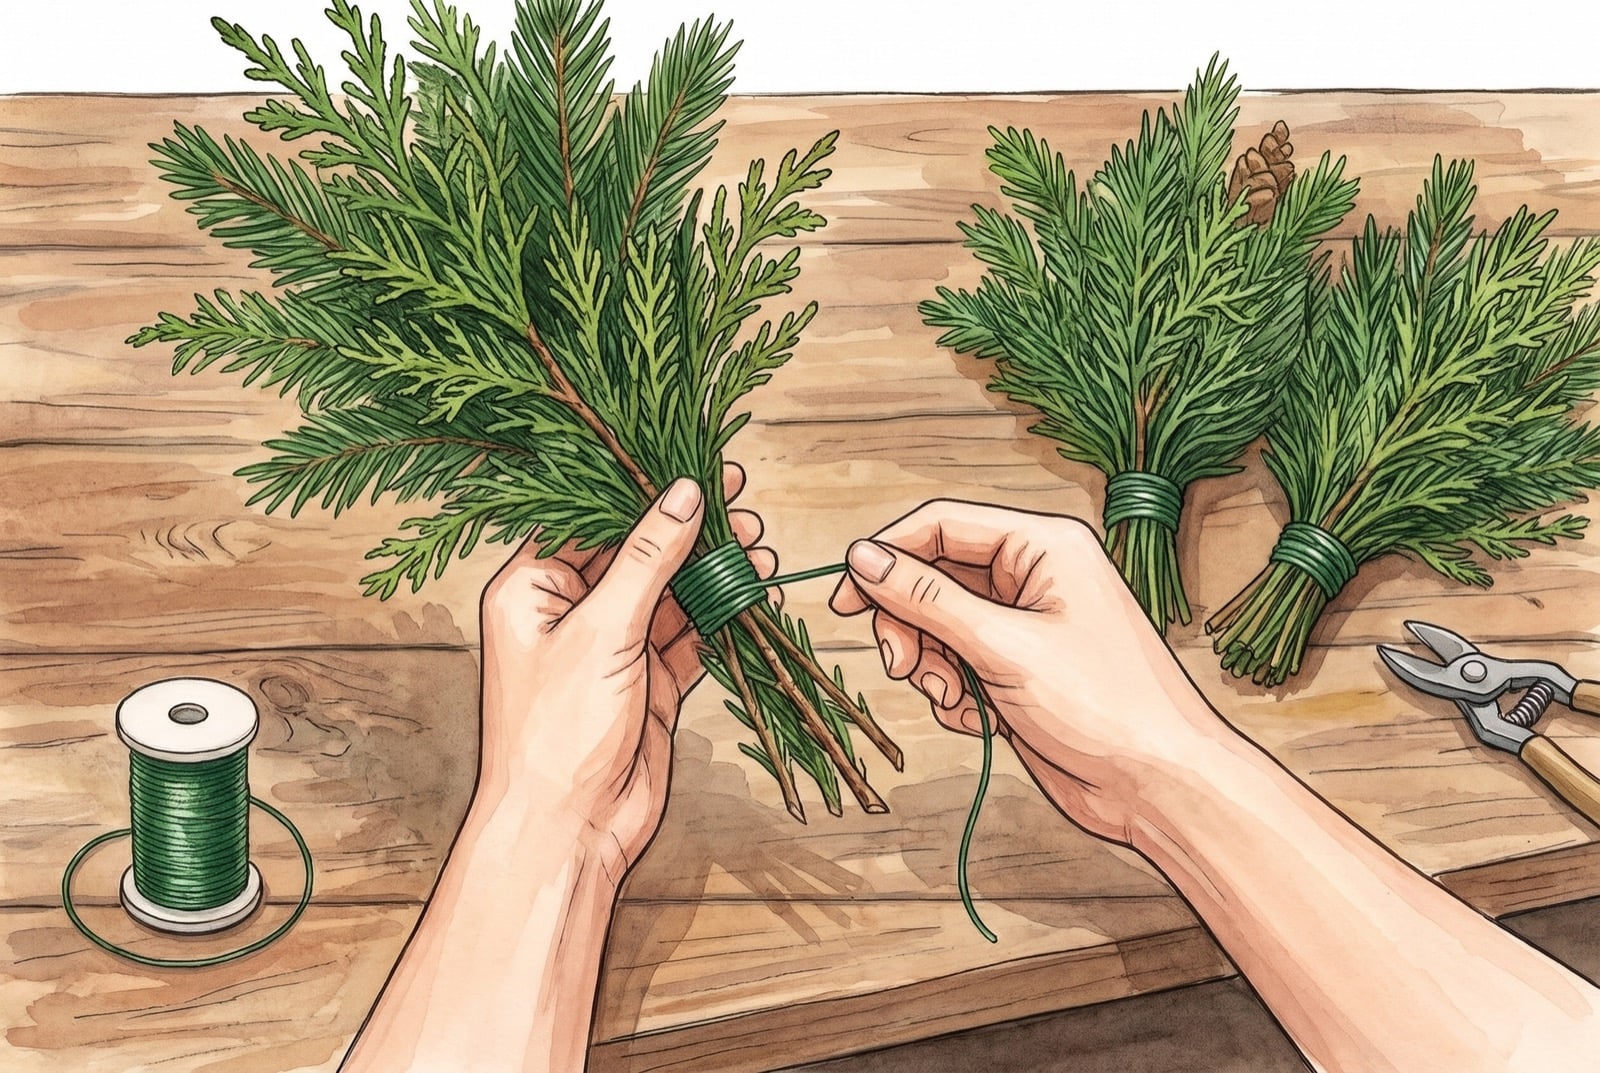
Building bundles first, instead of attaching single branches to the frame, is what gives a handmade wreath that lush, professional look. Take three or four pieces and fan them out slightly in your hand, with the fullest, flattest piece at the back and the most attractive one on top. If you’re mixing greens, put the base green at the back and layer a piece of cedar or pine in front of it.
Line up the bare stems at the bottom and wrap a short length of floral wire tightly around them two or three times. Make all the bundles before you start attaching them. It keeps the size consistent from one to the next, which is what makes the finished wreath look even all the way around. You’ll need 25 to 30 for a 14-inch frame.
Step 4: Attach the First Bundle
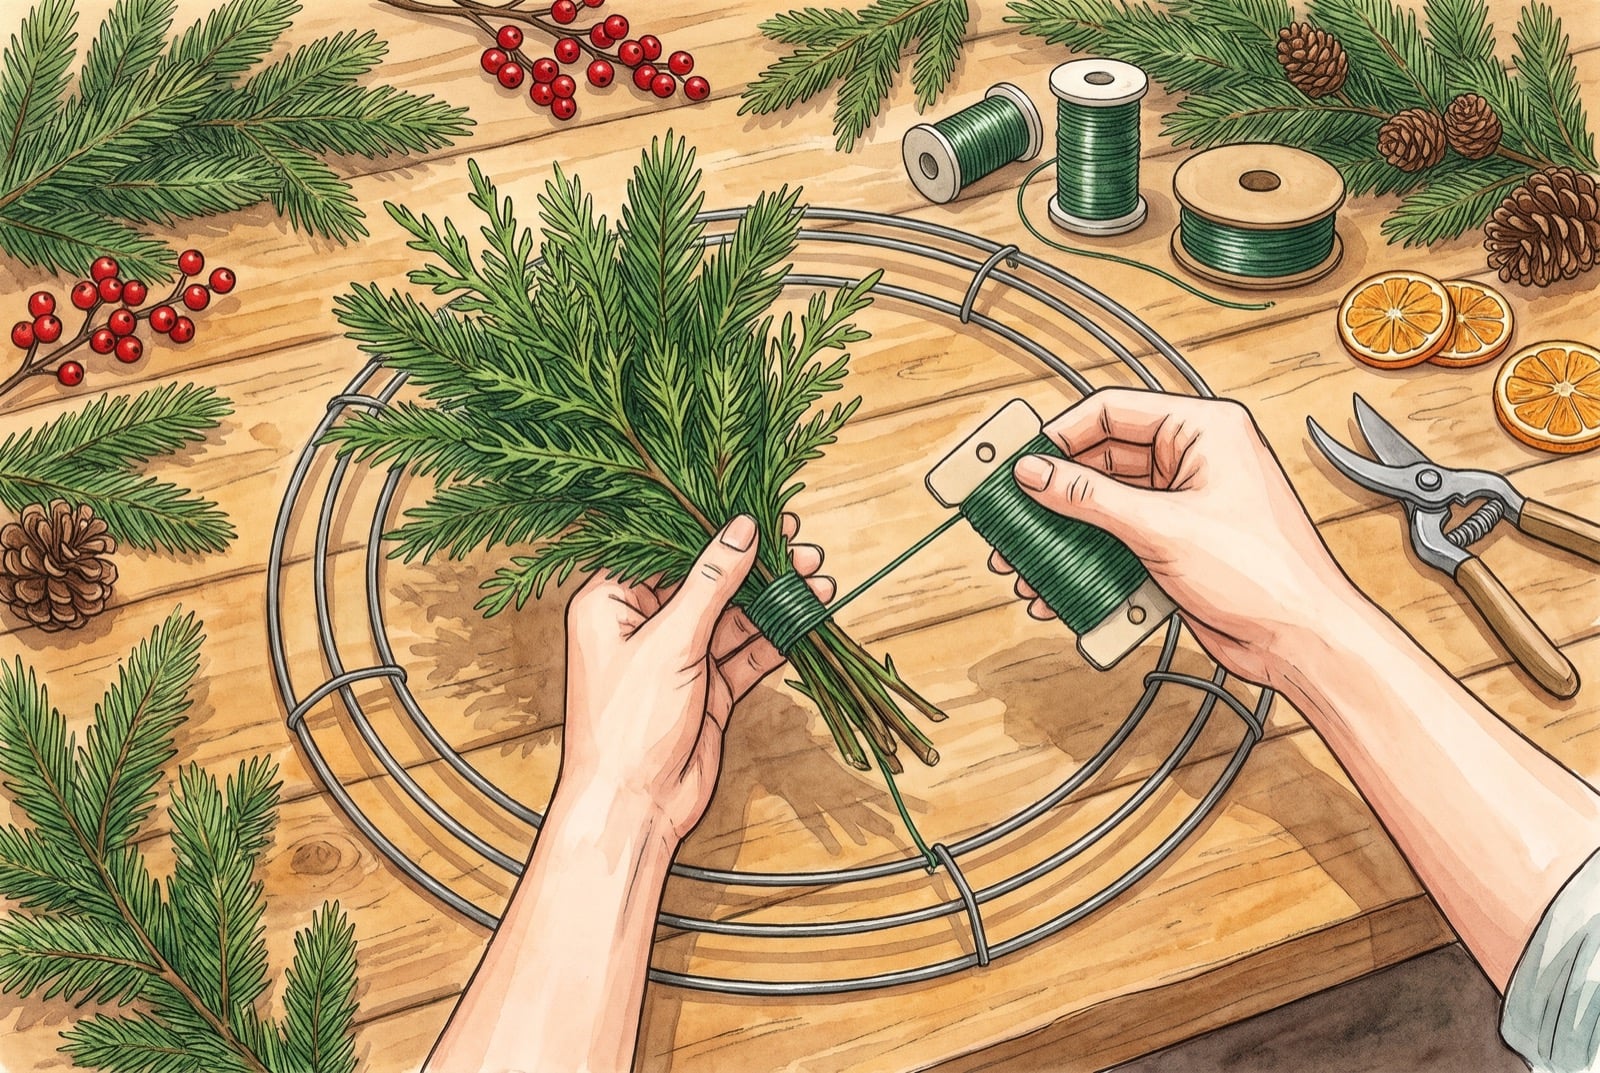
Twist the loose end of the paddle wire securely around one of the frame’s rings to anchor it. Don’t cut the wire from the spool. You’ll keep working from the same continuous wire all the way around the wreath.
Lay the first bundle on the frame with its stems pointing in the direction you’ll be working, which is clockwise for most people. Wrap the wire tightly over the stems and around the frame three times, right at the point where the bundle is tied. Pull firmly on each wrap. The bundle shouldn’t wiggle or spin when you nudge it. A loose first bundle means a loose wreath.
Step 5: Overlap and Repeat
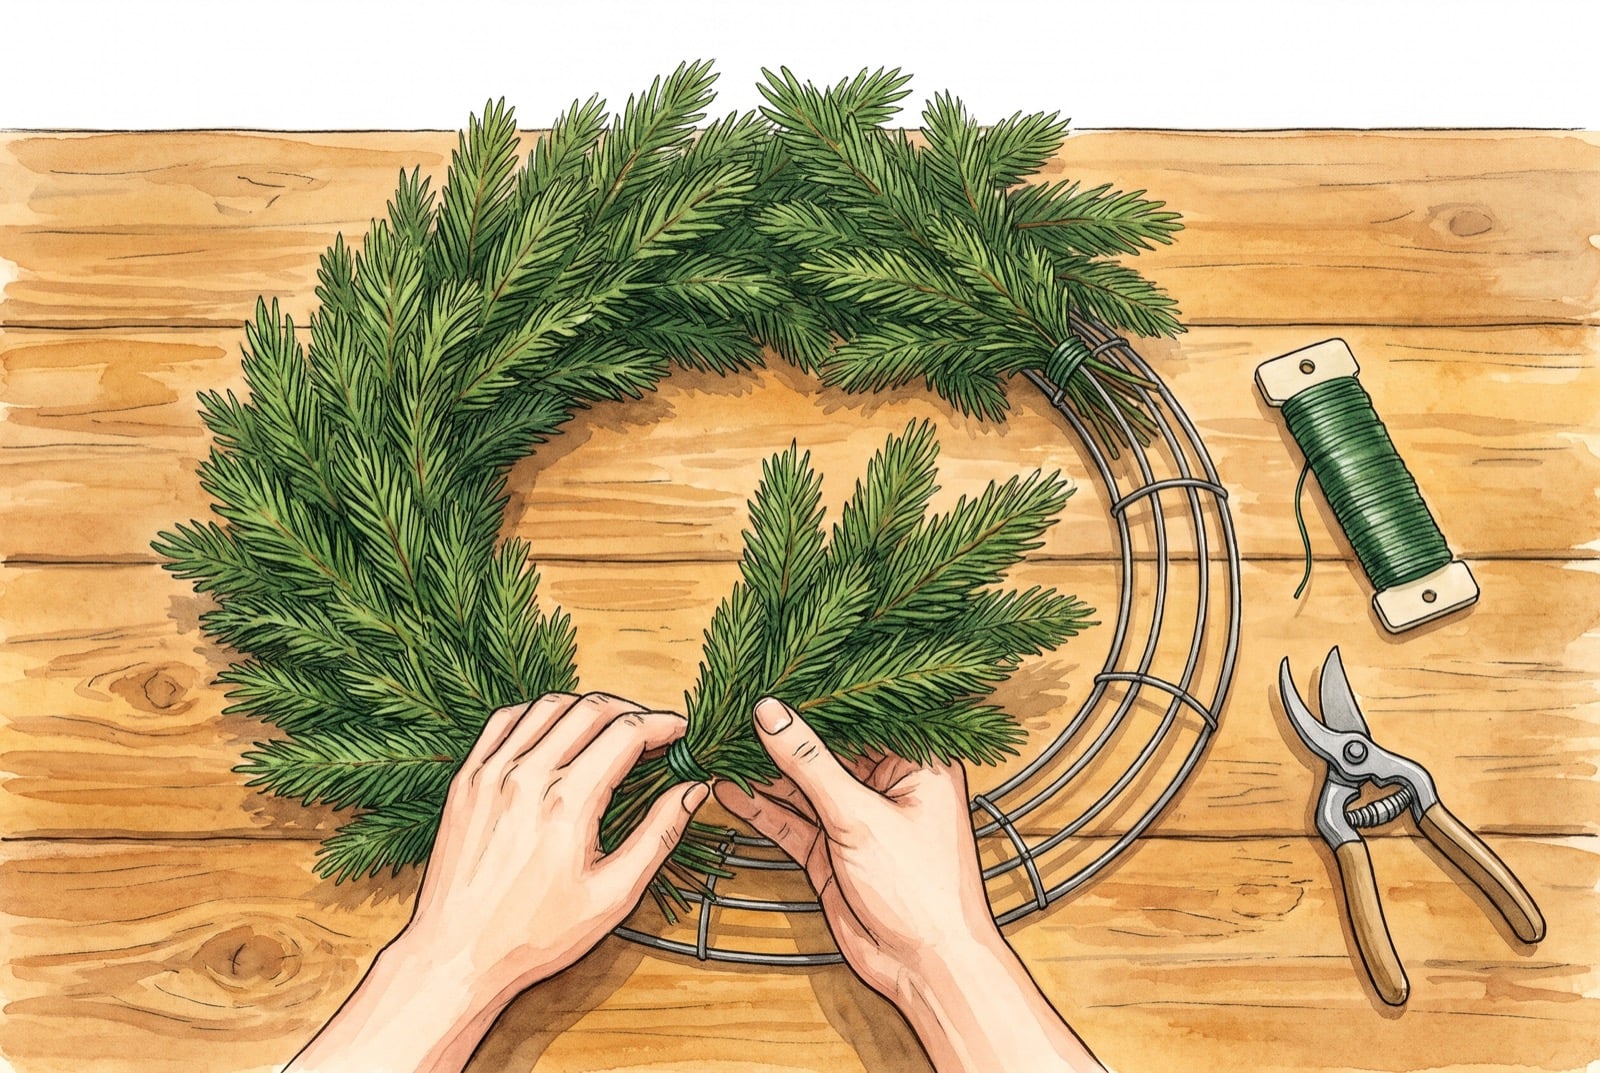
Place the next bundle so its greenery covers the stems and wire of the first, overlapping about two thirds of the previous bundle. Wrap the wire tightly three times around the new stems and the frame, then repeat, working steadily clockwise around the ring.
To get a round, full shape rather than a flat one, vary the angle slightly as you go. Point one bundle a little toward the outer edge of the frame, the next a little toward the inner edge, then one straight down the middle. Turn the frame now and then and check it from a distance. If one area looks thin, tighten up the spacing of the next few bundles to fill it out.
Tip: Keep the bundles packed close together. Gaps are much harder to fix after the wreath is finished than they are to prevent now.
Step 6: Close the Circle
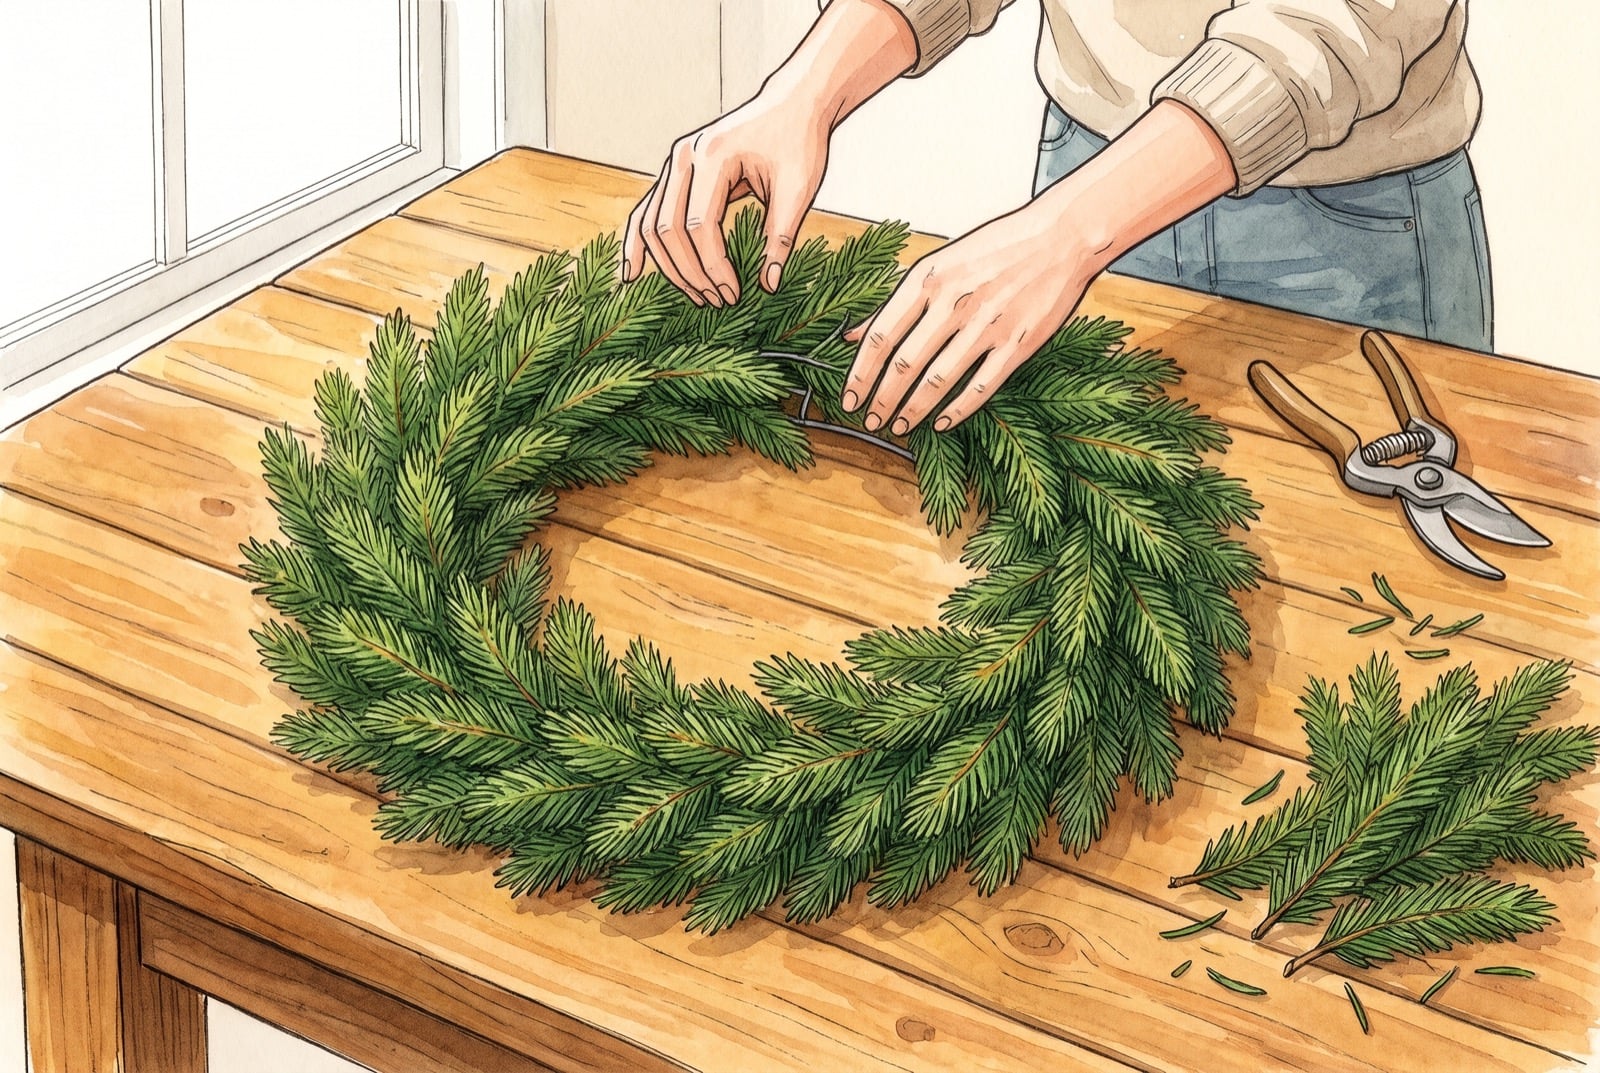
The final bundle is the trickiest, because it has to meet the very first one without leaving a visible seam. Gently lift the tips of the first bundle with one hand, slide the stems of the last bundle underneath them, and wire it down. The first bundle’s greenery then falls back over the last one’s stems and hides the join completely.
Cut the paddle wire, leaving a 6-inch tail. Wrap the tail around the frame on the back of the wreath and twist it into a small loop, which gives you a sturdy built-in hanger. Finally, hold the wreath up and trim any stray pieces sticking out of the outline with your shears. Fluff and adjust until the shape looks even.
Step 7: Add Accents
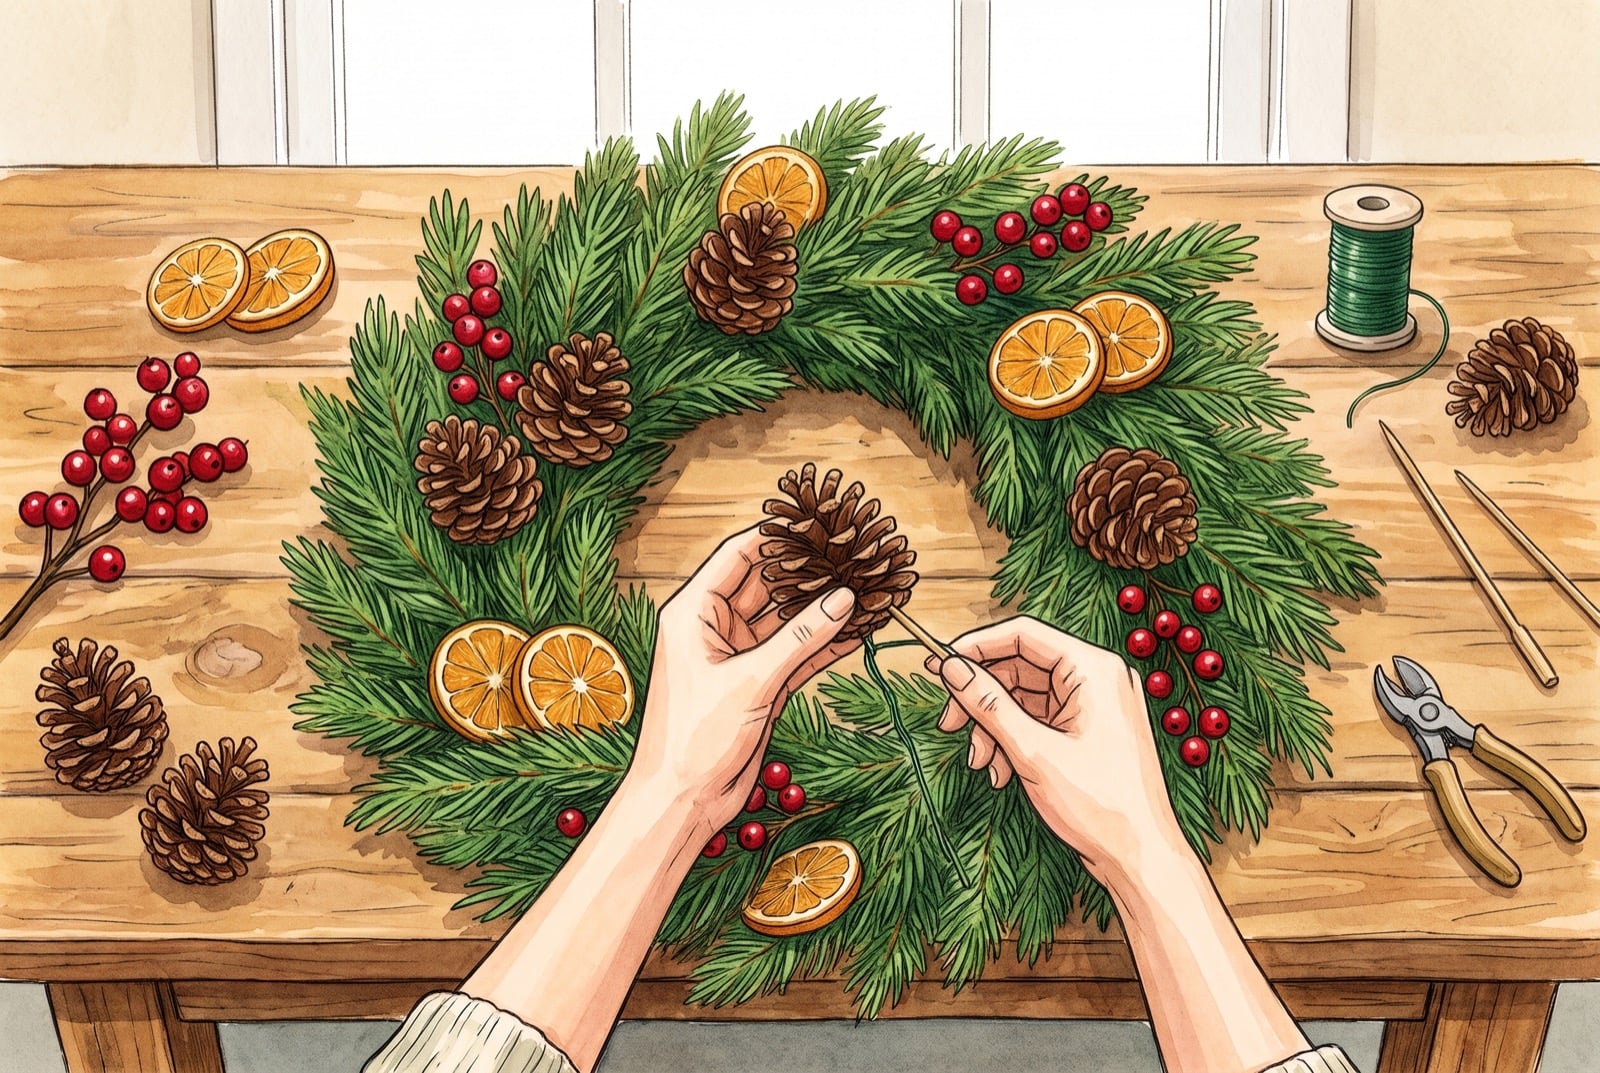
This is where the wreath gets its personality. To attach a pinecone, wrap the wire from a wood floral pick around the bottom row of scales, then push the pick deep into the greenery and twist the wire around the frame. Berry stems can be tucked straight in and wired at the base. Dried orange slices attach easily with a dab of hot glue or a short wire threaded through the slice.
The trick to a polished result is grouping. Instead of dotting accents evenly around the whole ring, cluster them in groups of three, and arrange the clusters in a loose triangle around the wreath. Leaving some greenery bare lets the accents stand out and keeps the wreath looking natural rather than crowded.
Tip: To dry your own oranges, slice them a quarter-inch thick, pat them dry, and bake on a rack at 200°F for three to four hours, turning once an hour. They’ll keep their color for the whole season.
Natural brown touches like pinecones have a good track record with our readers: entryway images with brown accents got hearts 52% of the time, compared with 43% for other images in the same articles.
Step 8: Tie the Bow and Hang
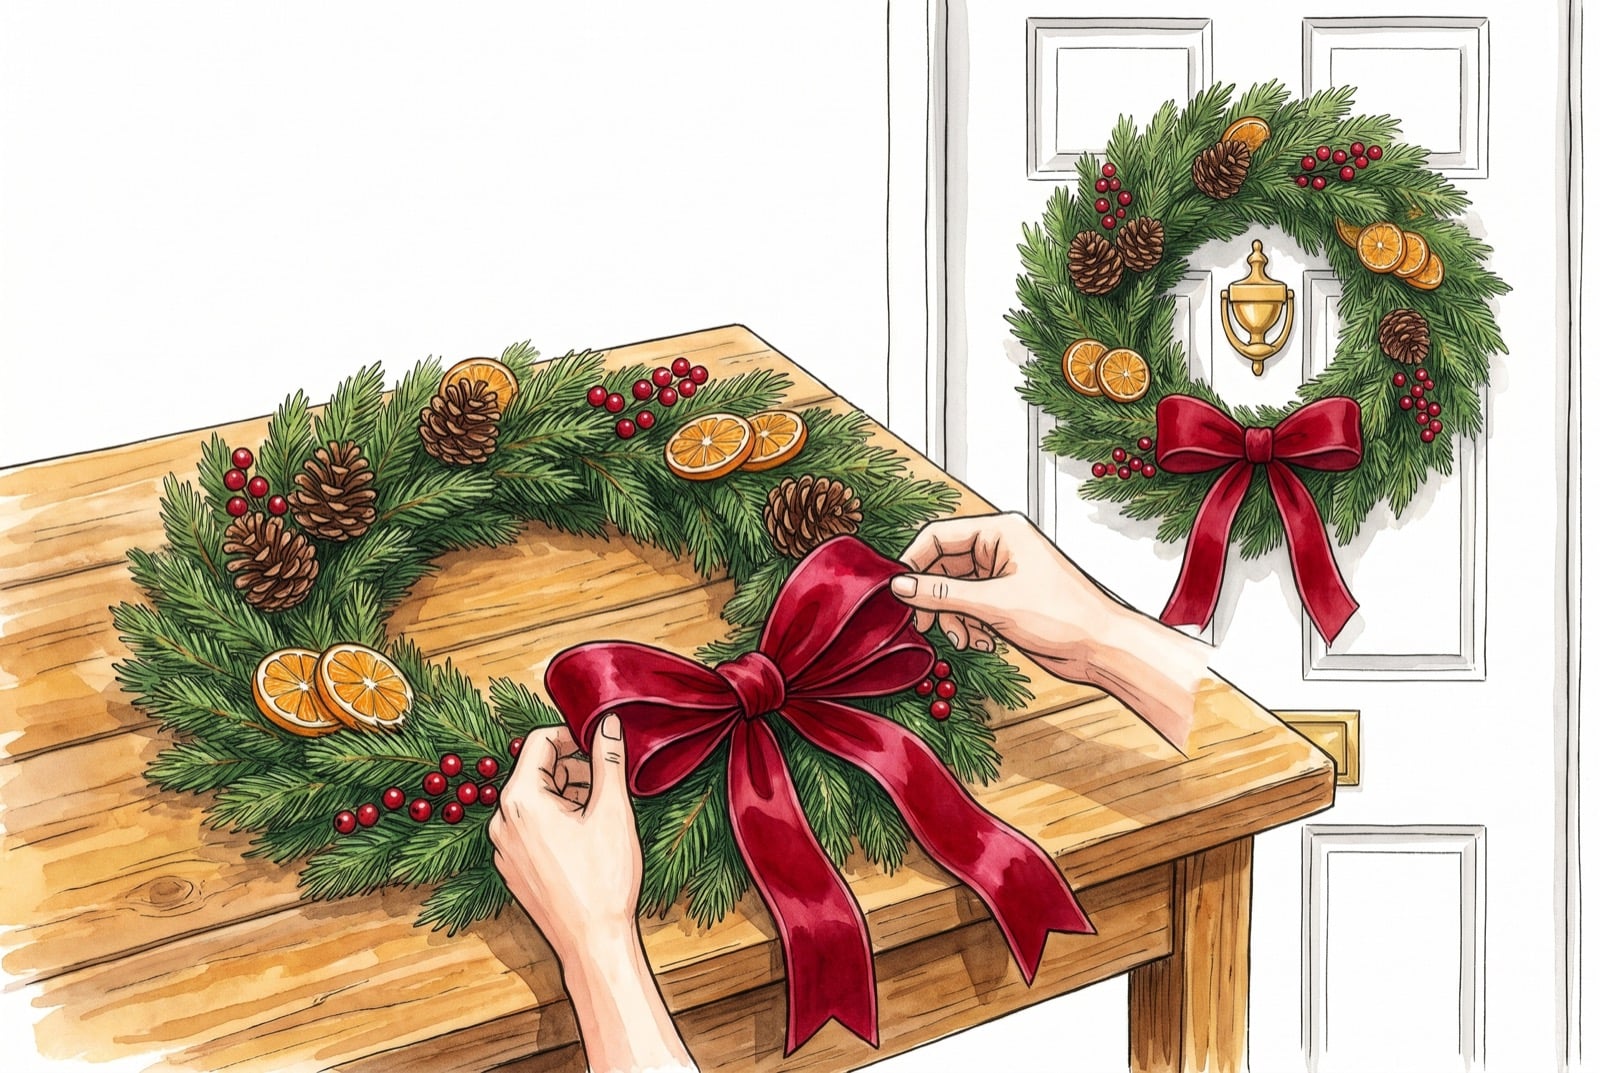
A big, generous bow finishes the wreath. Wired ribbon makes it far easier, because the loops hold their shape. Leave a tail about a foot long, then fold the ribbon back and forth into loops, pinching each one at the center so you end up with two loops on each side. Secure the center tightly with a piece of floral wire, then wrap a short piece of ribbon over the wire to hide it. Cut the tails at an angle or snip a V into the ends so they don’t fray.
Wire the bow onto the frame through the back of the wreath. Bottom center is classic, while top center or slightly off to one side, around the five o’clock position, feels a little more modern. Shape the loops and tails with your fingers. Hang the wreath on an over-the-door hanger or a sturdy hook using the wire loop on the back.
How to Keep Your Wreath Fresh
A well-made fresh wreath can look good for four to six weeks outdoors in cold weather, and one to two weeks indoors. A few habits stretch that time considerably:
- Mist it with water every few days, front and back, to keep the needles hydrated.
- Keep it out of direct sun and away from heat sources like fireplaces, radiators and heating vents.
- Watch out for storm doors. A wreath hung between a glass storm door and the front door can bake in the afternoon sun and brown within days.
- Soak it overnight in a bathtub of cool water if it starts to look dry. Let it drip dry before rehanging.
Common Mistakes to Avoid
- Using pieces that are too long, which gives the wreath a scraggly, uneven outline.
- Wiring too loosely, so bundles slip and twist after a few days on the door.
- Spacing bundles too far apart, leaving the frame showing through.
- Skipping the overnight soak, which cuts the wreath’s life short.
- Overloading the accents, so the greenery disappears under ornaments.
The Complete Tutorial at a Glance
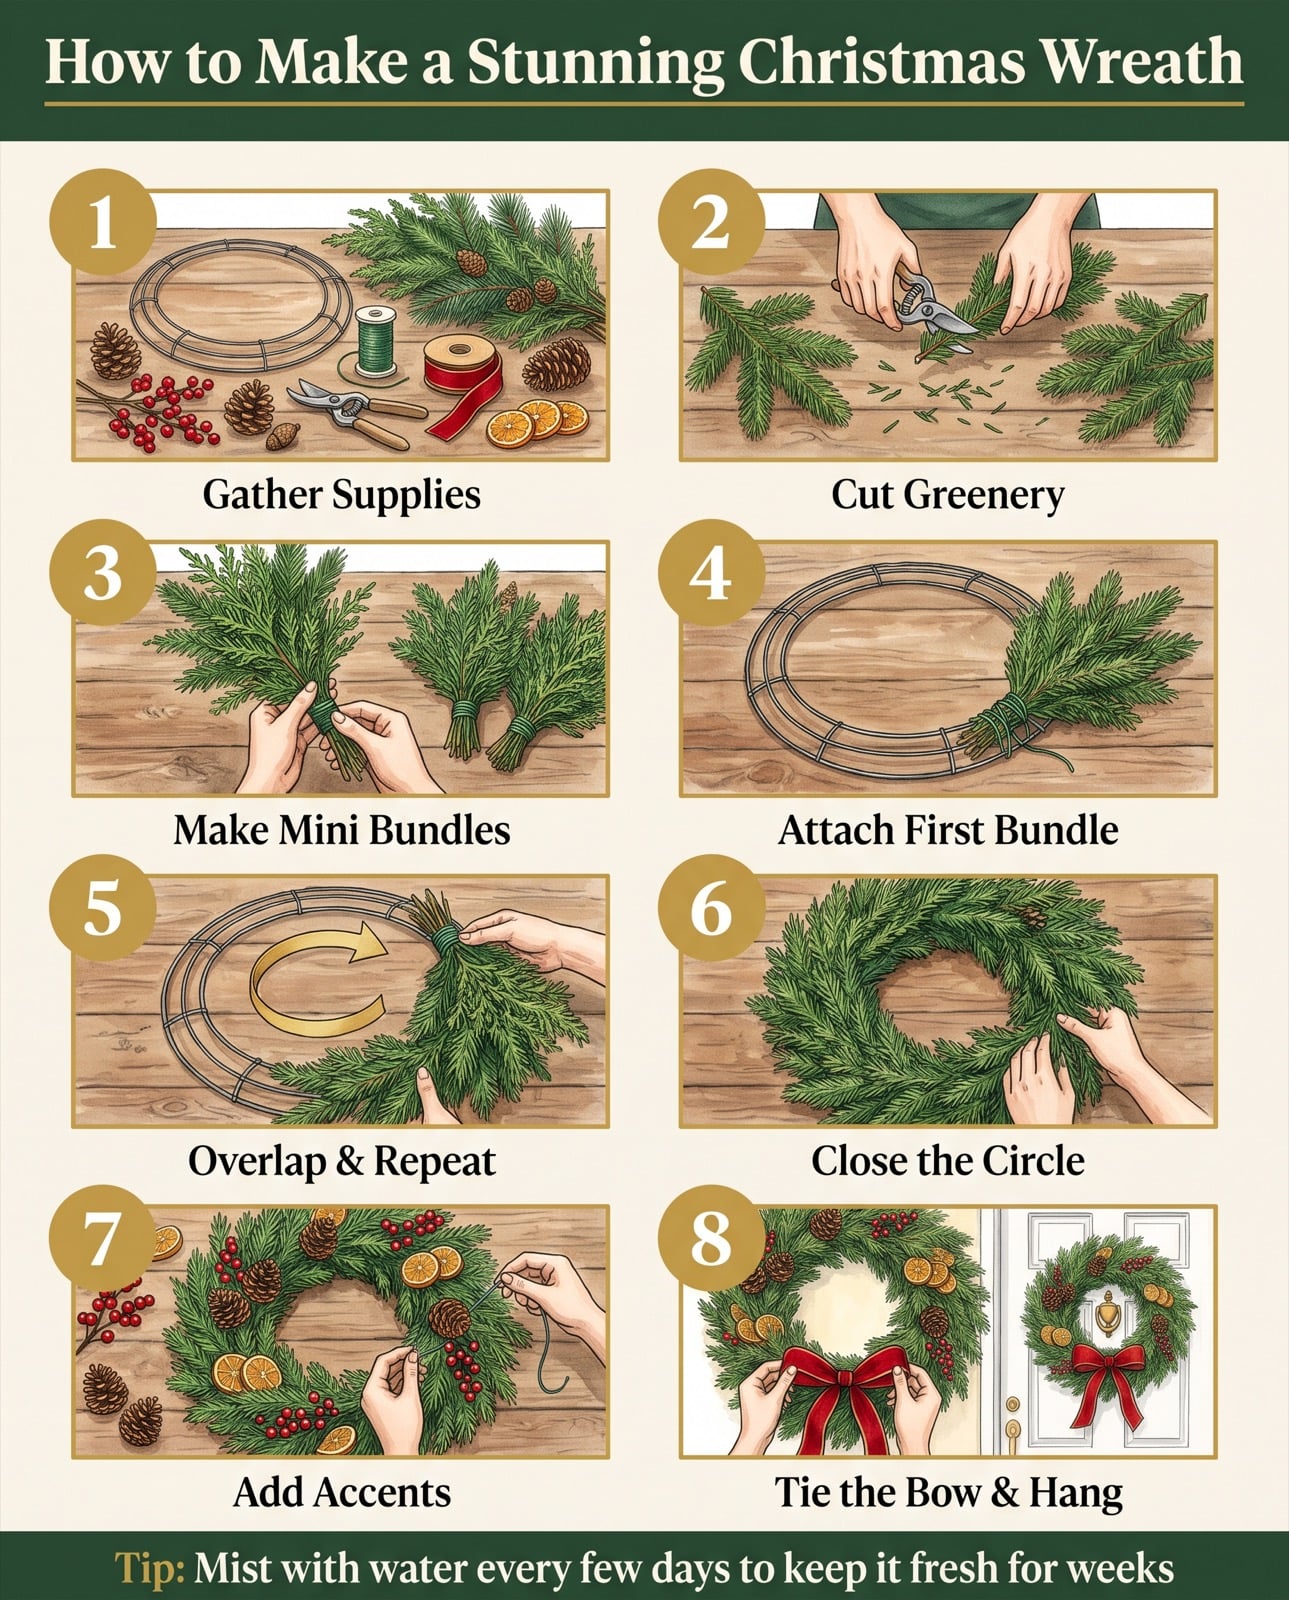
Here’s the whole process in one image. Save it or pin it so it’s handy when you sit down to make your wreath.