
🔥 Would you like to save this?
Every artificial tree looks convincing in the box photo. Then you set it up under real light, at real eye level, and the seams start showing — the bare pole, the plastic-shine needles, the pinecones that were clearly born in a mold. We pulled apart the most common ways a fake tree gives itself away, and once you see them, you can’t unsee them. Fix these before you spend a dime, and the guy who visits in December will swear you cut it down yourself.
40. Buying a Tree With Too Few Branch Tips
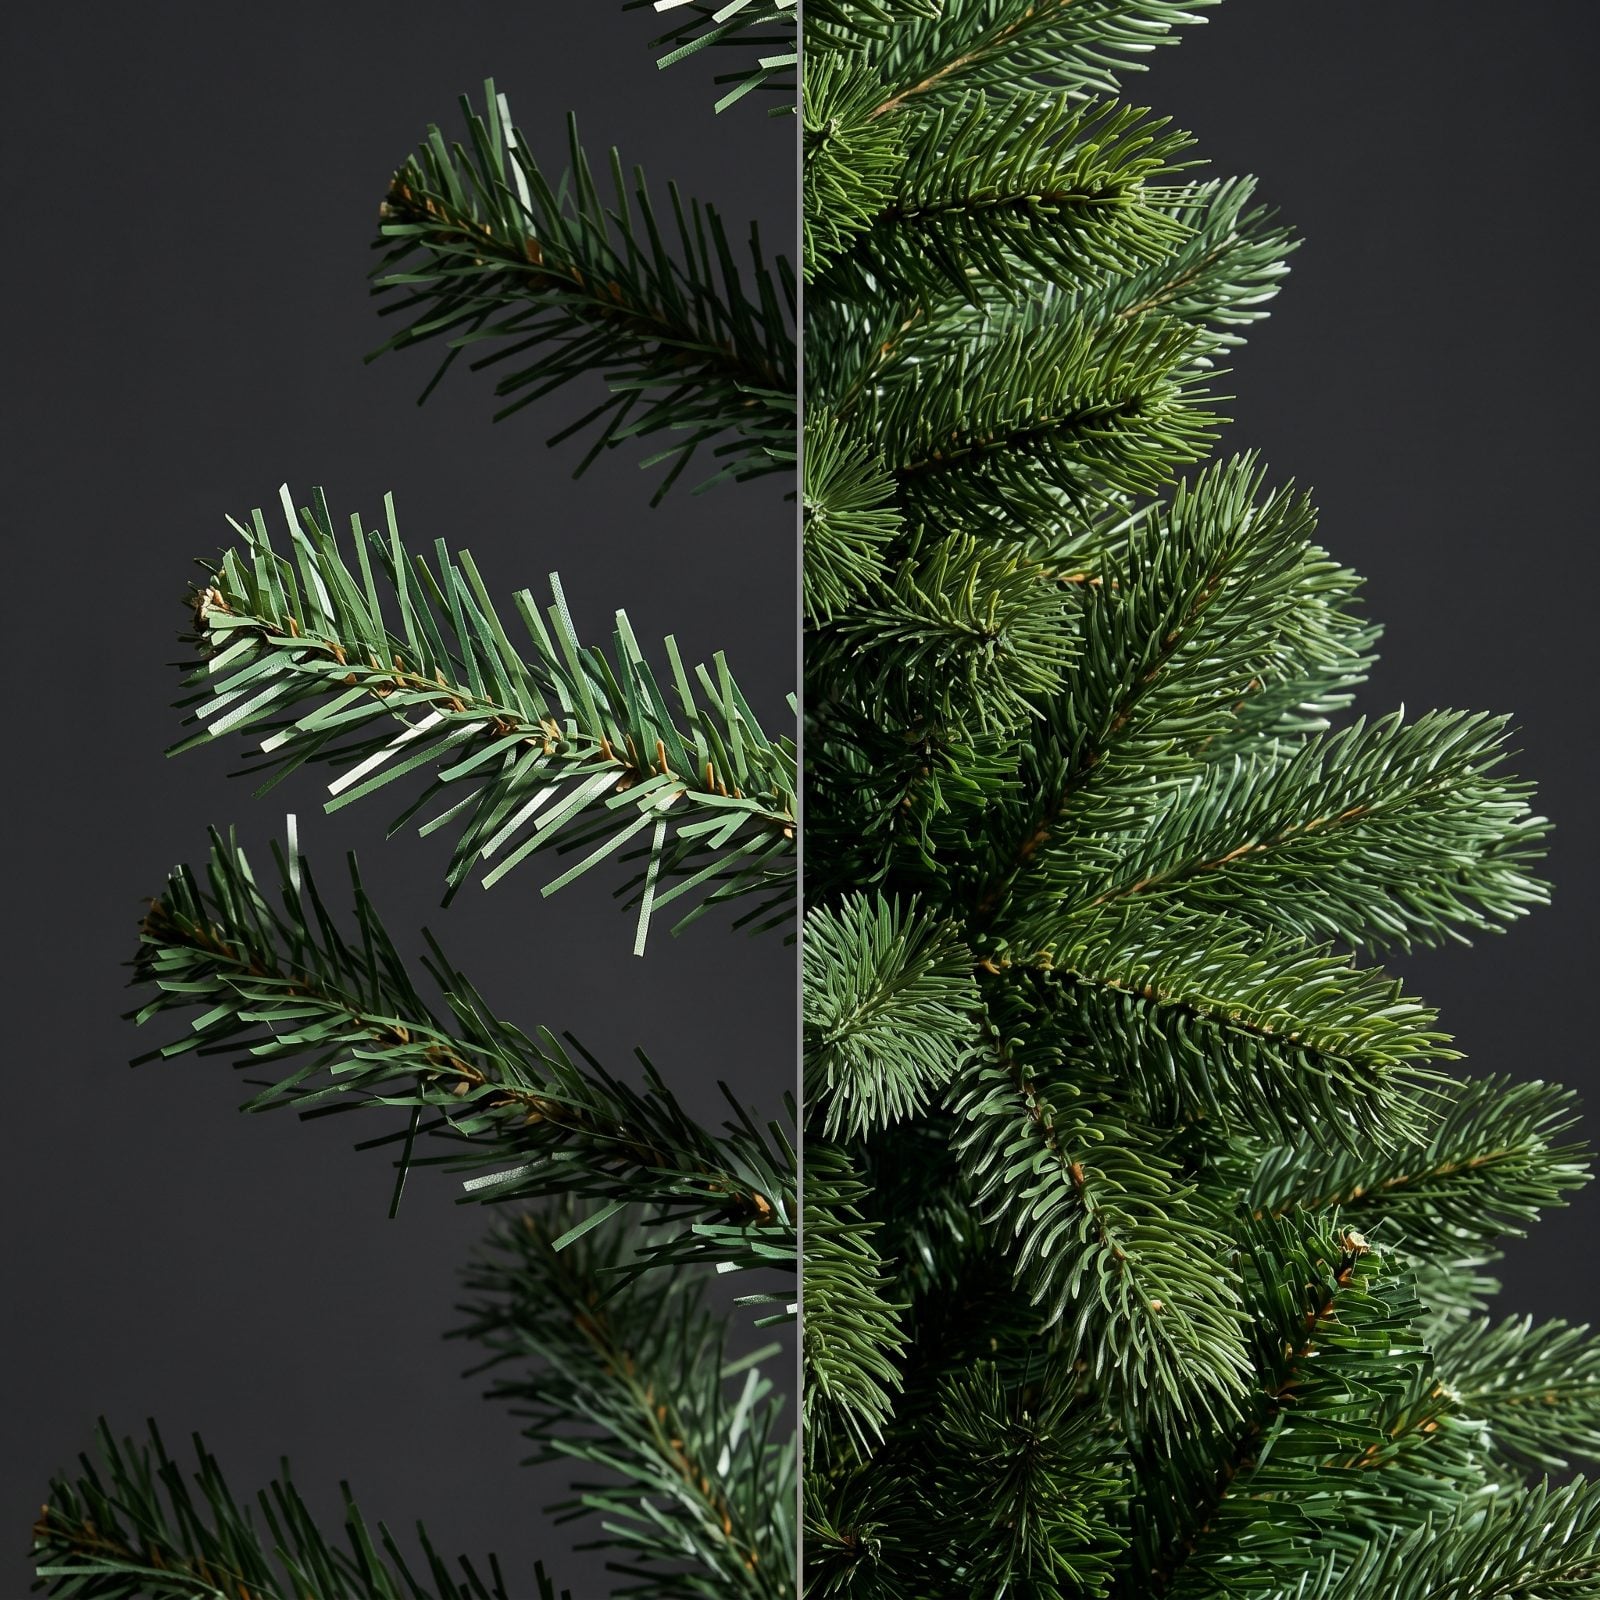
Tip count is the single number that separates a tree reading real from one reading clearance rack, and manufacturers bury it in the fine print because most shoppers never look. A full 7-foot tree carries well over a thousand tips. The cheap ones give you half that and hope the ornaments distract you.
In order to come up with the very specific design ideas, we create most designs with the assistance of state-of-the-art AI interior design software. Also, assume links that take you off the site are affiliate links such as links to Amazon. this means we may earn a commission if you buy something.
They don’t. Your eye reads the gaps instantly, catches the wall behind the tree, and the whole illusion collapses. Fluffing helps some. But you can’t fluff branches that were never there.
39. Choosing Flat PVC Needles From Trunk to Tip
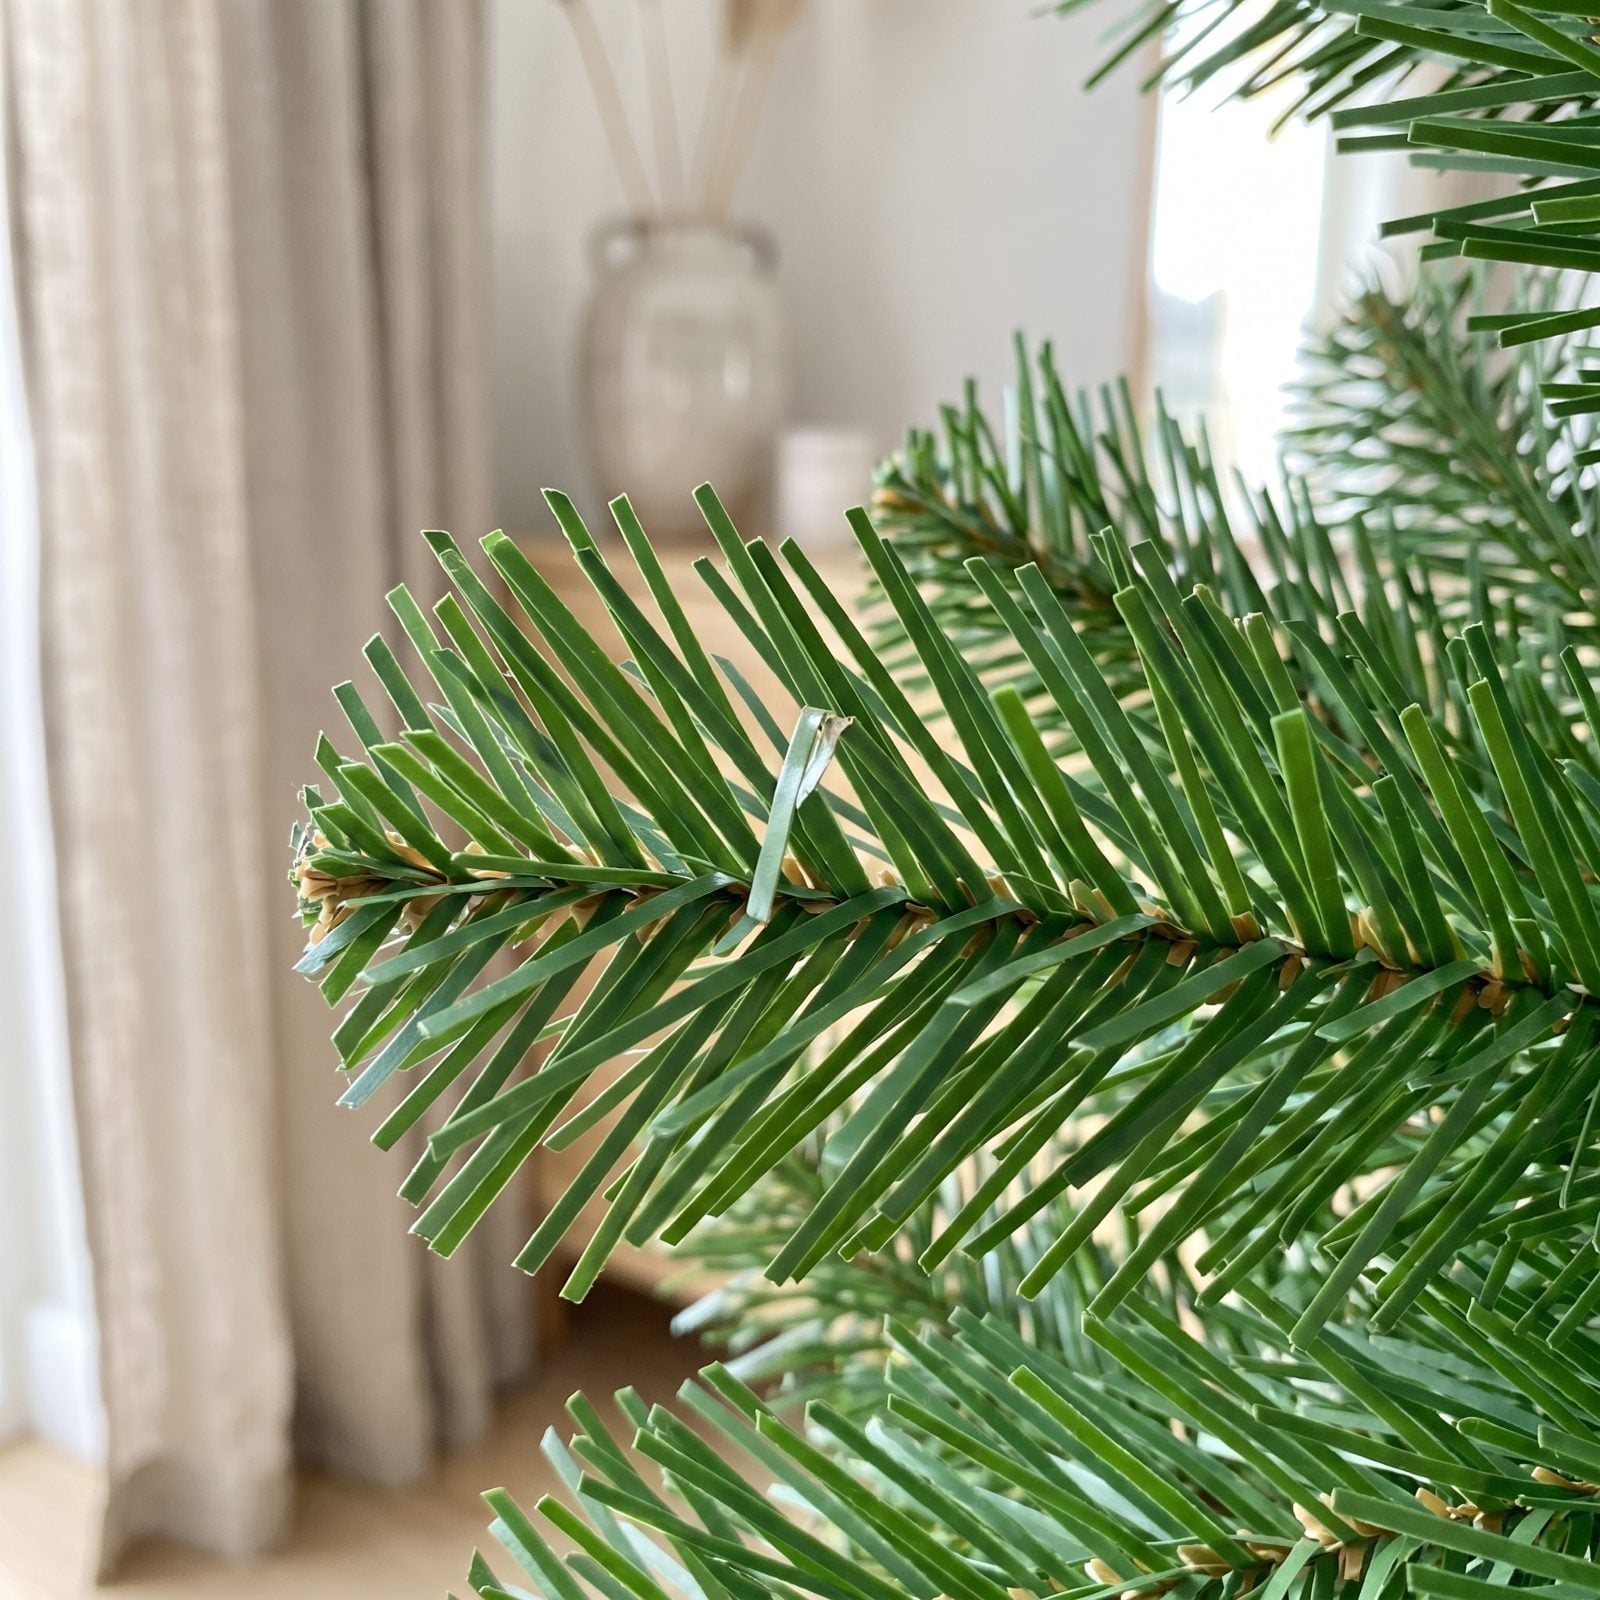
Flat PVC needles are the tell you can spot from across the room. Stamped from thin plastic sheet, they lie flat like little green ribbons instead of standing out in three dimensions the way a real needle does.
The fix is a mix. Good trees use molded PE (polyethylene) tips on the outer branches, where you actually see them, and cheaper PVC deep inside where nobody looks. All-PVC, front to back? That’s your giveaway. Under a lamp those flat needles throw flat highlights, and your brain files the whole thing under fake before you’ve hung a single ornament.
38. Choosing Uniformly Bright, Glossy Needles That Look Like Vinyl

Real evergreen needles are matte. They absorb light and come in a dozen shades of green on a single branch — some silvery, some almost blue, some tired and brown near the trunk.
A cheap tree is one flat, glossy, radioactive green from top to bottom. Put it near a window and it shines like a raincoat. That shine is the most honest thing about it. Look for trees described as color-blended or two-tone with a matte finish. Uniform gloss is a plastic tablecloth in a costume.
37. Choosing a Perfect Cone With No Natural Irregularity

Here’s the counterintuitive part. A perfect tree looks fake.
Real firs are lopsided. One side got more sun, one branch grew long and reached for the window, the top leans a little. A tree stamped into a flawless cone with identical tiers reads as a traffic cone in disguise, because your eye clocks the geometry as manufactured.
Premium trees now build in asymmetry on purpose, with varied branch lengths and a slightly irregular profile. So when you set yours up, don’t fix every quirk. Let a couple of branches stick out longer than the rest. Perfection is the amateur move.
36. Forcing an Oversized Tree Into a Tiny Room
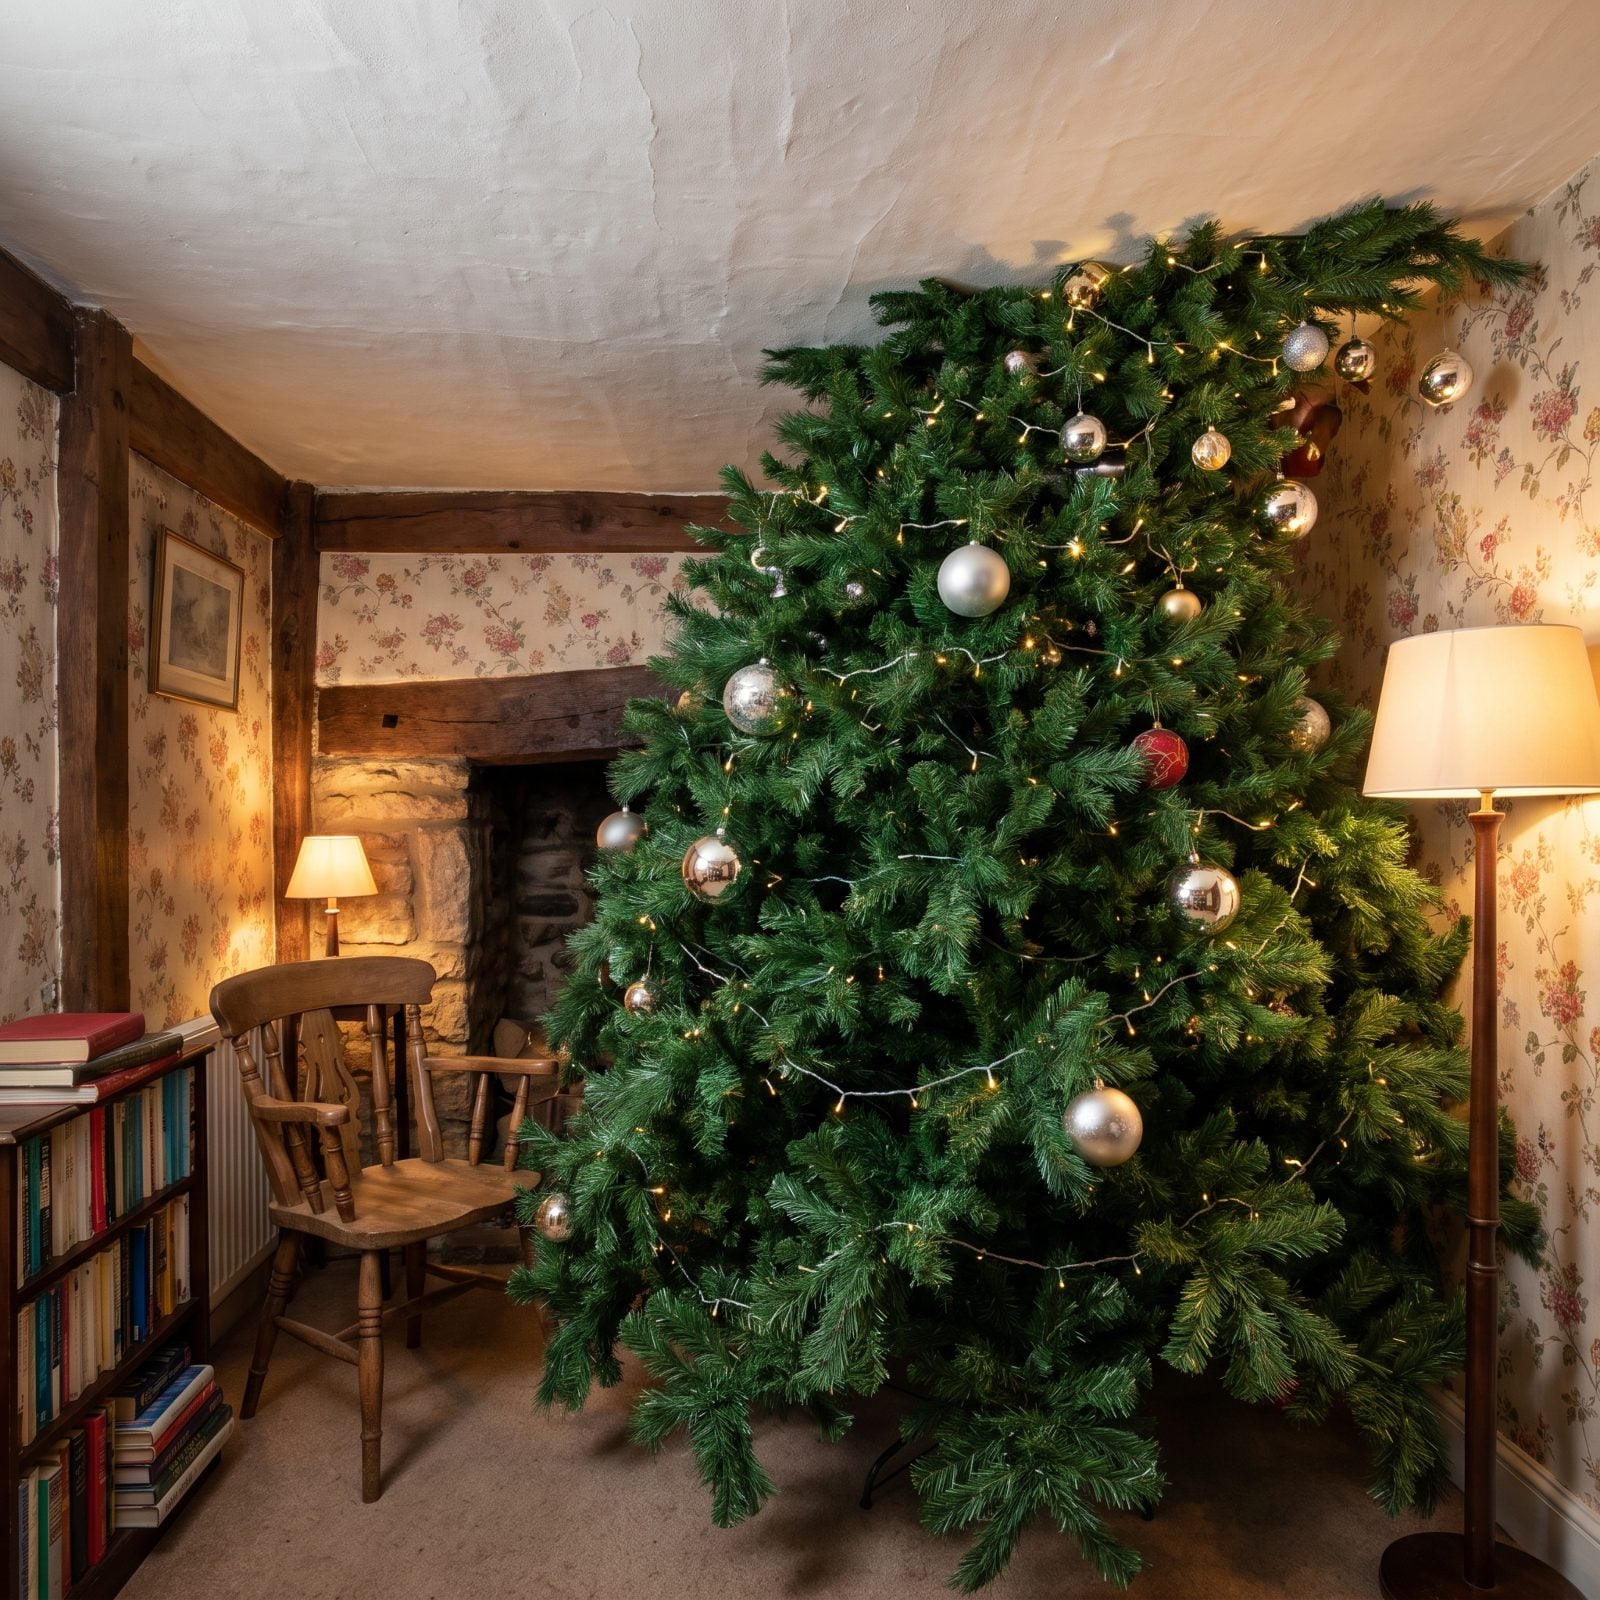
An oversized tree in a small room doesn’t look grand. It looks like you didn’t measure.
The branches jam against the sofa, block the walkway, and swallow the floor. Suddenly the room is about the tree, and not in a good way. A tree should breathe — clearance on all sides so the eye can read its shape, and a scale that relates to the furniture rather than bullying it.
Measure your ceiling height, subtract room for the topper, then measure the floor footprint the diameter will eat. Slim and pencil-profile trees exist for exactly this. Working with tight square footage? The same restraint that makes small kitchen decor feel calm applies here: scale down and let the space breathe.
35. Choosing a Tree That Stops Far Below the Ceiling
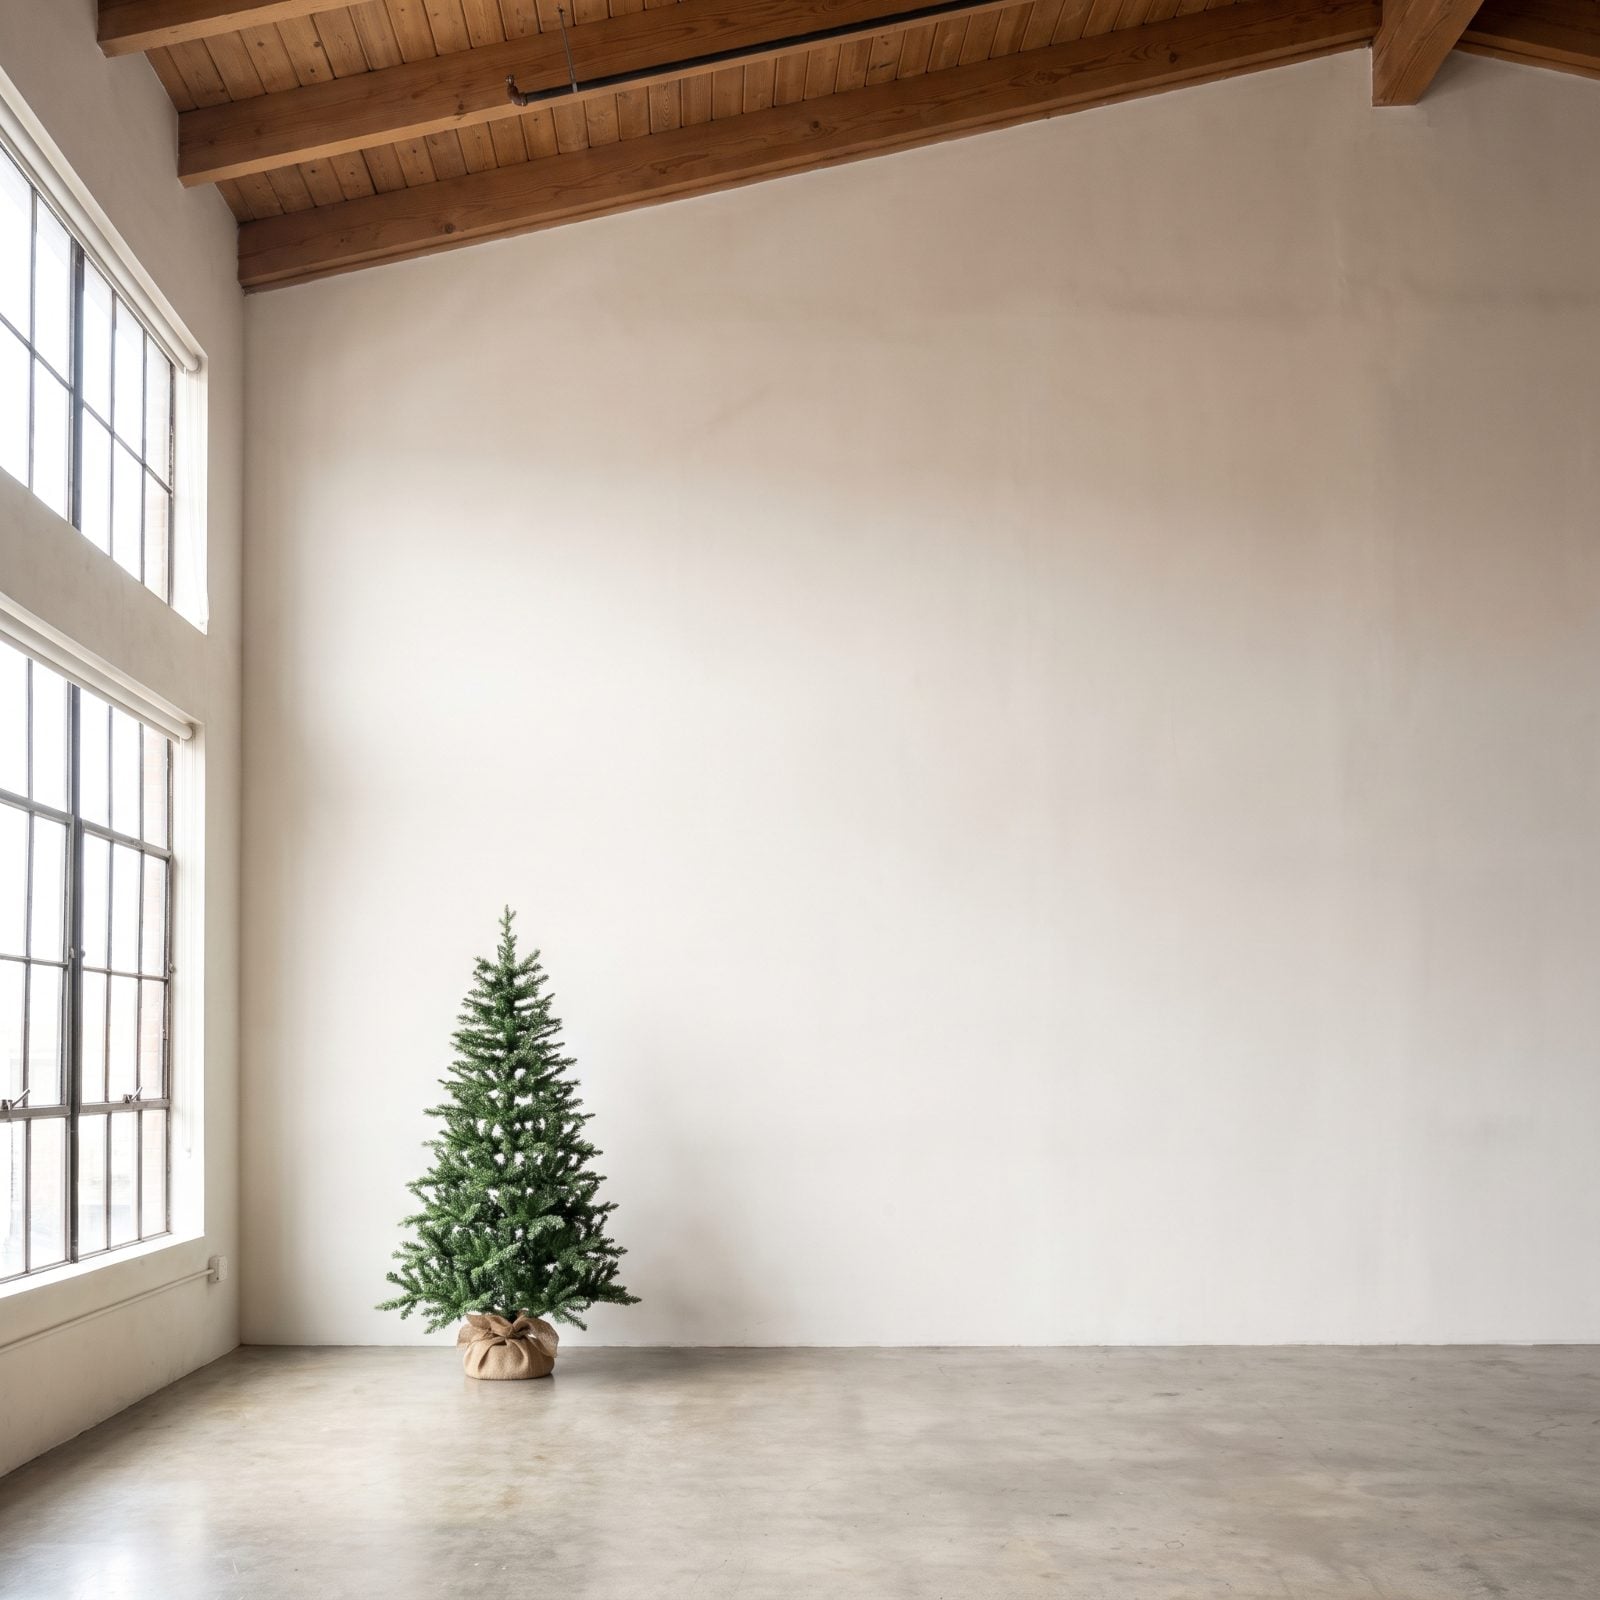
A tree that ends three feet short of the ceiling looks marooned. All that empty wall above it drags the eye up to nothing, and the tree shrinks by comparison.
Here’s the rule most people ignore: leave roughly 6 to 12 inches between your topper and the ceiling. That gap reads as intentional. Three feet reads as a mistake. Tall ceilings? Size up. A stranded tree makes even a nice room feel unfinished.
34. Choosing a Hinged Tree With Visible Mechanical Joints
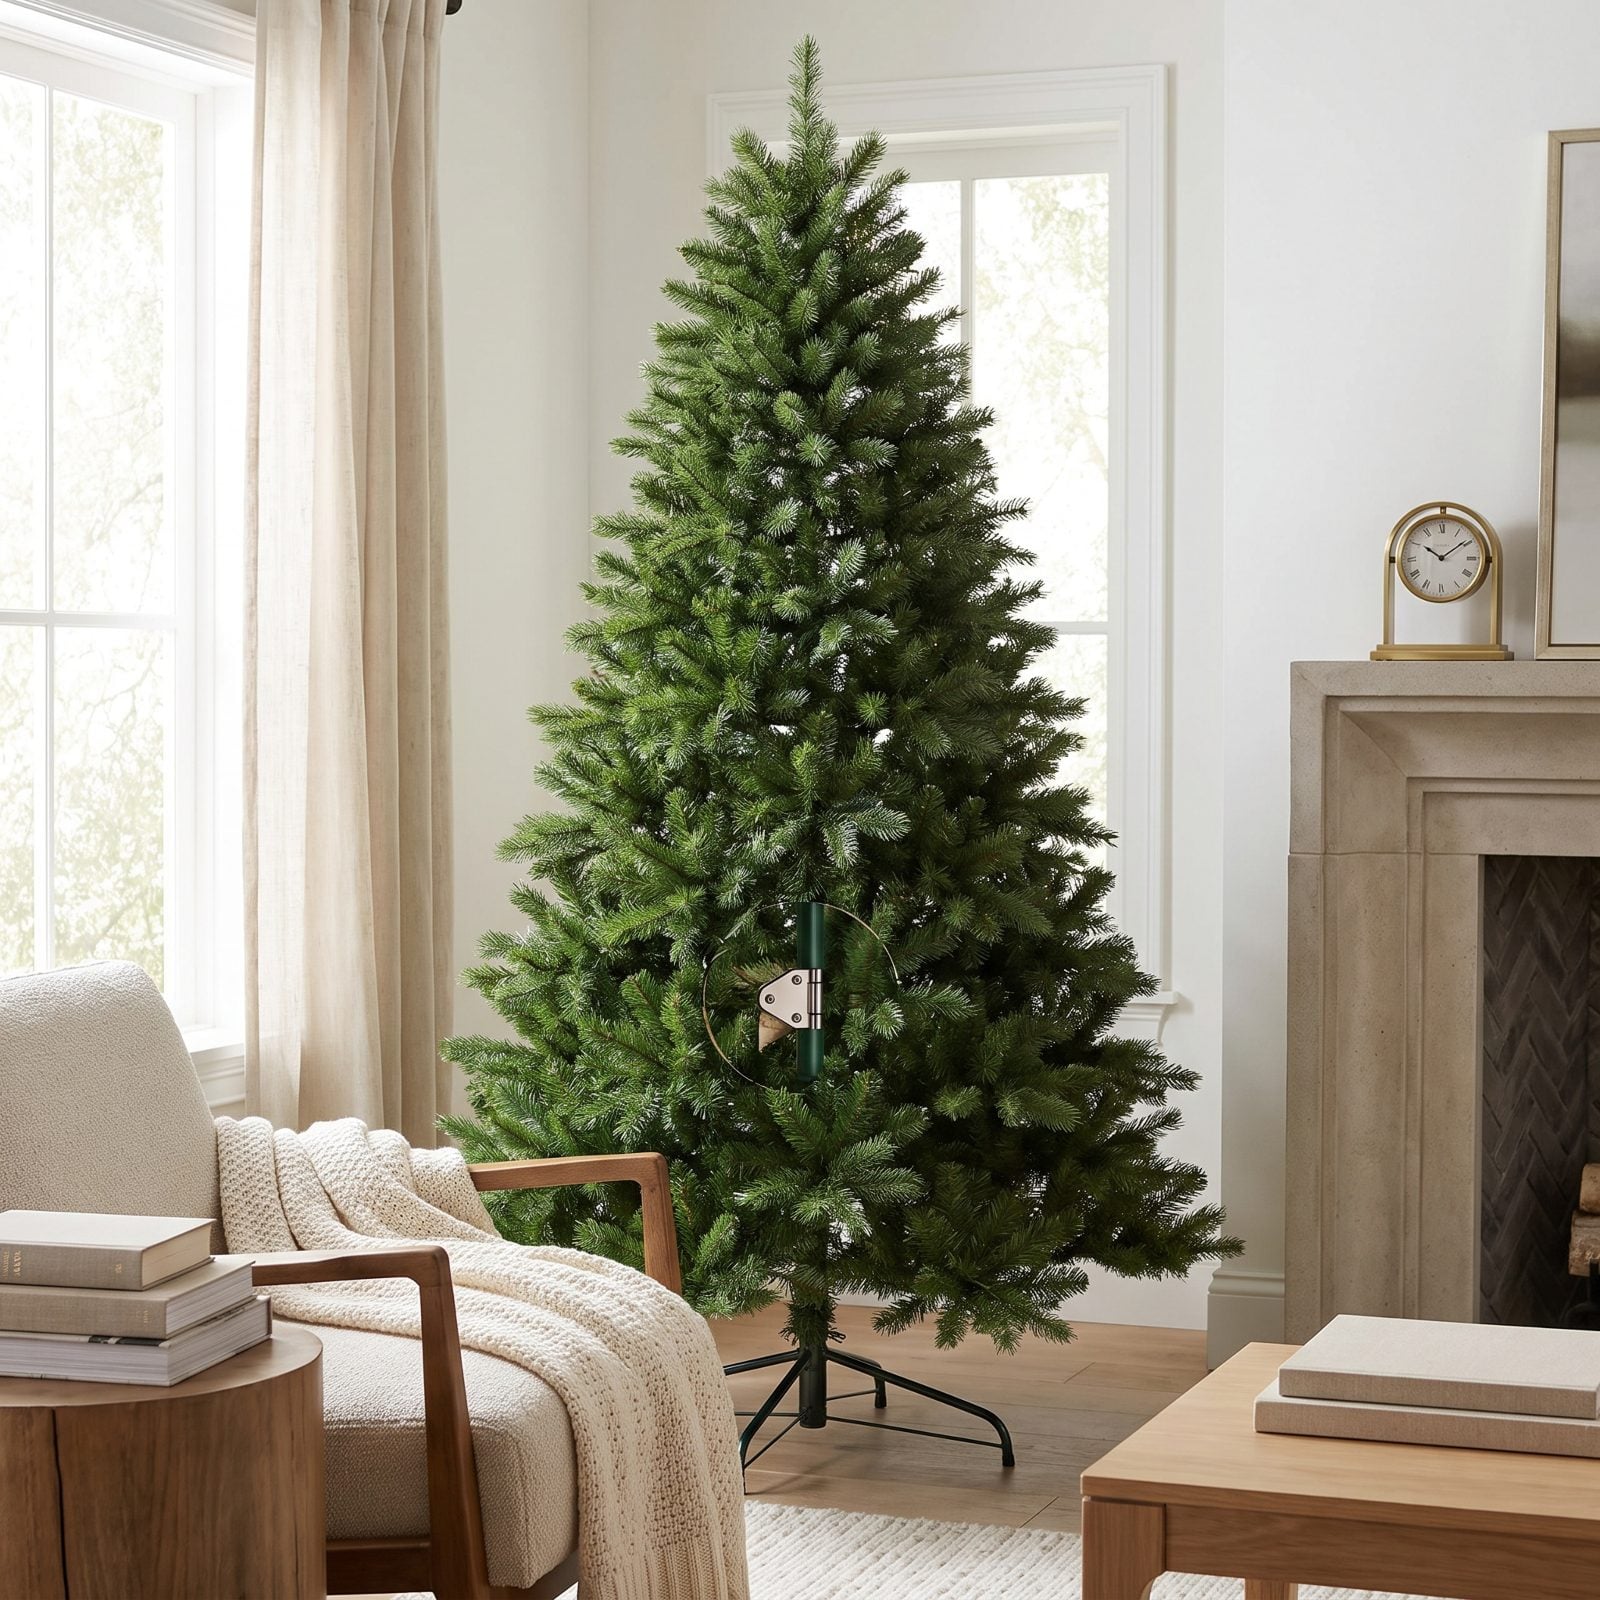
Hinged construction is a convenience feature. The branches fold down for storage and drop into place when you set up. Nothing wrong with the idea.
The problem is cheap execution. On a budget tree the metal hinges, bare wire, and silver joints sit right out in the open where the inner branches should hide them. You end up with a Christmas tree that has visible plumbing.
Better trees paint the hardware dark green or brown and bunch the interior foliage thick enough to swallow it. When you’re shopping, part the branches near the trunk with your hand. See a hardware store in there? Keep walking.
33. Buying a Tree With an Obviously Bare Central Pole

Look at the trunk. Really look.
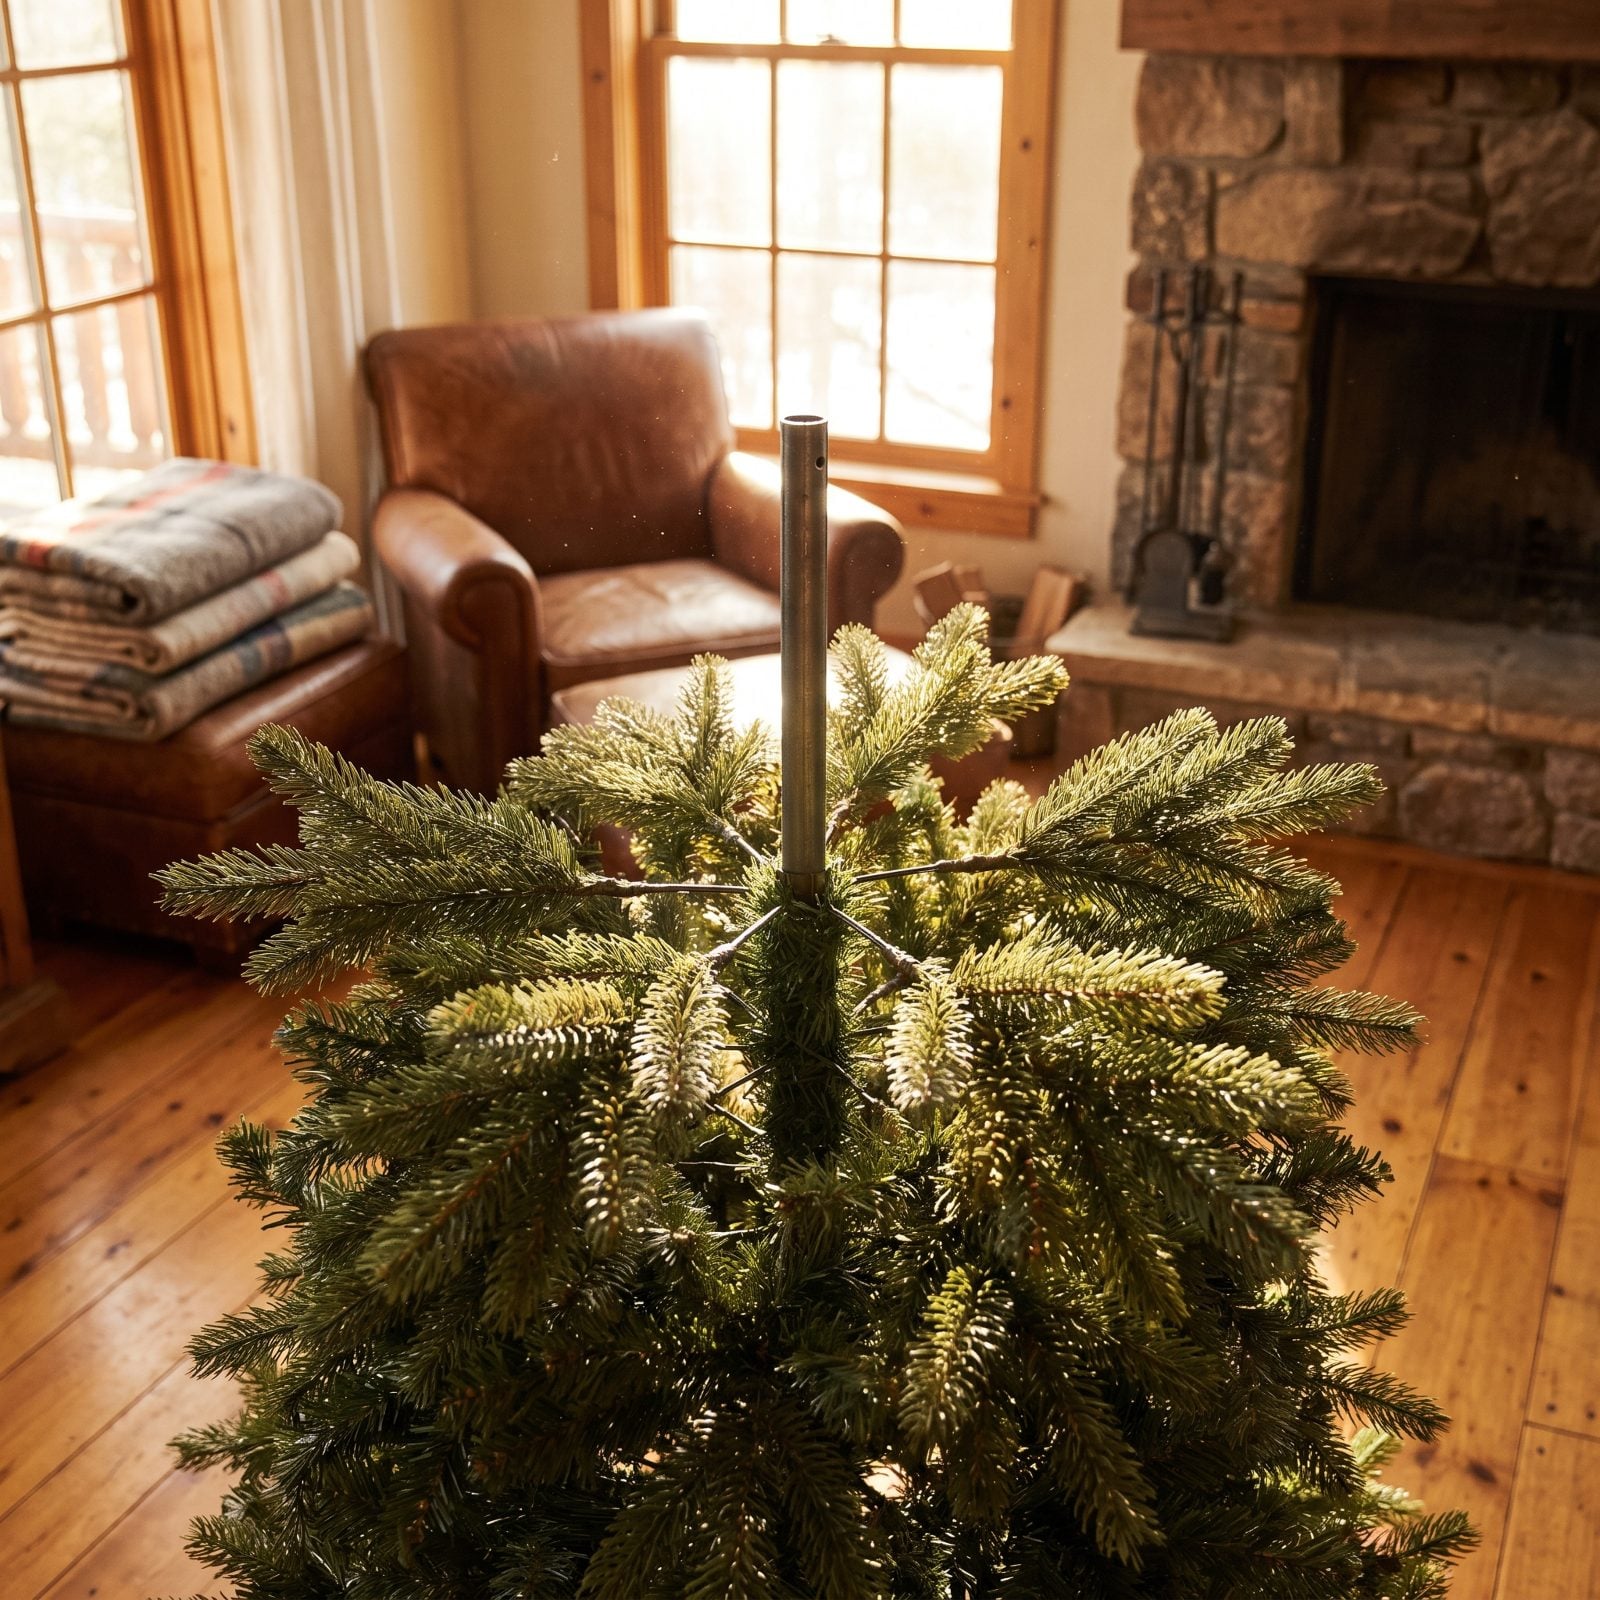
On a poorly built tree, the central pole shows through the gaps as a bare green metal stick, especially in the upper third where the branches thin out. It’s the most literal reminder possible that you’re staring at hardware wearing plastic.
A well-made tree drowns the pole in overlapping interior branches so you never catch a glimpse of it. Before you buy, walk around the display tree and look for daylight through the middle. If the pole is playing peekaboo under the store’s flattering lighting, it’ll be a searchlight in your living room.
32. Buying Flocking That Sheds in Clumps
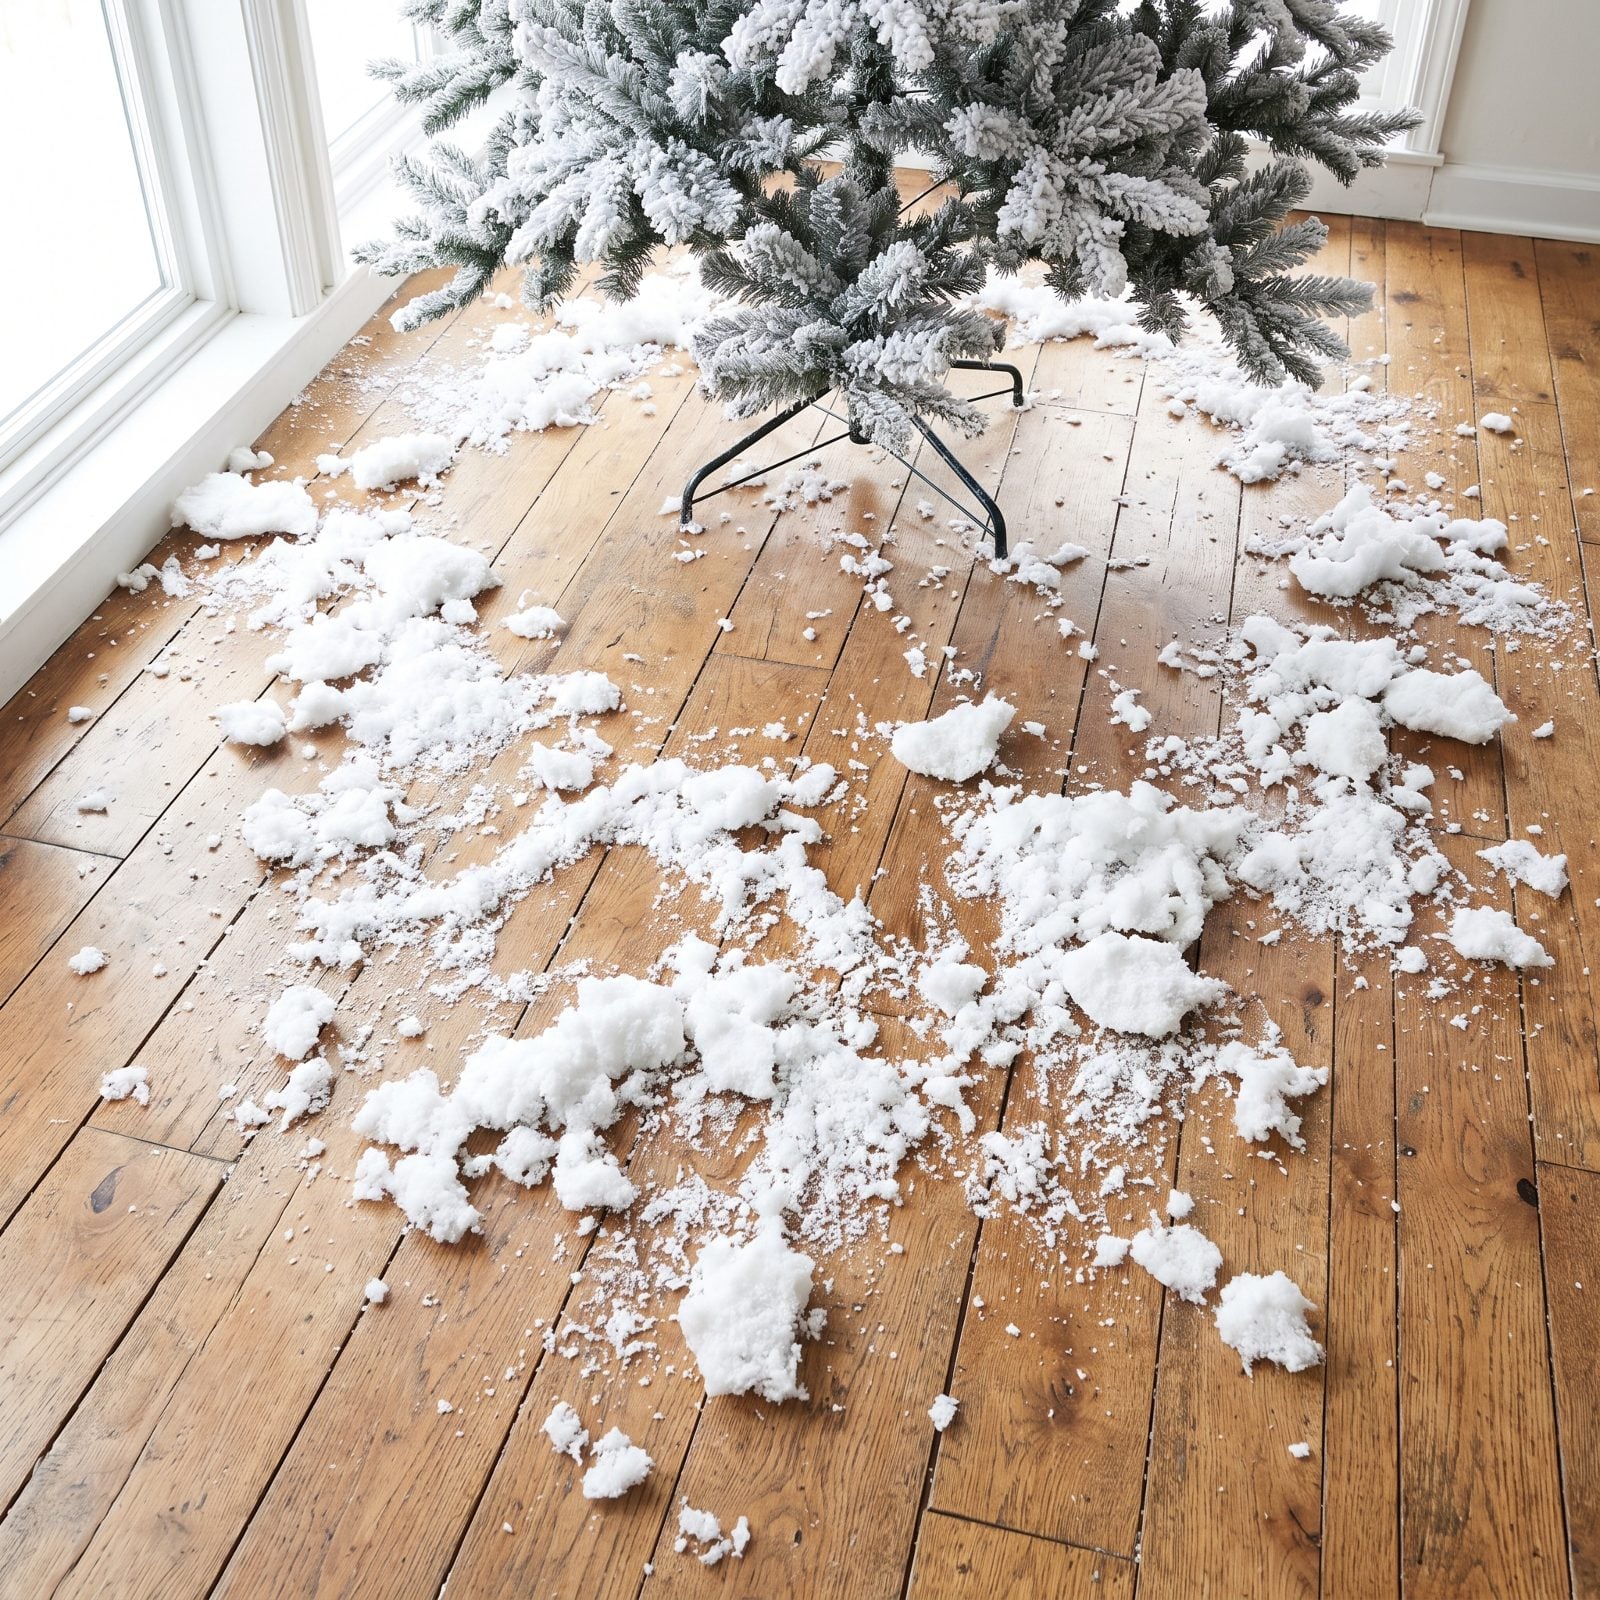
Flocking sold the dream of a snow-dusted tree. Cheap flocking sells a mess on your floor.
The bad stuff is basically glued-on foam that lets go the second you touch it. You get bare green patches where the flocking gave up and little white clumps drifting onto the rug every time the heat kicks on. Looks less like snow, more like the tree is molting.
Quality flocking goes on wet, bonds to the branch, and covers evenly with a soft matte finish. The test in store, if they let you: run a finger along a branch. If white comes off on your hand, that’s a preview of your entire December.
31. Choosing Fake Pinecones Molded Into the Branches

Molded-on pinecones are the little lie that undoes all the others. They come stamped in identical shiny plastic — same size, same brown, spaced at tidy intervals like a robot installed them. Which one did.
Real pinecones are chaos: different sizes, weathered edges, matte texture, clustered in some spots and absent in others. If your tree came with fakes fused to the branches, our honest advice is to snip them off and wire on a few real ones from the yard. Do it, and the tree stops looking like a display piece and starts looking like something that grew.
30. Leaving the Back Half Compressed

Nobody walks around the back of your tree. That’s the excuse, and it falls apart the second someone sits on the far side of the couch and sees plastic tips pressed flat against the wall.
A compressed back half reads as an obviously cheap tree even when the front looks perfect, because your eye catches the density change in peripheral vision before it registers what’s wrong. So fluff the whole thing, front and back, every branch pulled out and separated until the metal trunk disappears.
29. Arranging Every Tip at the Same Angle
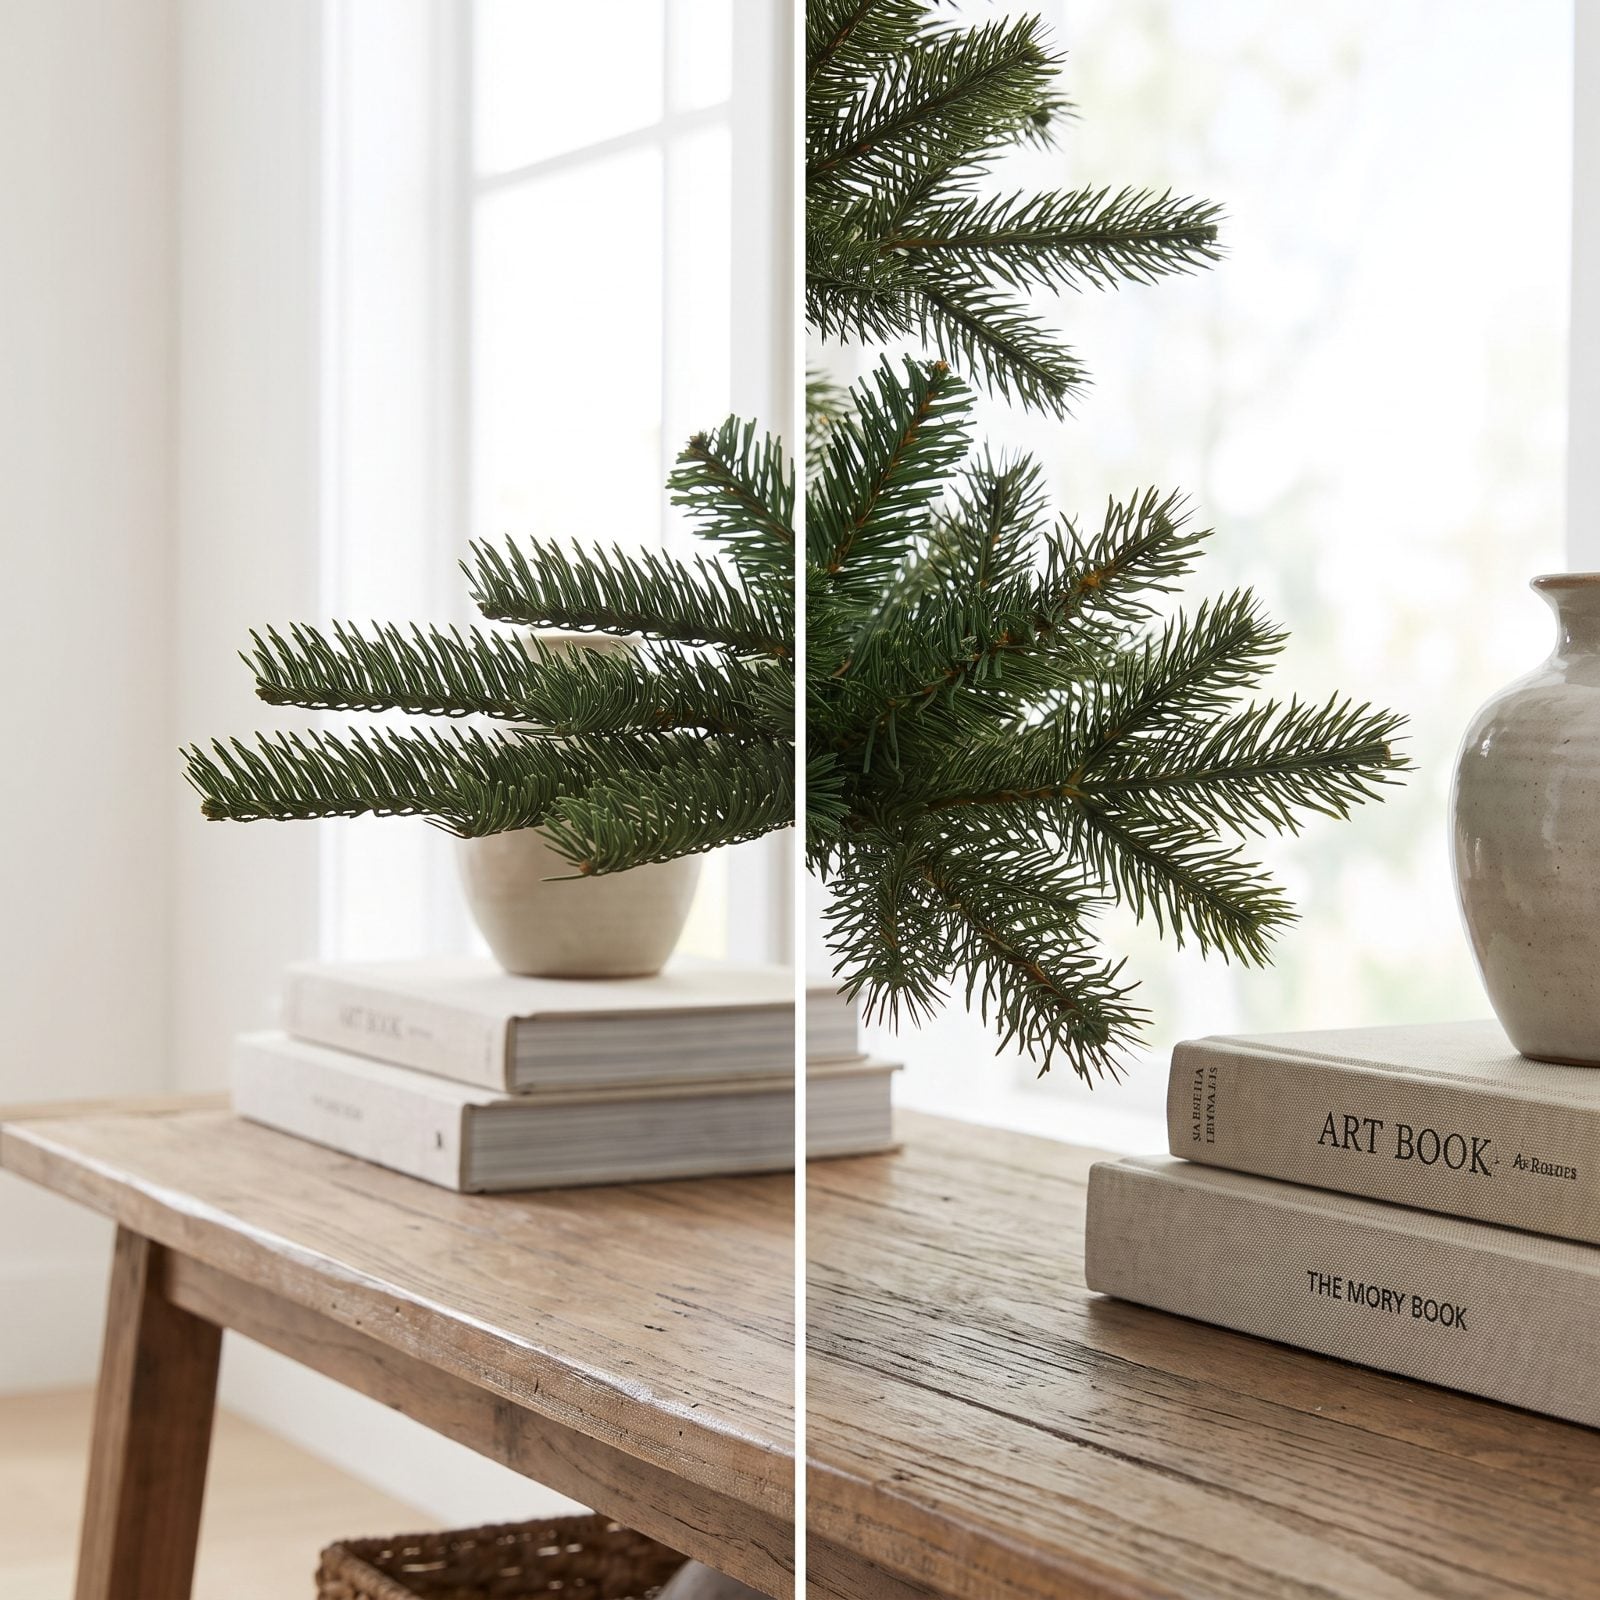
Real branches grow in chaos. Some point up, some droop, some twist sideways after fighting for light for a decade. An artificial tree where every tip curves to the identical angle looks like exactly what it is — molded plastic stamped from one die.
Bend the tips in different directions on purpose. Some up, some out, a few pointing slightly down the way real needled limbs do near the bottom. That randomness is what your brain reads as alive.
28. Failing to Separate the Inner Branches
🔥 Would you like to save this?
It’s an easy mistake to make. You fluff the outer branches, step back, call it done, and never once touch the inner ones near the trunk. Then every night the tree glows on the outside and goes pitch black in the middle — a hollow tube with a metal pole down the center.
Actual trees are dense all the way to the core. Pull the inner branches out and down, let them fill the space between the trunk and the outer layer, and the whole thing gains a depth that makes it look grown instead of assembled.
27. Leaving Perfectly Even Gaps Between Tiers

You can spot a hinged tree from across the room when the gaps between its tiers march up the trunk at machine-perfect intervals. Real growth never does that — branches overlap, crowd, and blur into each other until you can’t find where one tier ends and the next begins.
So close the gaps. Angle the top branches of a lower tier upward and the bottom branches of the tier above it downward until the layers mesh into one continuous mass, not a stack of cones. A slim tree fits a tight spot beautifully, and a well-fluffed one can anchor a light hallway renovation without ever giving away its price.
26. Letting the Top Section Look Narrow and Unfluffed
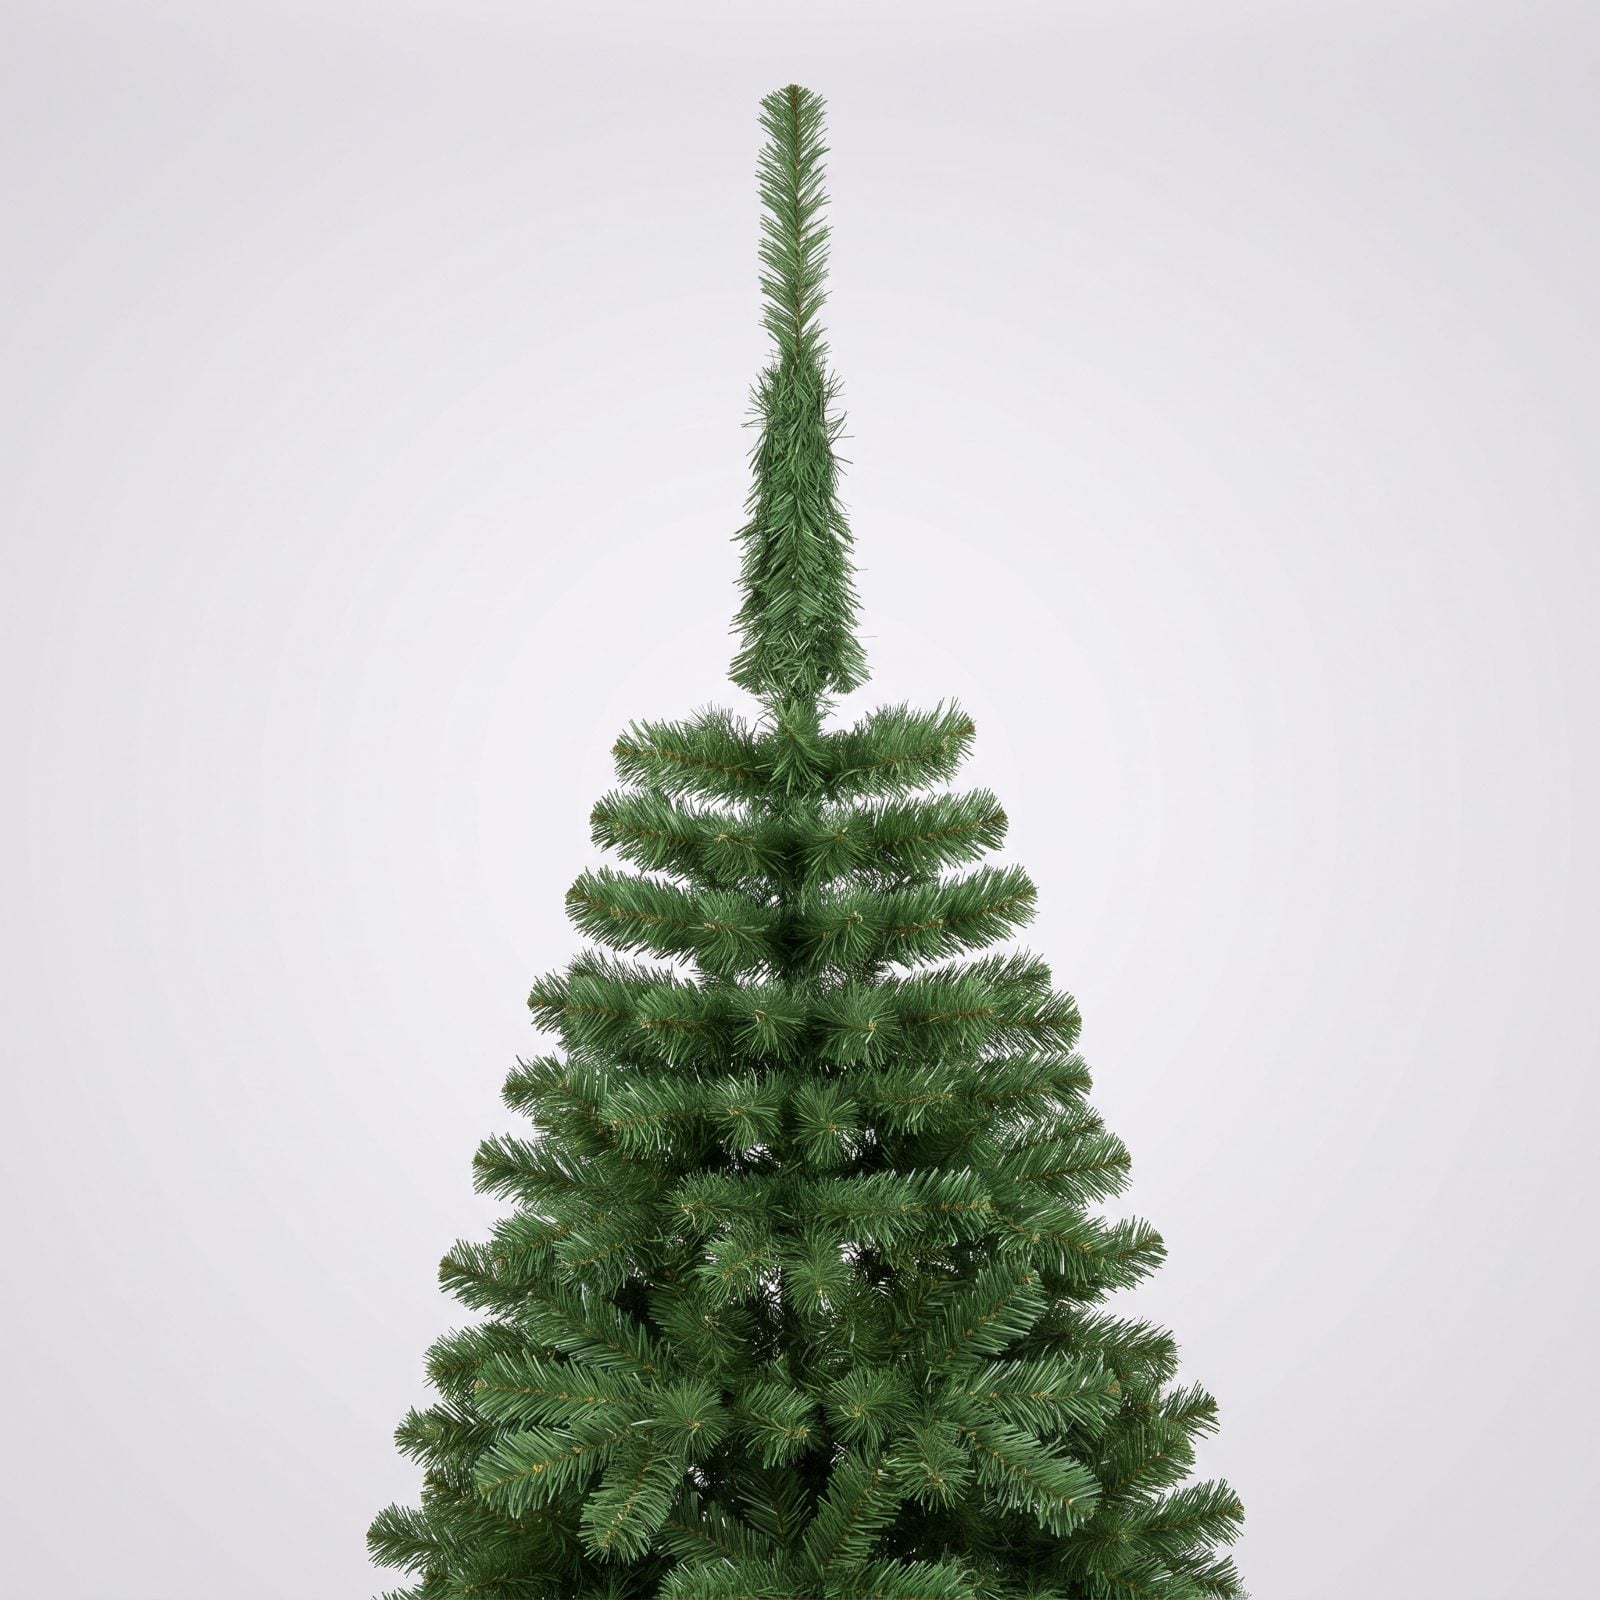
Everyone runs out of steam by the time they reach the top. The middle gets loving attention and the crown gets a shrug, so you end up with a full-bodied tree wearing a thin little party hat.
Here’s the irony: the top has the fewest, smallest branches to begin with, so it needs the most fussing, not the least. Fan every tip wide, coax them up and out, hide that metal spike before the topper goes on. A skimpy peak makes the whole tree look like it’s shrinking as it climbs.
25. Leaving Crushed Branches Around the Base

The bottom branches take the worst of storage. They’re the largest, they get folded hardest, and they come out of the box crushed flat like somebody sat on them. Left alone, they curl up toward the trunk instead of sweeping down to the floor — and suddenly the stand legs are on full display for the whole room.
Work these first, while your hands are still fresh and patient. Bend them back down and out until they skim the floor and swallow the hardware. A base that flares wide grounds the entire tree and makes it look rooted rather than propped.
24. Allowing Color-Coded Assembly Tags to Show
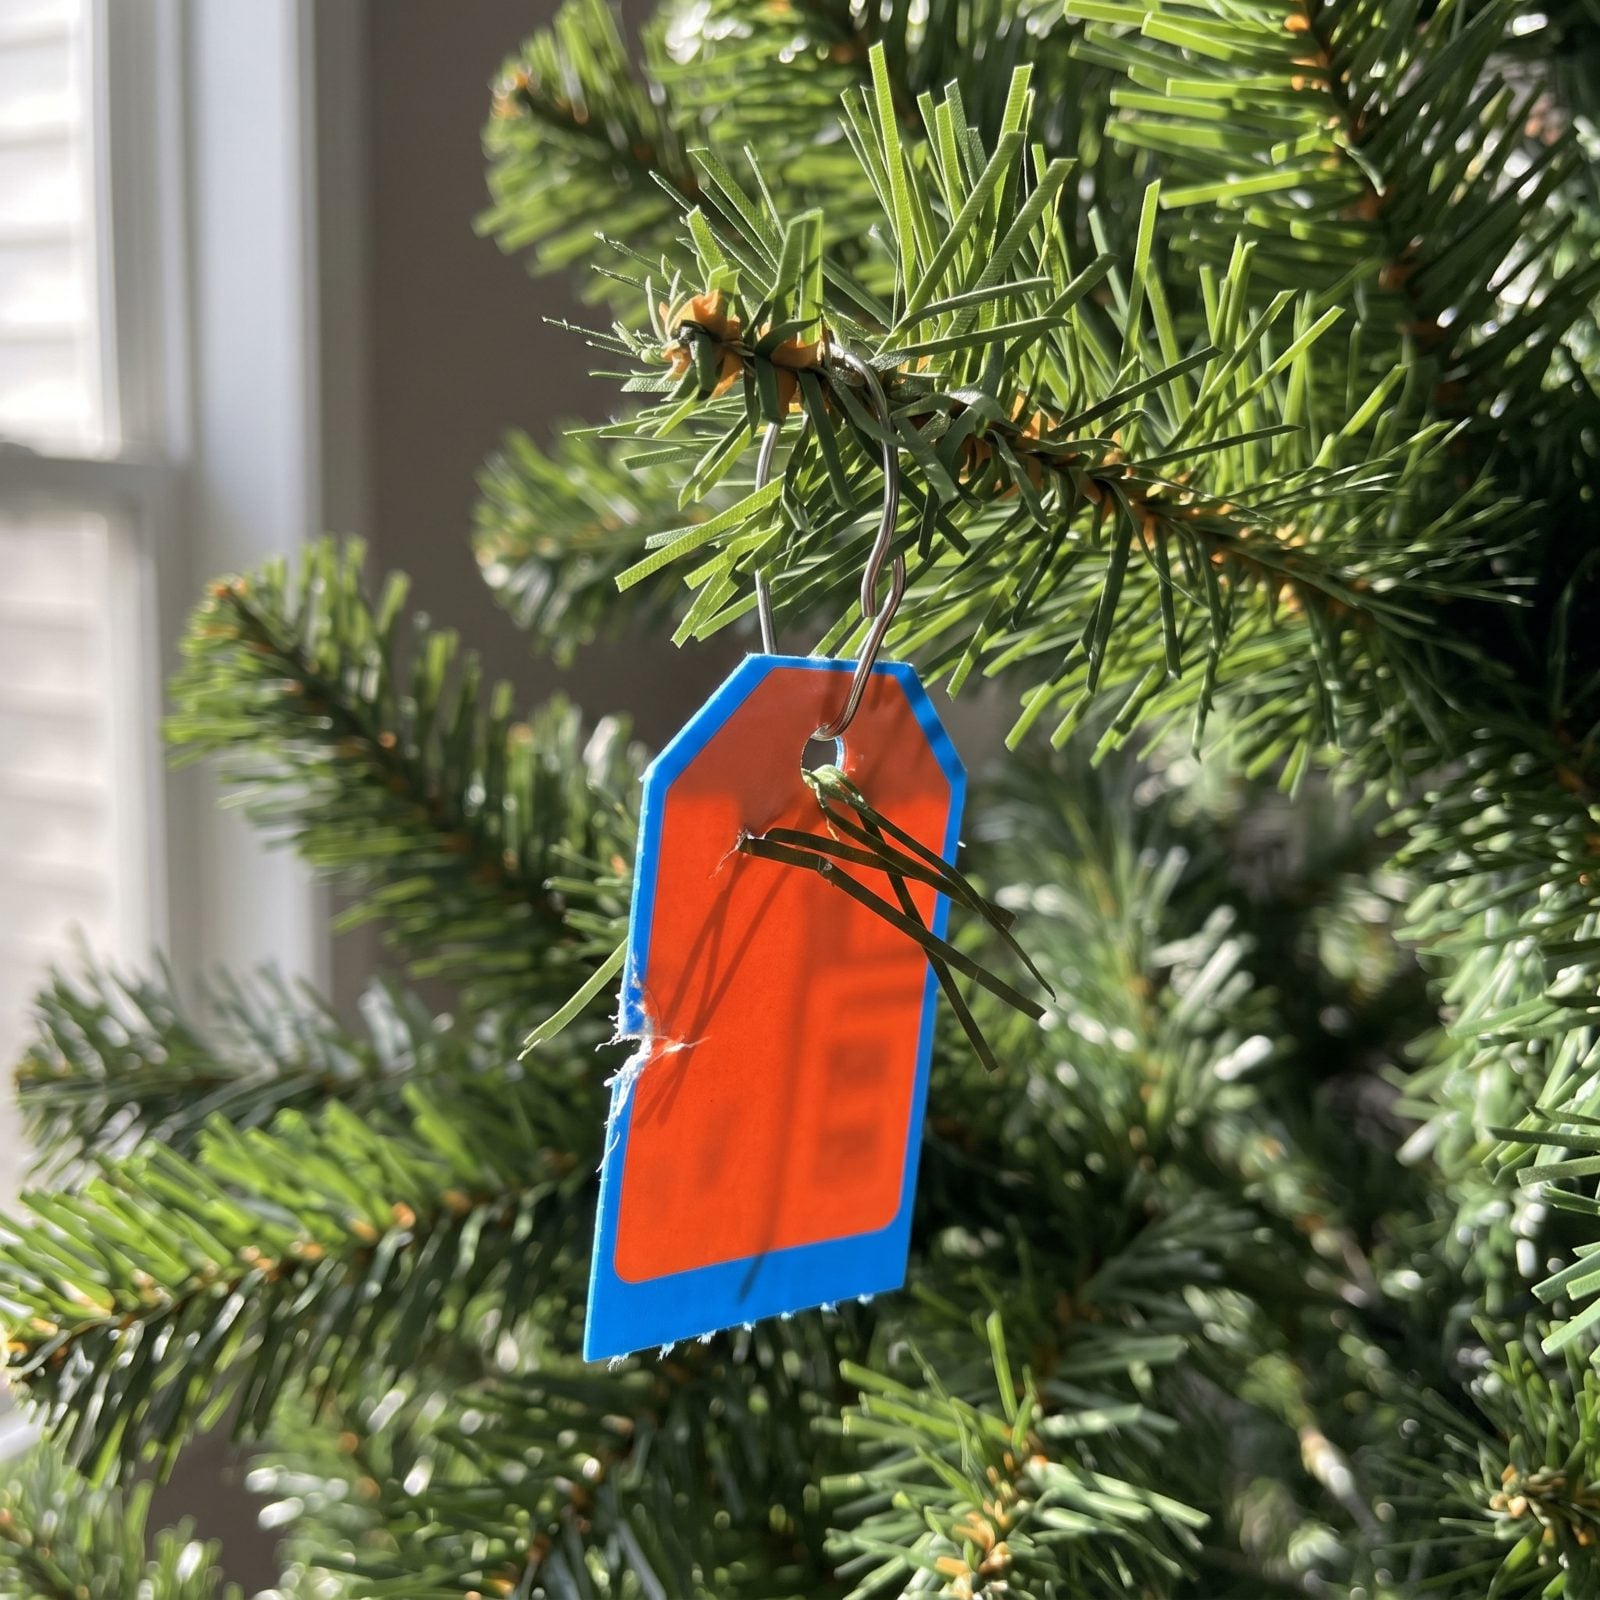
Manufacturers color-code the sections so you don’t jam the wrong pole into the wrong hole. Handy during assembly. A dead giveaway once the tree is up, because nothing in nature has a little red plastic band wrapped around it.
Once each section is seated, tuck the branches down over the collar so the tag vanishes, or peel the stickers off if they’re the removable kind. Those bright dots of red and blue announce the price tag from clear across the room.
23. Using a Tree Skirt Too Small to Cover the Hardware

A skirt that stops short of the stand legs is worse than no skirt at all. Now you’ve drawn a neat velvet circle and framed the ugly plastic sitting just outside it.
Size up. The skirt needs to reach past the widest branches and the stand’s whole footprint — or skip it entirely and set the tree in a woven basket or a metal collar instead. Under-sizing the skirt is the base equivalent of a too-short curtain hovering above the floor. Everyone notices, nobody says a word.
A tree skirt has one job: hide the machine underneath. If it can’t do that, it’s just decoration on top of the problem.
22. Choosing a Plastic Collar That Looks Like Printed Wood
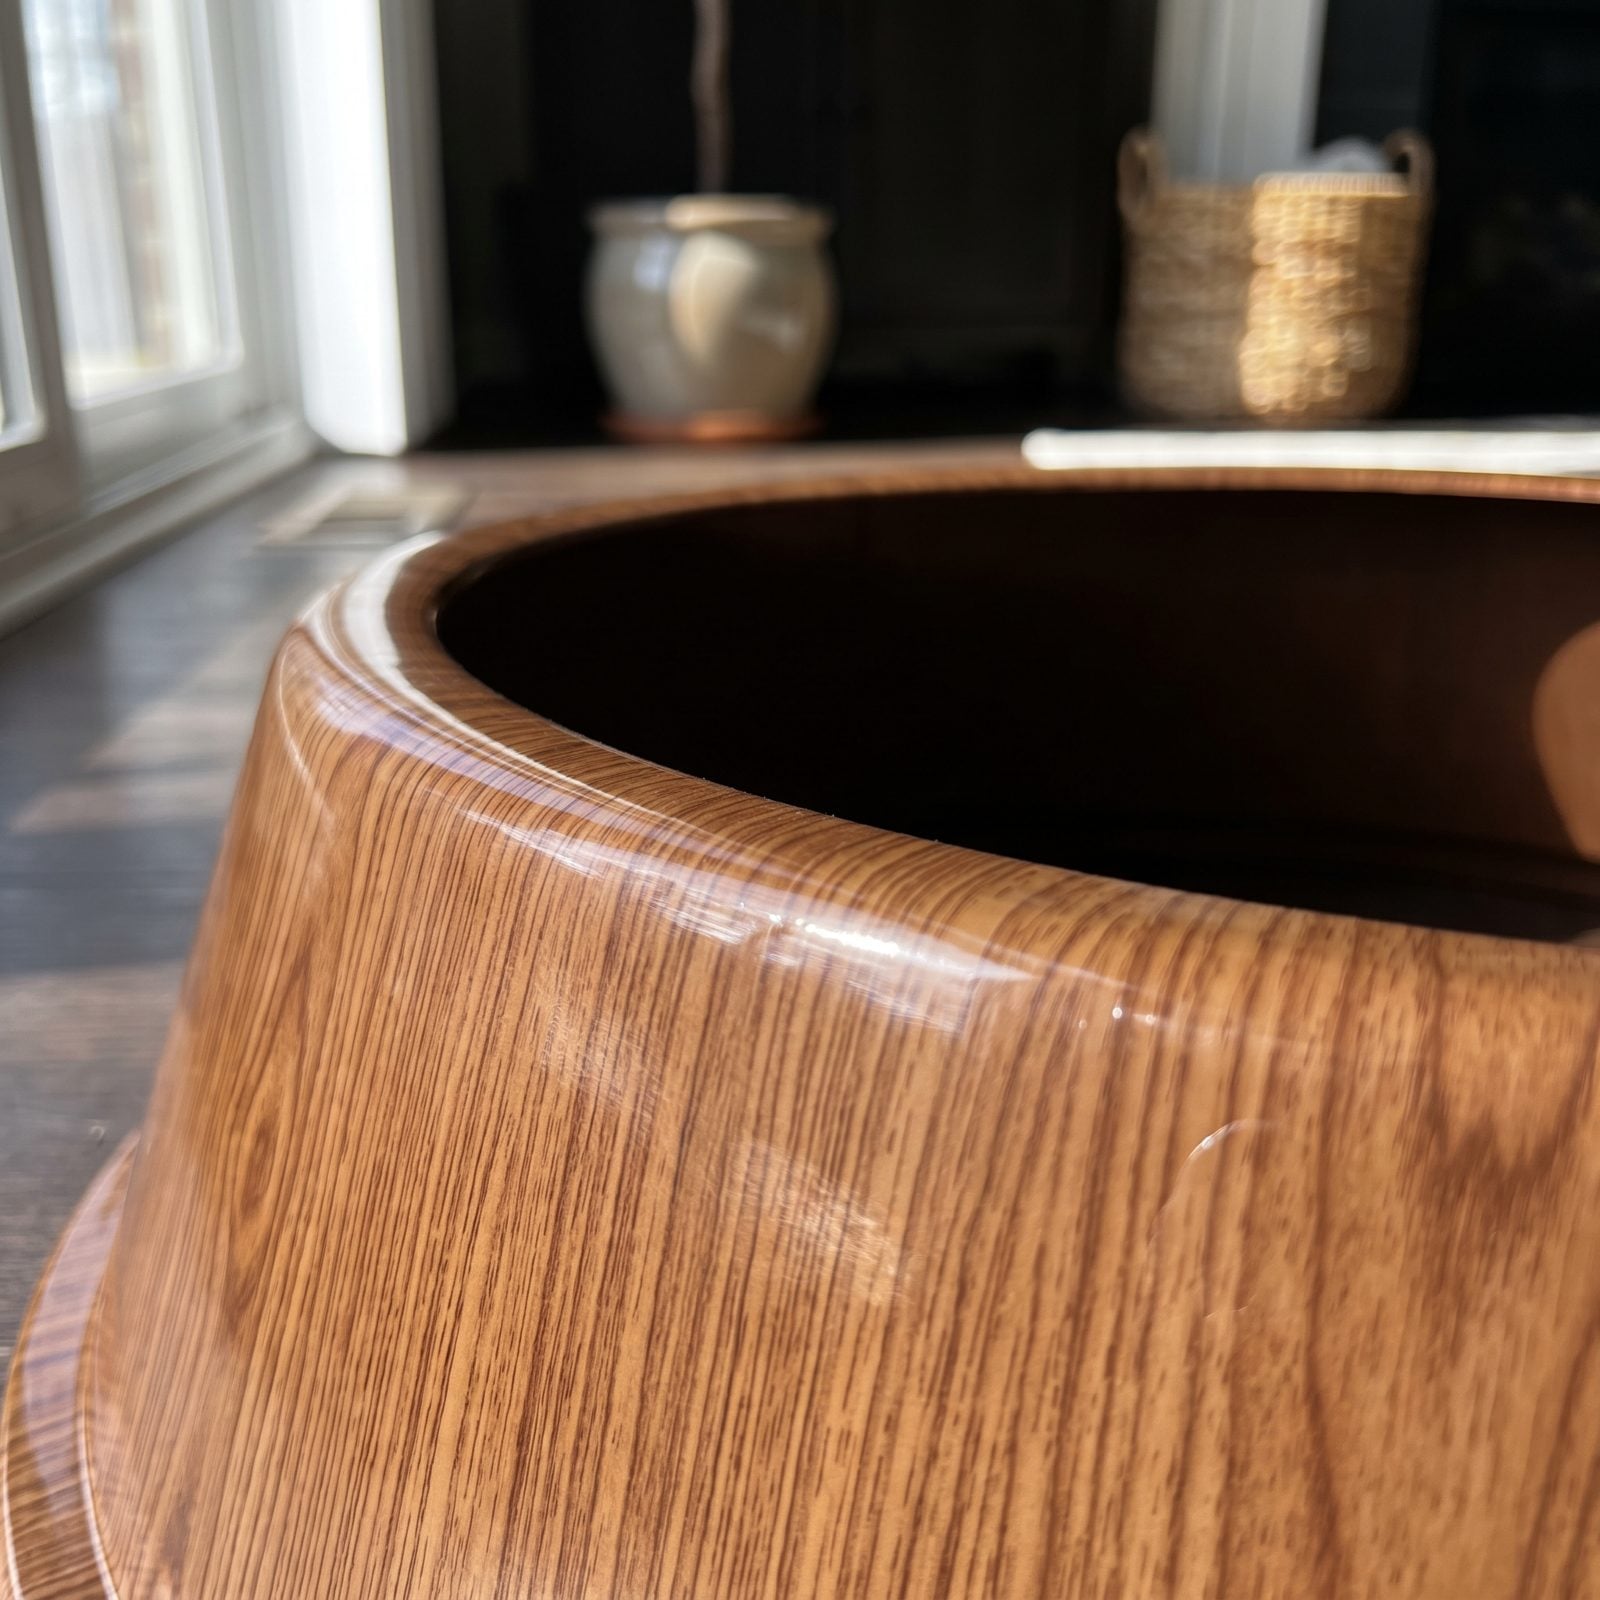
Printed wood grain never fools anyone. The pattern repeats, the plastic throws off a sheen no real timber has, and there’s almost always a molding seam running straight up the middle to seal the deal.
Want the collar look? Buy an actual one — galvanized metal, real woven seagrass, genuine wood staves with a band. The material has to be honest or don’t bother. A metal or seagrass basket also plays beautifully with the kind of natural-texture tan courtyard decor that reads as quietly expensive, which is exactly the register a printed-plastic collar torches in a second.
21. Leaving the Electrical Trunk Connections Visible
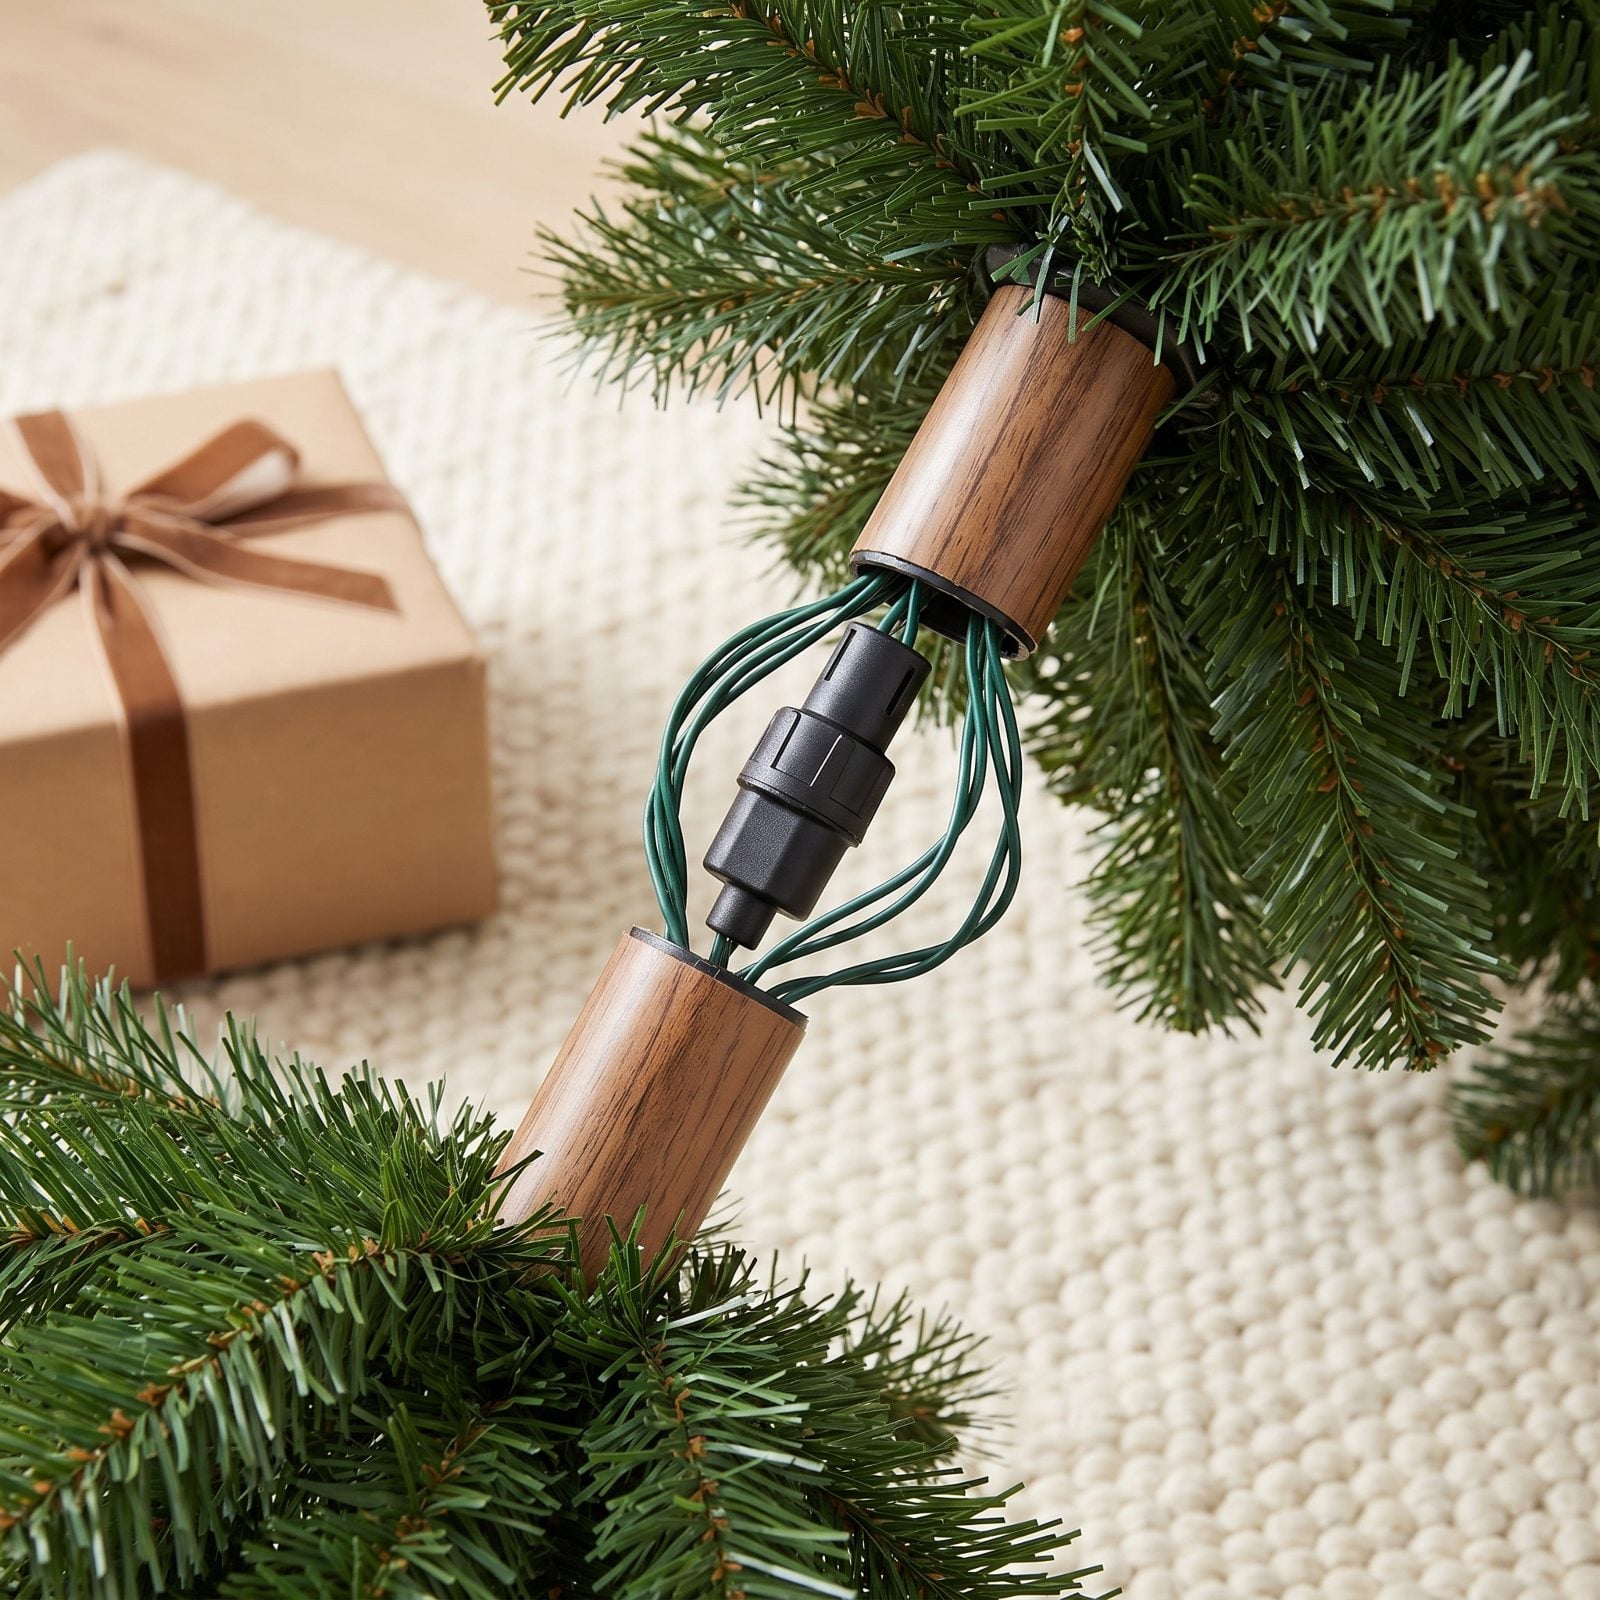
Pre-lit trees connect section to section with plugs at the trunk, and those black connectors and their loops of wire love to peek out between the branches. Once you see them, you can’t unsee them.
After the tree’s assembled and lit, go back and push every plug and every stray run of wire deep toward the pole, then close the branches over them. Fiddly work. It’s also the difference between a tree that looks decorated and one that looks wired, and ten minutes of tucking buries the whole electrical spine.
20. Running a Green Power Cord Across a Pale Floor
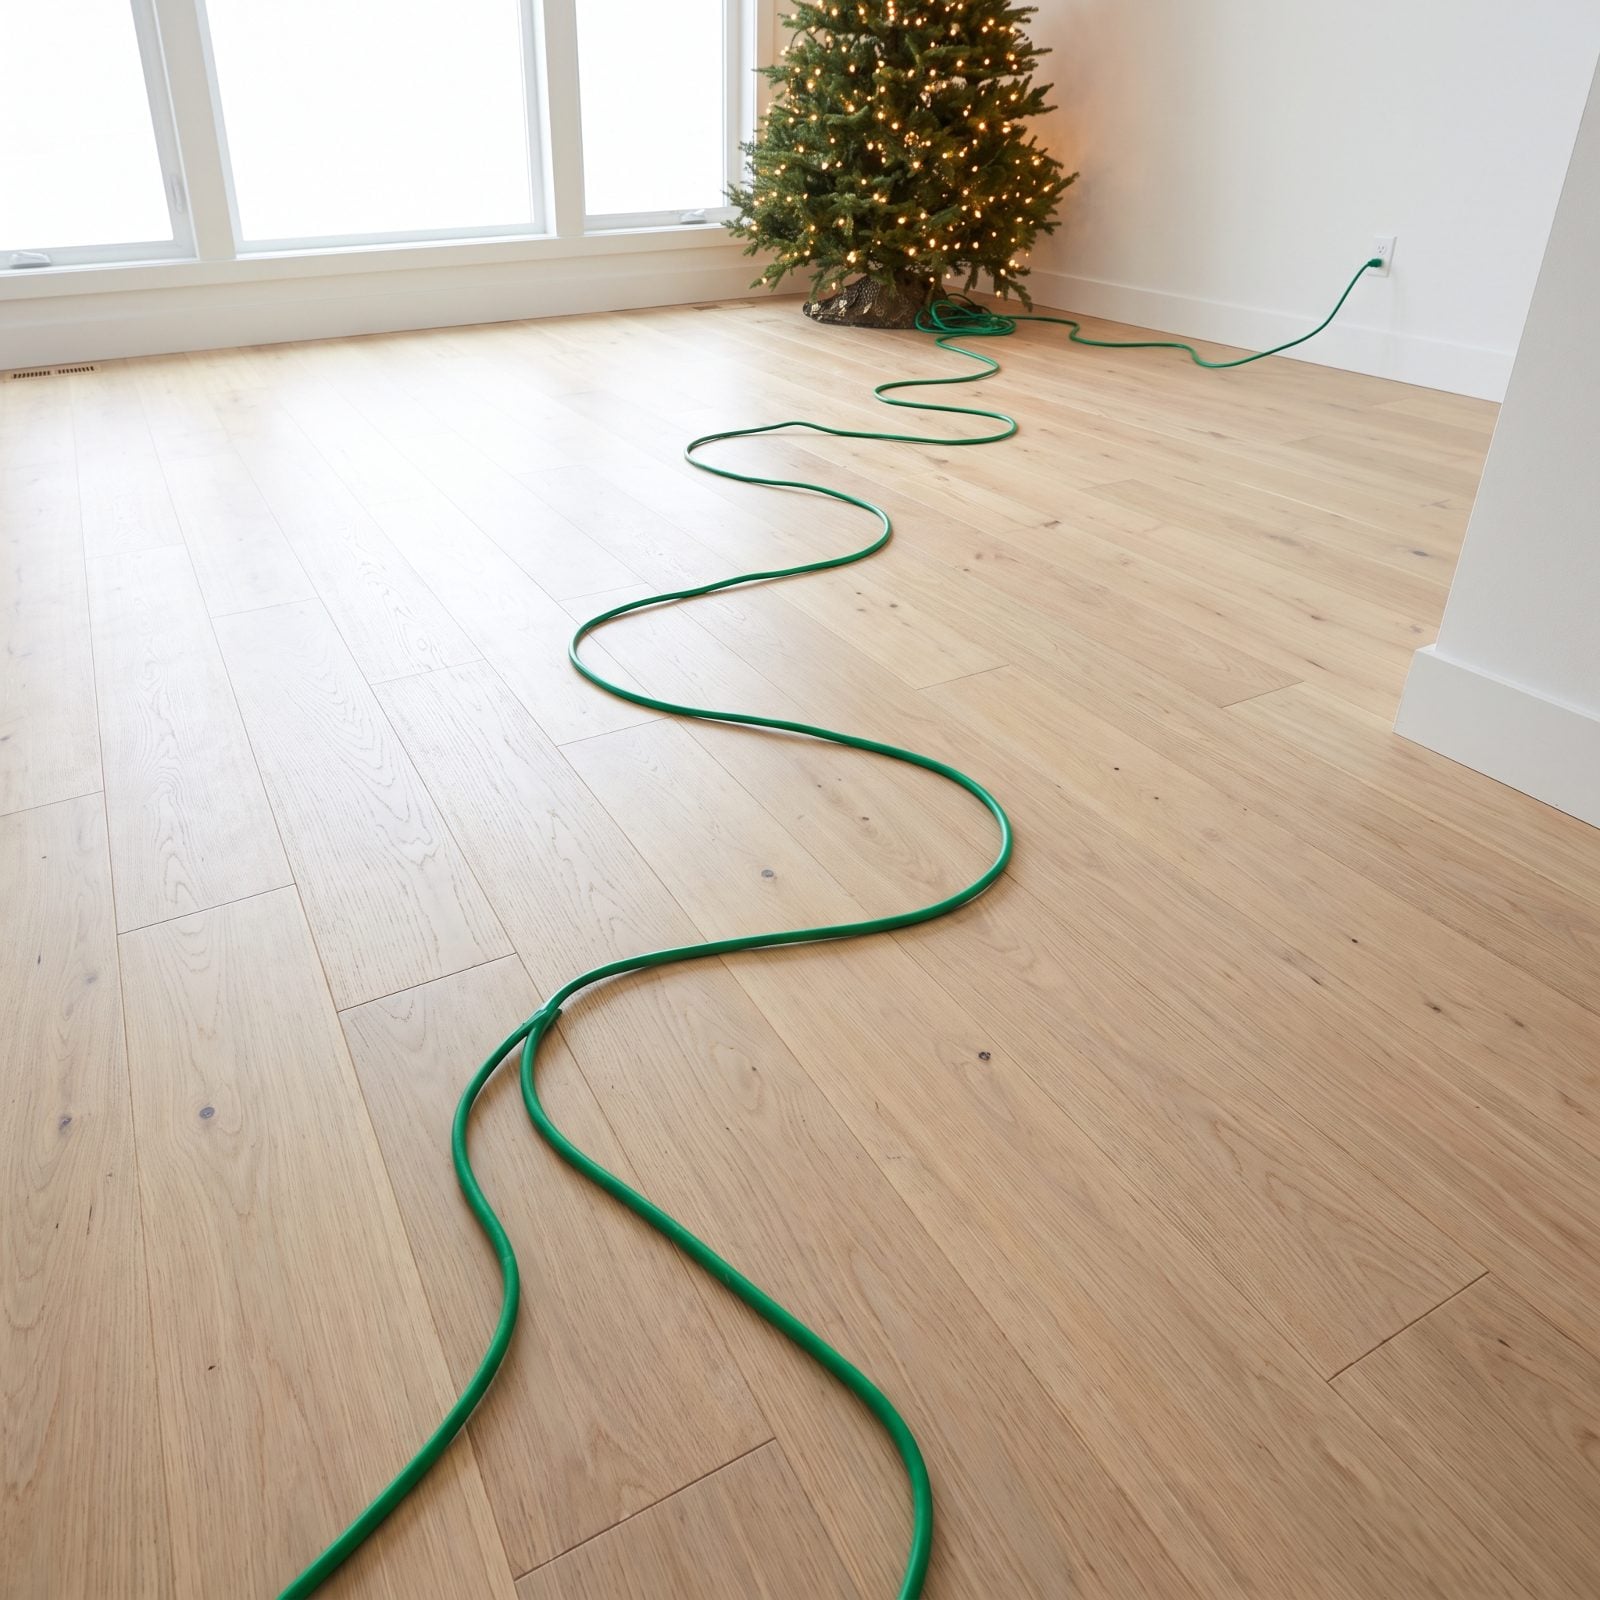
Nothing gives up a tree faster than a green cord snaking across a pale floor. Manufacturers dye the cord green so it hides in the branches, but on oak or cream carpet it does the exact opposite and becomes the first thing your eye lands on.
Run it along the baseboard, tuck it under the rug, or use a flat cord cover that matches the floor. We ignored this for years and kept wondering why our tree looked cheap in photos. The cord. Every single time.
19. Using Too Few Lights for the Tree’s Density

You can spot this one from across the room. The tree glows in patches and goes dark in the middle, and the whole thing reads flat.
Here’s where most people underspend: figure on about 100 lights per foot of tree, minimum. A seven-foot tree wants around 700, and a thousand looks better. Buy far more than feels reasonable. A dense, evenly lit tree hides its plastic; a sparse one puts it on display.
18. Wrapping Lights Only Around the Outer Surface
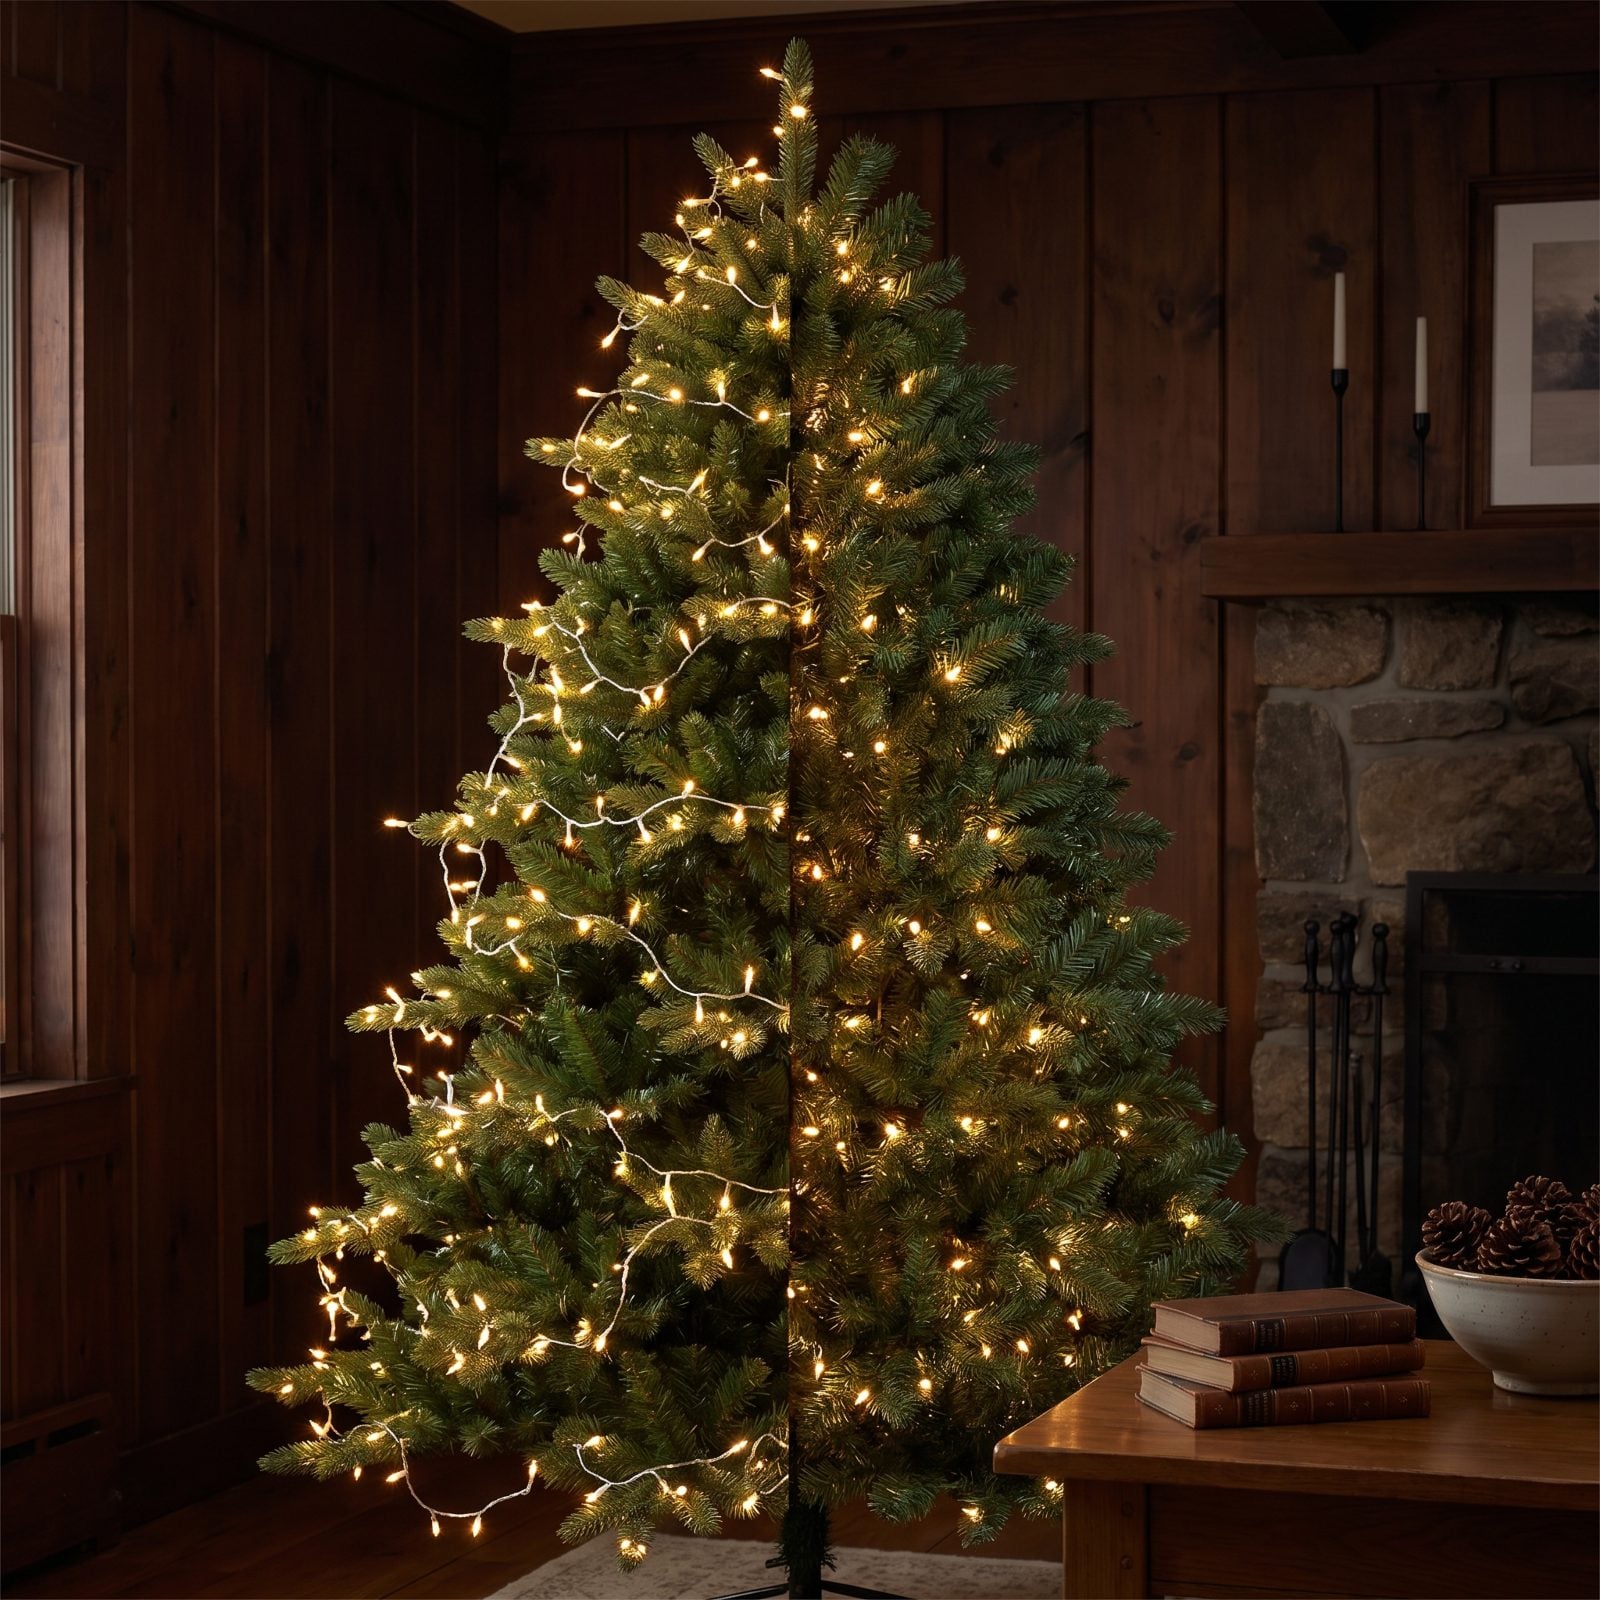
Real depth comes from lights buried deep near the trunk, not draped across the surface. Skip the interior and you get a glowing shell with a black hole in the middle.
Work each strand in toward the pole and back out to the tips, branch by branch. Tedious? Absolutely. But it’s the single biggest upgrade you can make to a fake tree, because it fakes the one thing plastic can’t manage on its own: dimension. A well-lit interior throws light back through the branches the way a real tree catches the sun.
17. Mixing Incompatible Light Temperatures

Two strands, two color temperatures, one very obvious seam. One side glows amber and cozy while the other reads blue and clinical, and your brain clocks the split immediately even if you can’t name why.
Pick one temperature and commit. Warm white, somewhere around 2700K, flatters skin, ornaments, and a room at night. Cool white looks crisp but goes sterile fast. Adding to an existing pre-lit tree? Match the original as closely as you can, and check both lit and side by side in the store before you buy. Same warmth logic that makes a kitchen lighting setup feel inviting instead of harsh.
16. Leaving Pre-Lit Sections With Noticeably Different Brightness
🔥 Would you like to save this?
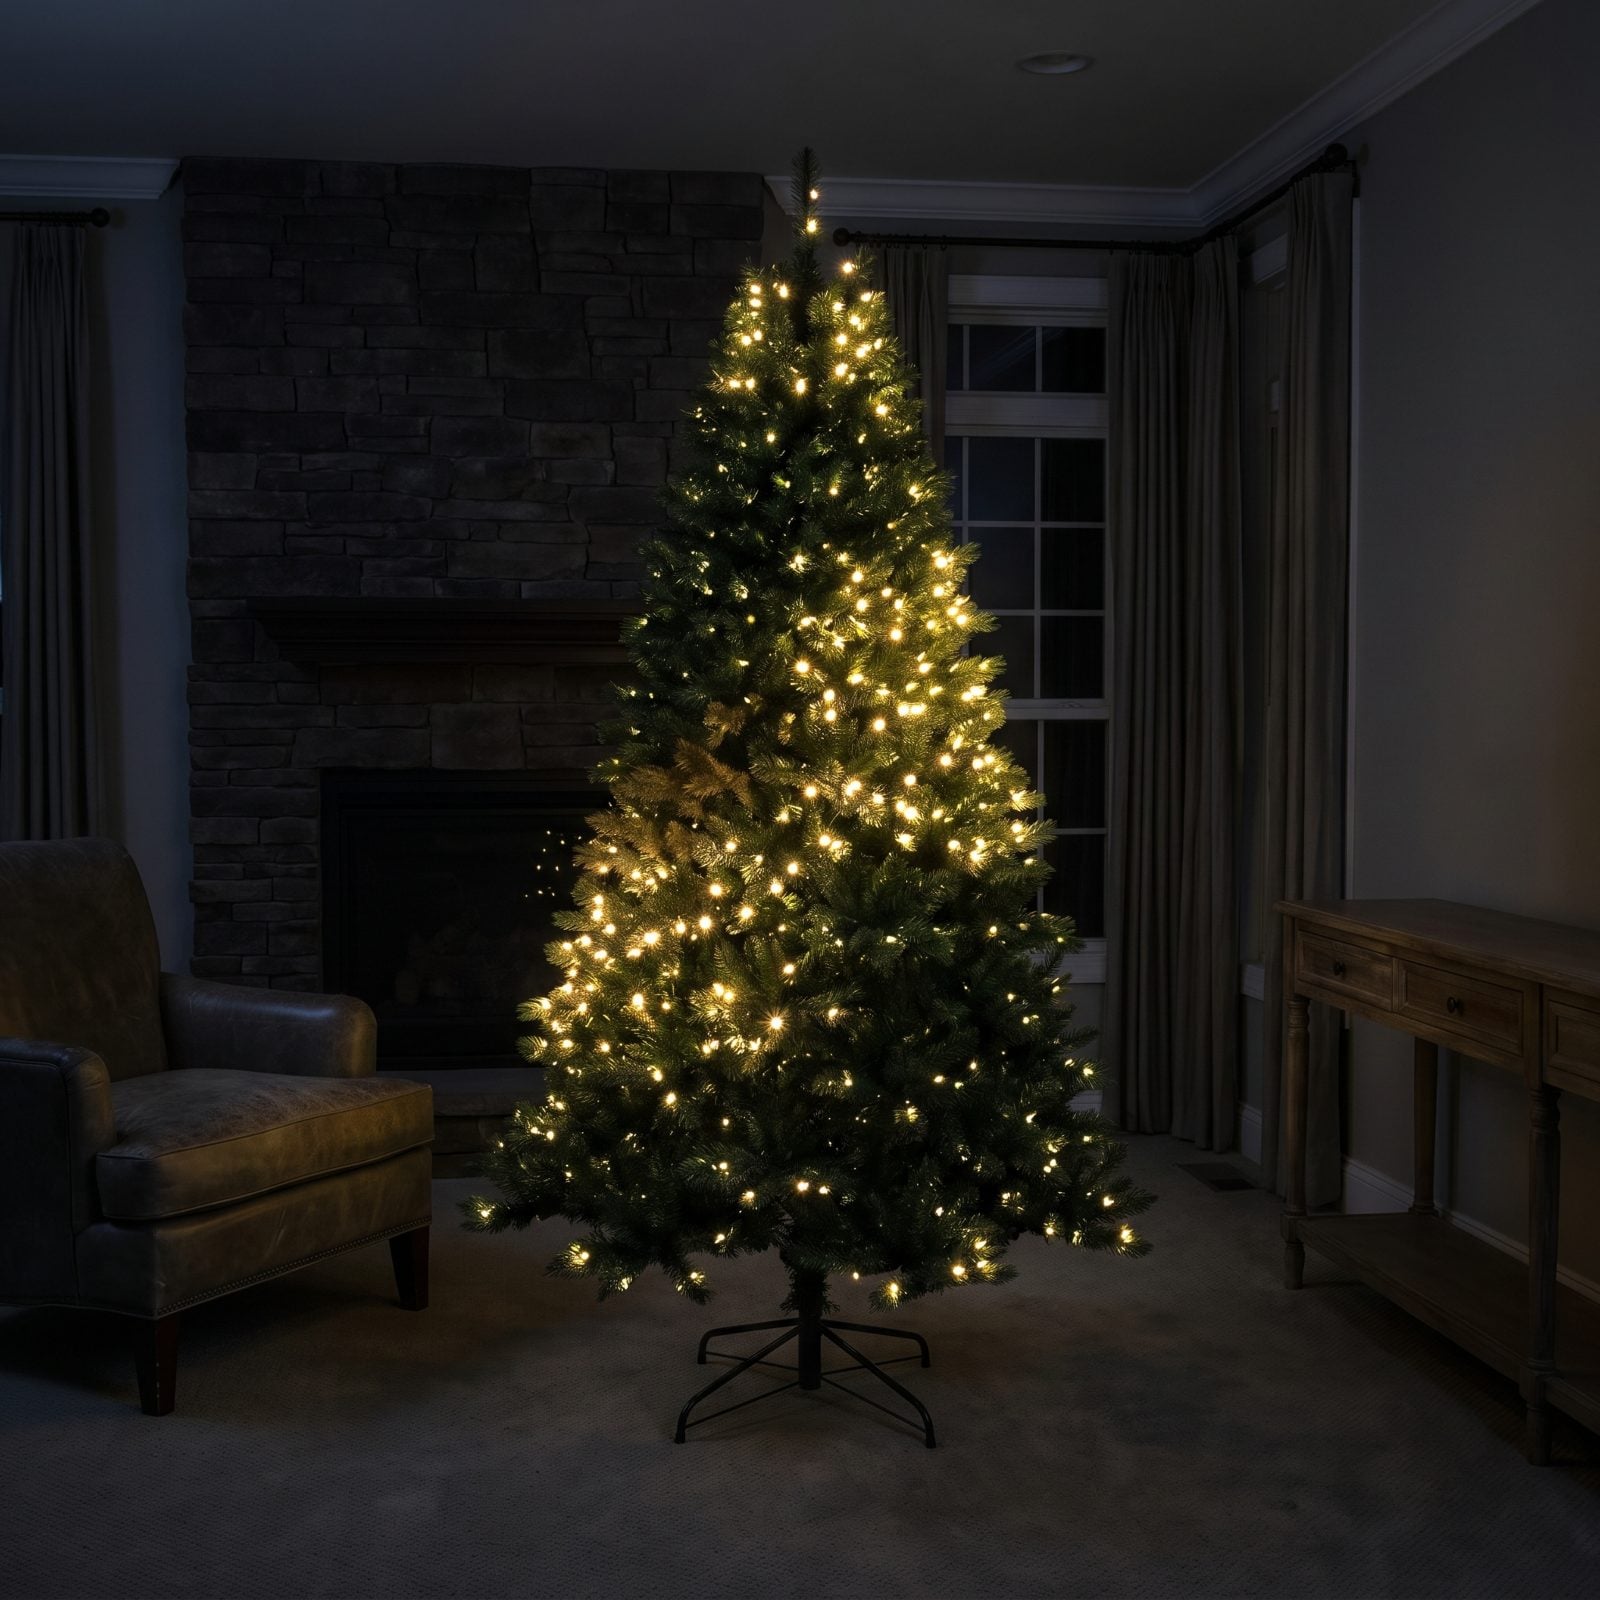
Pre-lit trees come in sections that plug together, and those sections age at different rates. One run of bulbs fades or half-fails, and suddenly there’s a dark stripe across your tree that no amount of ornaments will hide.
Test every section before you decorate. Swap dead bulbs, replace fuses, and if a whole run is dim, layer a supplemental strand of matching lights over it. A tree that glows evenly top to bottom looks intentional. One with a faded band looks like it’s on its last season — which, honestly, it usually is.
15. Using a Flashing Light Pattern That Overpowers the Tree
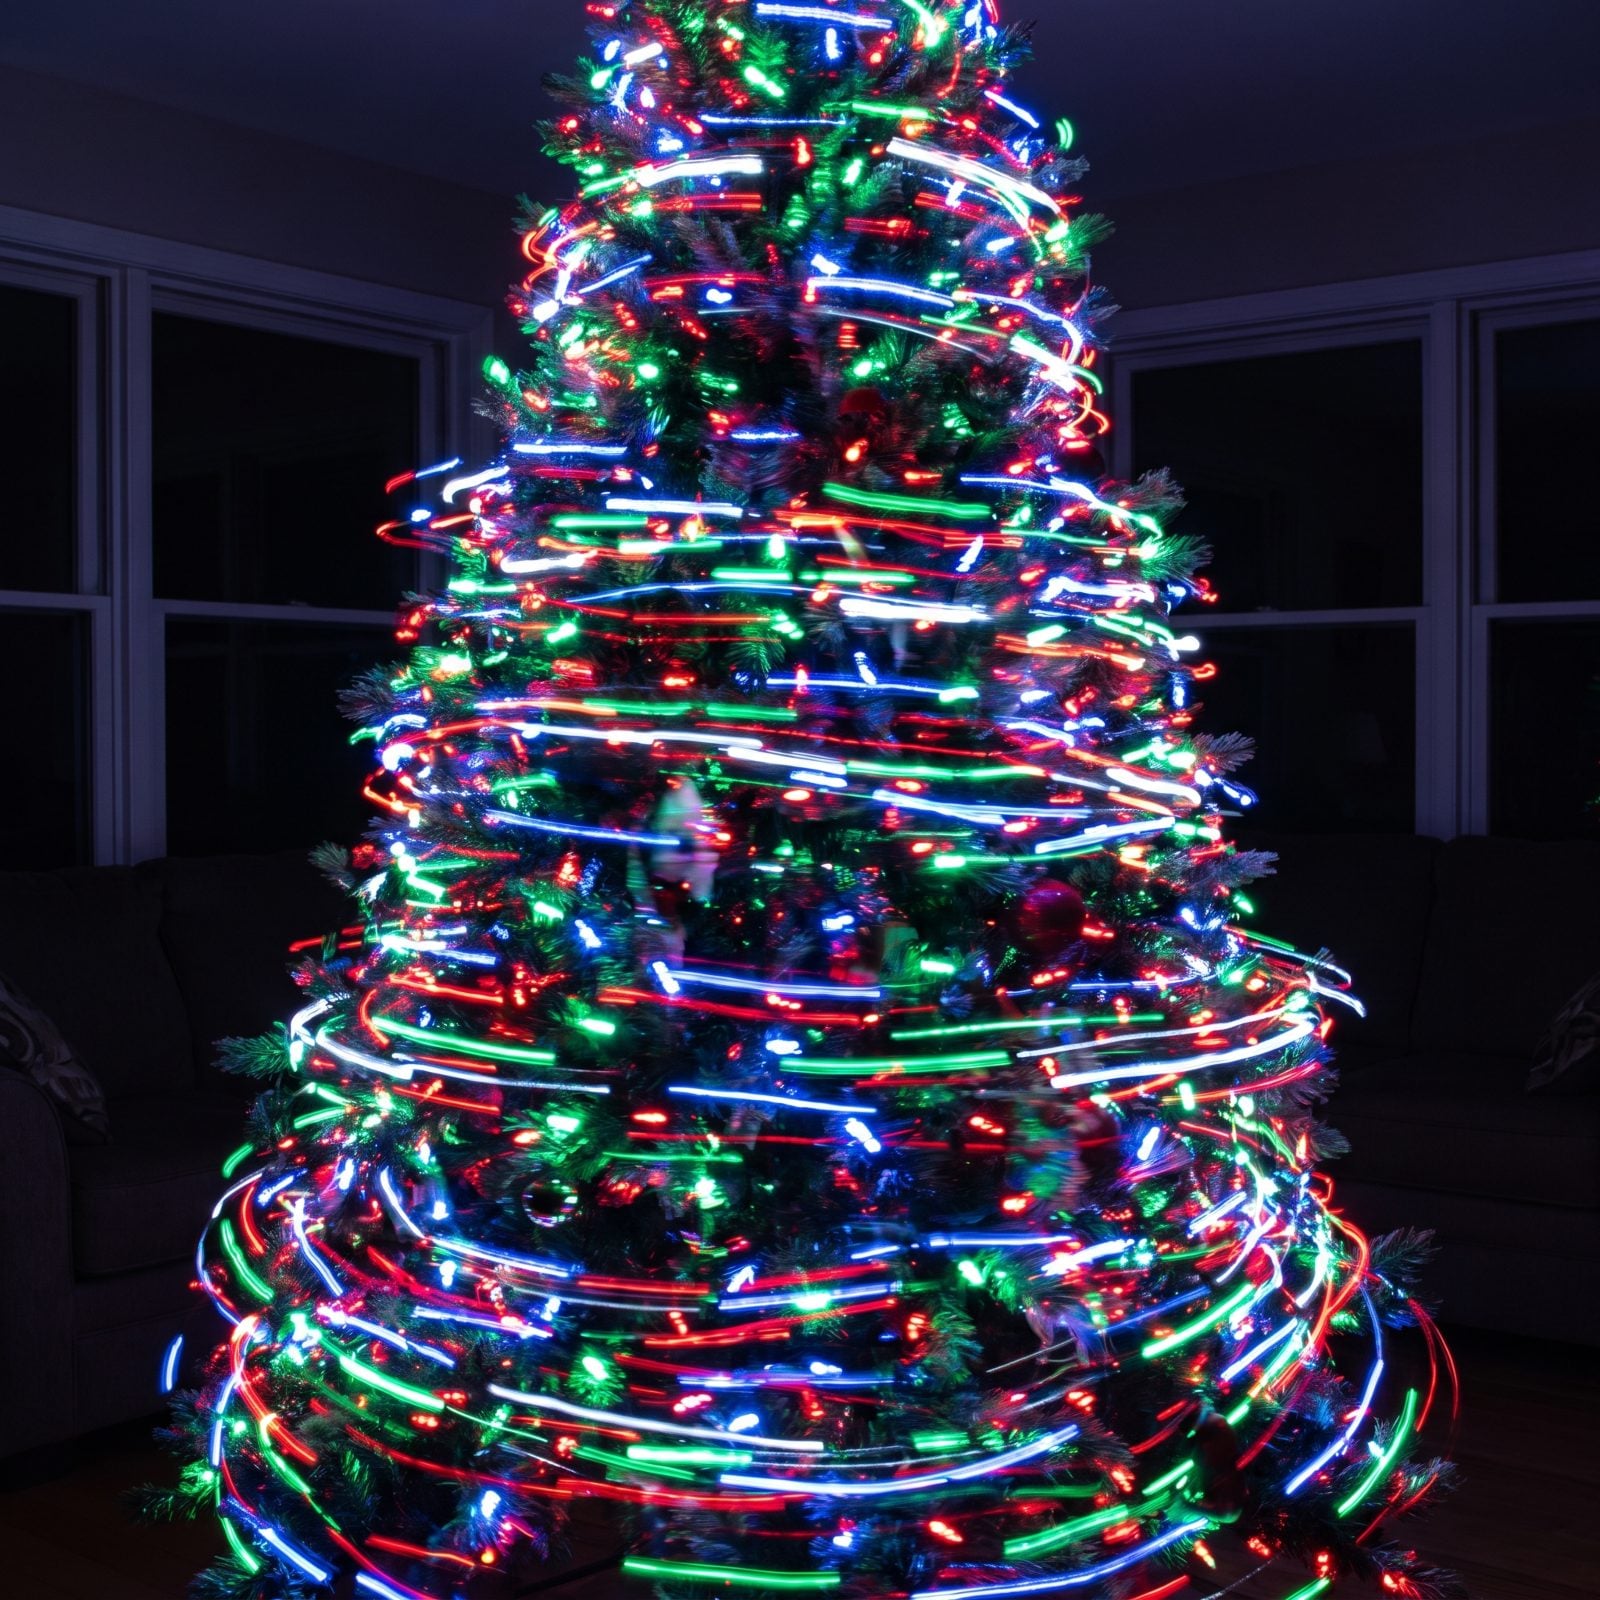
The multifunction controller comes with eight settings, and seven of them are a mistake. Chase, twinkle, and strobe modes chop the tree into bright patches and dark holes — exactly the plastic-showing look you’re trying to dodge.
Steady on. Always. A tree lit at a constant, even glow reads warm and expensive, while a flashing one looks like a display window nobody dressed properly and gives every guest a low-grade headache by dessert. I will die on this hill.
14. Hanging Every Ornament From the Branch Tips

Tip-hung ornaments give you a flat curtain of baubles with a hollow, plastic-filled center behind them. The tree reads as a ring instead of a mass.
Hang some ornaments deep, nestled close to the trunk on interior branches, where they catch and bounce light from inside and build the depth a fake tree so badly needs. Save your prettiest, most reflective pieces for that middle layer where the light lives, and let the tips carry the lighter, smaller stuff.
13. Decorating Only the Front Face
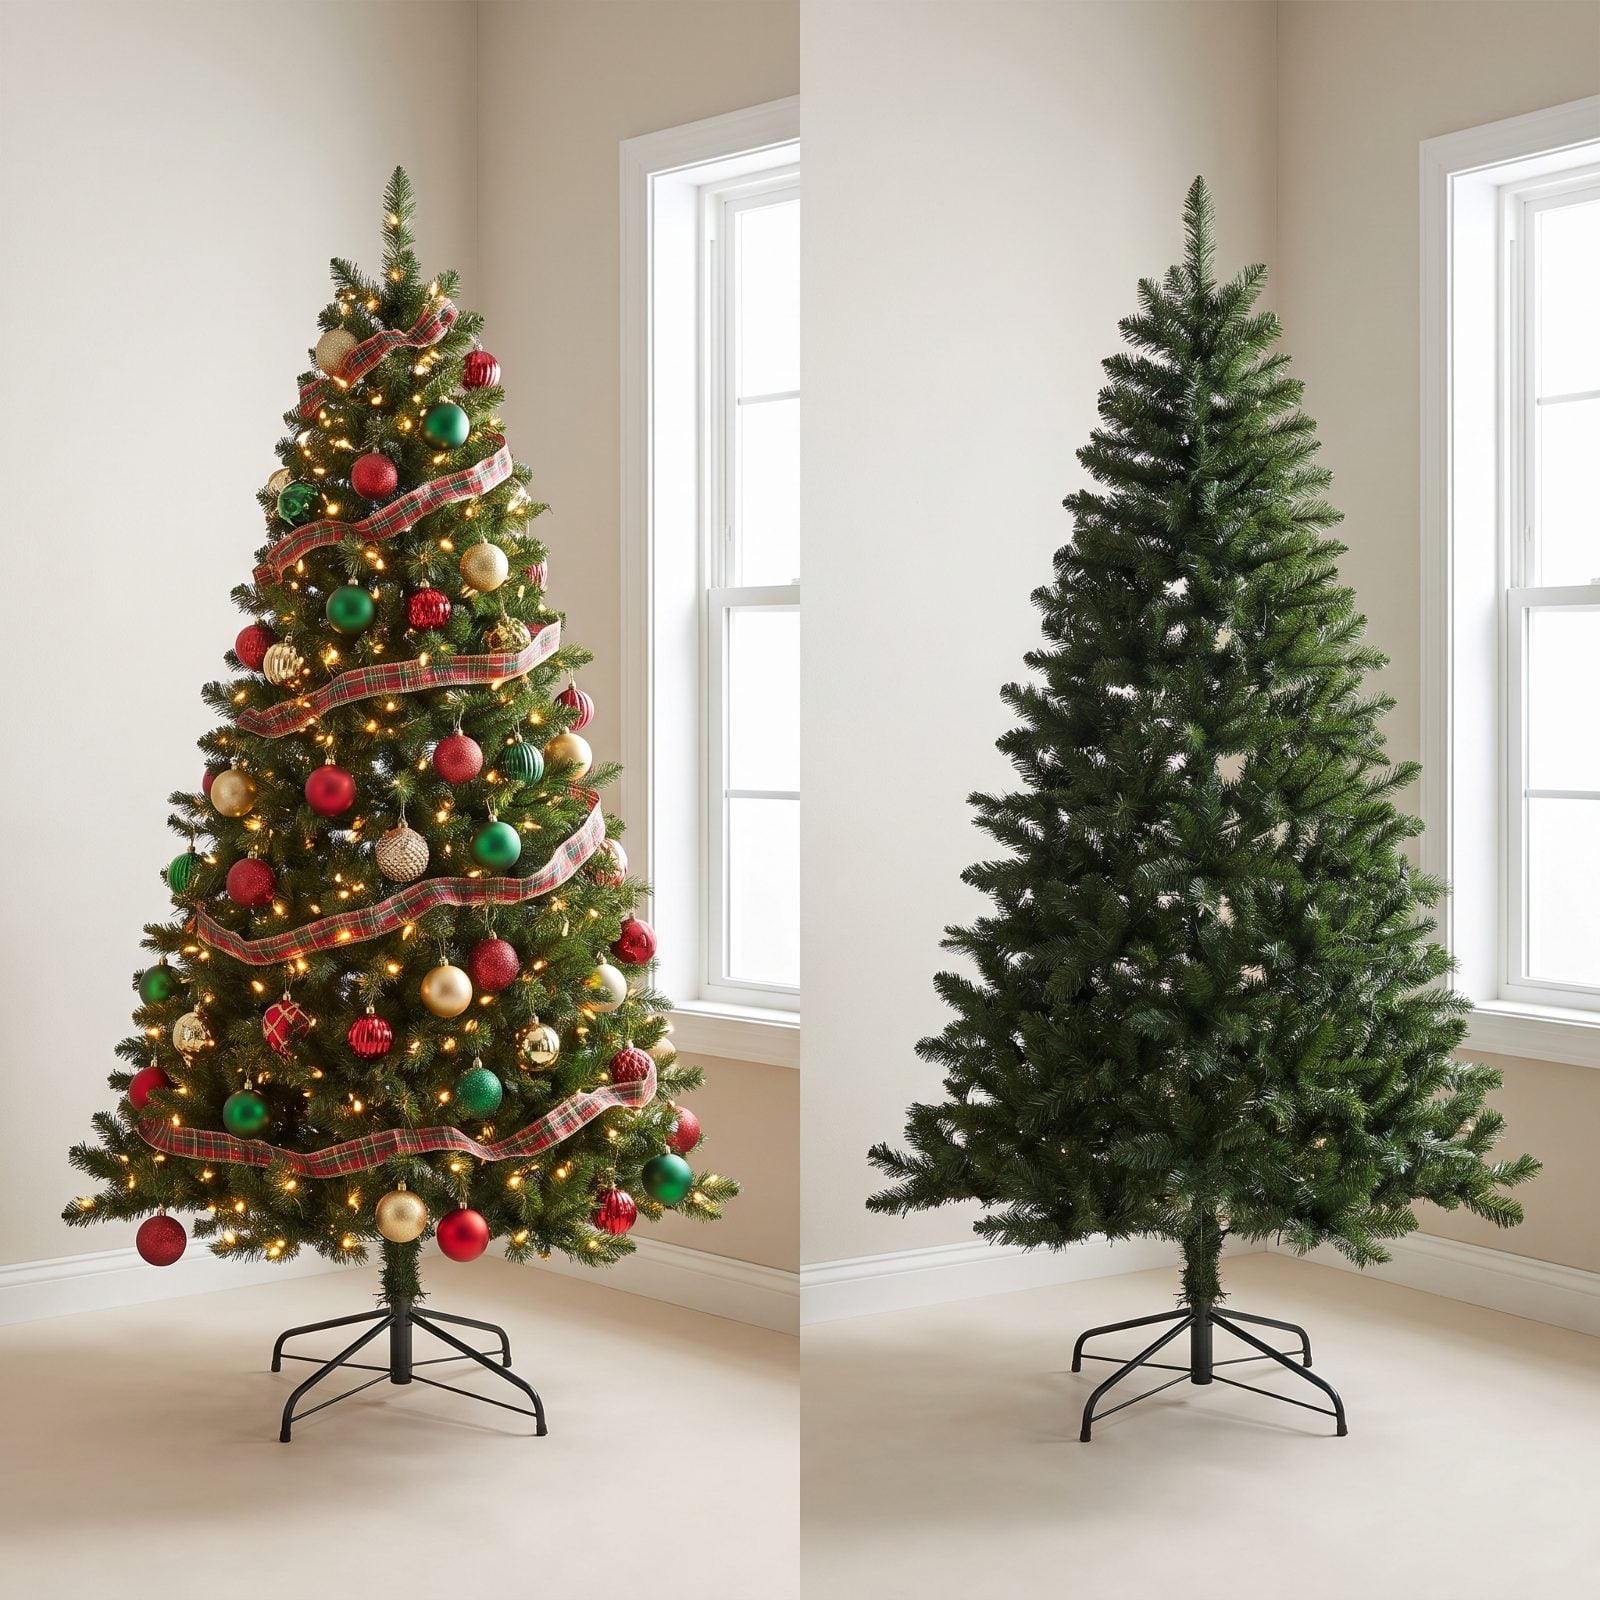
Push the tree into a corner and it’s tempting to decorate only what you’ll see. Then someone walks around it, or it reflects in a window at night, and that bare plastic back gives the whole thing away.
Decorate the full circumference, even lightly on the back. You don’t need your best ornaments back there — but the branches shouldn’t be naked either. Matters even more in an open plan or a light hallway renovation, where the tree gets seen from every angle all evening.
12. Using Too Many Lightweight Plastic Ornaments

Thin plastic balls have a tell. They catch light in a hard, flat, hollow way, with seam lines running down the sides, and a whole tree of them reads cheap no matter how many you pile on.
Mix in weight and texture. A few glass ornaments, some matte finishes, natural materials like wood or felt — anything with real heft. You don’t need to replace everything. A handful of substantial pieces scattered among the plastic tricks the eye into reading the whole tree as richer. Contrast in finish is what sells it, the same way one light sofa looks pricier next to a nubby wool throw than it does beside more of the same.
11. Leaving Cheap Ornament Caps and Strings Visible

Up close, the cheapest thing on most trees isn’t the ornament. It’s the hardware. Flimsy metal caps, white cotton string tied in knots, gold hooks jutting out at angles — all of it screams discount bin.
Swap in dark green or brown ornament hooks that vanish into the branches, and turn crooked caps so they face inward. Anything hung on string, tuck the knot behind a branch. A five-minute fix that nobody consciously notices and everyone unconsciously registers. The details you hide are what make the tree look intentional.
10. Using One Ornament Size Across the Entire Tree

One ornament size reads flat from across the room. Your eye needs a rhythm to travel across — big, medium, small, repeat. Skip that and the tree turns into wallpaper: technically decorated, visually asleep.
Buy three sizes minimum. The large baubles anchor everything and carve out depth near the trunk, mediums handle the middle, and the little ones tuck into gaps to catch light where the branches thin out. That variation is what separates a tree that looks styled from one that just looks stocked.
9. Creating Obvious Horizontal Rows of Decorations
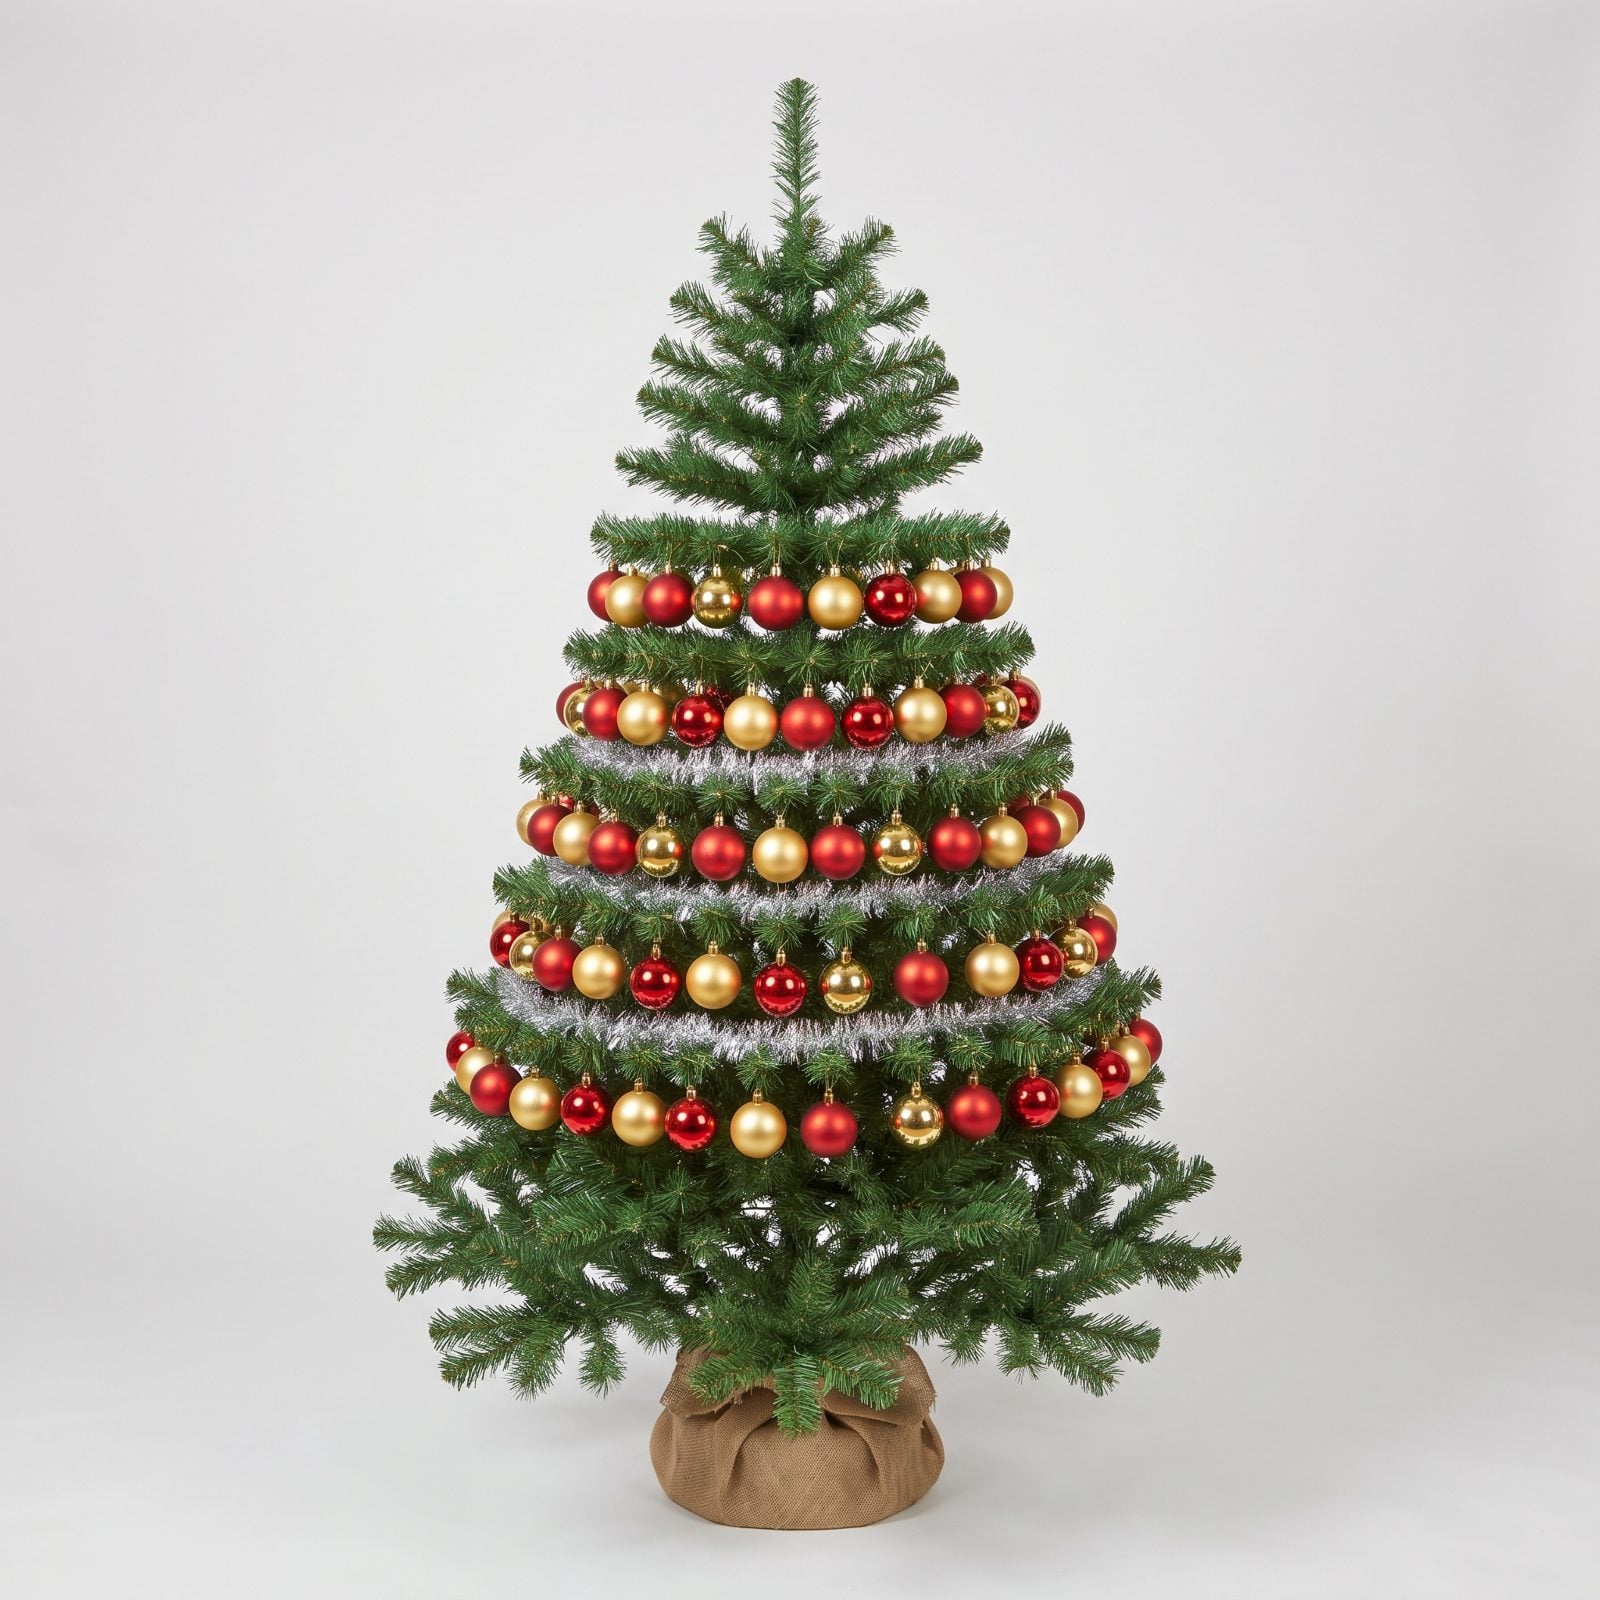
Rows happen because you hang ornaments at whatever height feels comfortable, which is chest level, over and over until the whole thing looks like a spreadsheet. Nobody means to do it. Everybody does it.
The fix is boring and it works: hang deep and shallow, high and low, tucked near the trunk and out on the tips. Stagger everything. A tree should look like the ornaments landed there, not like they lined up for roll call.
8. Wrapping Ribbon Like Tight Stripes Around the Tree

The barber-pole wrap might be the most common ribbon mistake there is. Pulled tight in a spiral, the ribbon flattens against the branches and reads like packaging tape, fighting the shape of the tree instead of moving with it.
Ribbon should dive in and out of the branches, never lie on top. Vertical cascades or loose diagonal drops give it dimension. The tight horizontal wrap does the opposite — and it makes even a pricey tree look like it got decorated during a fire drill.
7. Using Wired Ribbon Without Shaping the Loops
🔥 Would you like to save this?
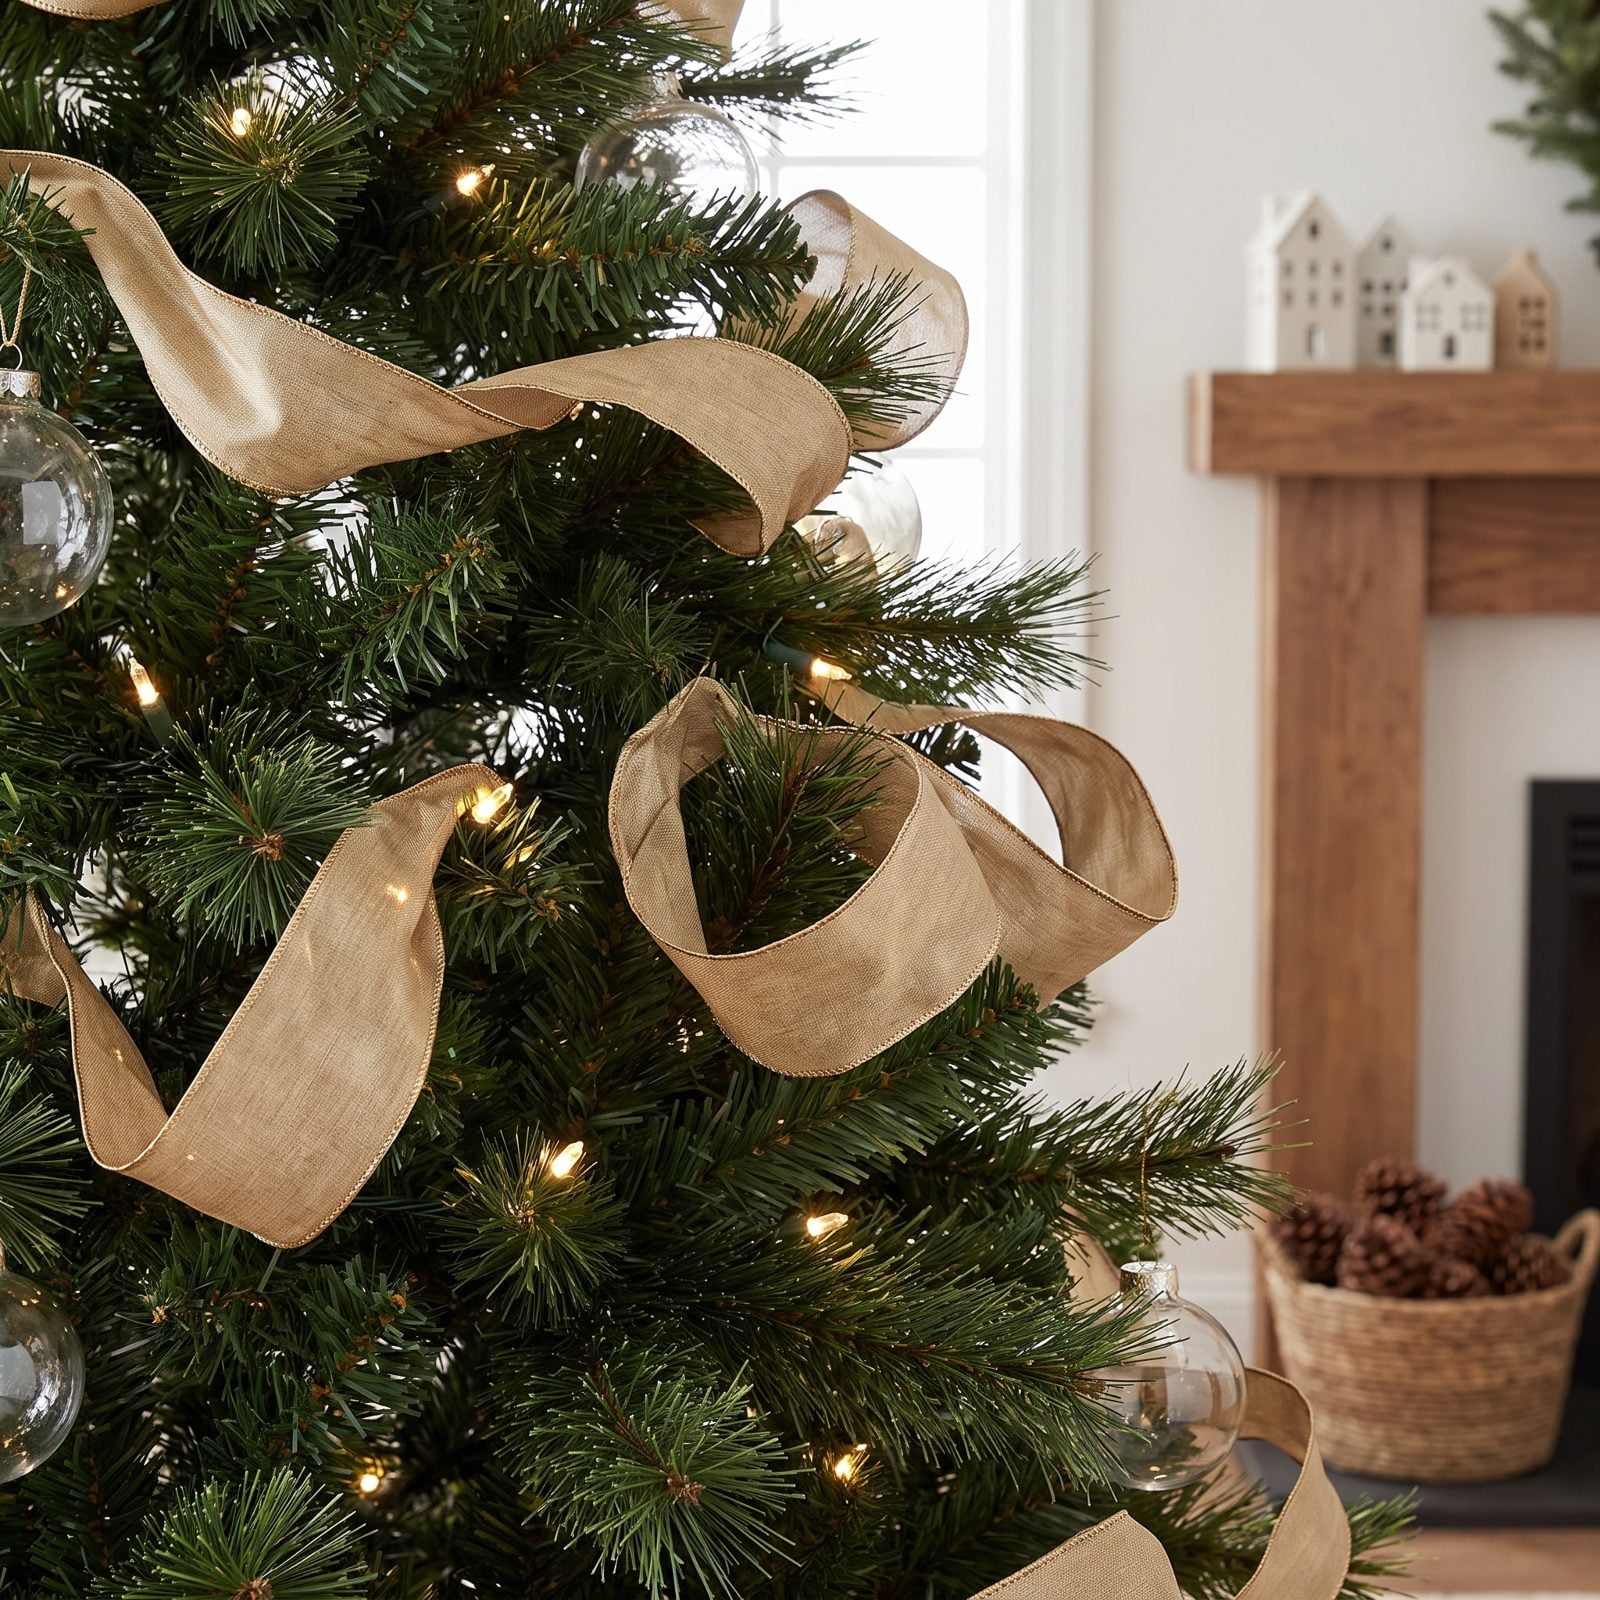
Wired ribbon has a superpower and most people ignore it entirely. That thin wire baked into the edge lets you pinch, twist, and hold a shape. Skip that step and you’ve paid for premium ribbon that behaves like a limp bookmark.
So pinch it into loops and let the wire hold them proud of the branches. Fluff the ends. Bend a curl. Ten seconds of shaping turns a flat length into something with real volume, and volume is what separates a designer tree from a default one.
6. Choosing Thin Ribbon That Disappears Into the Branches
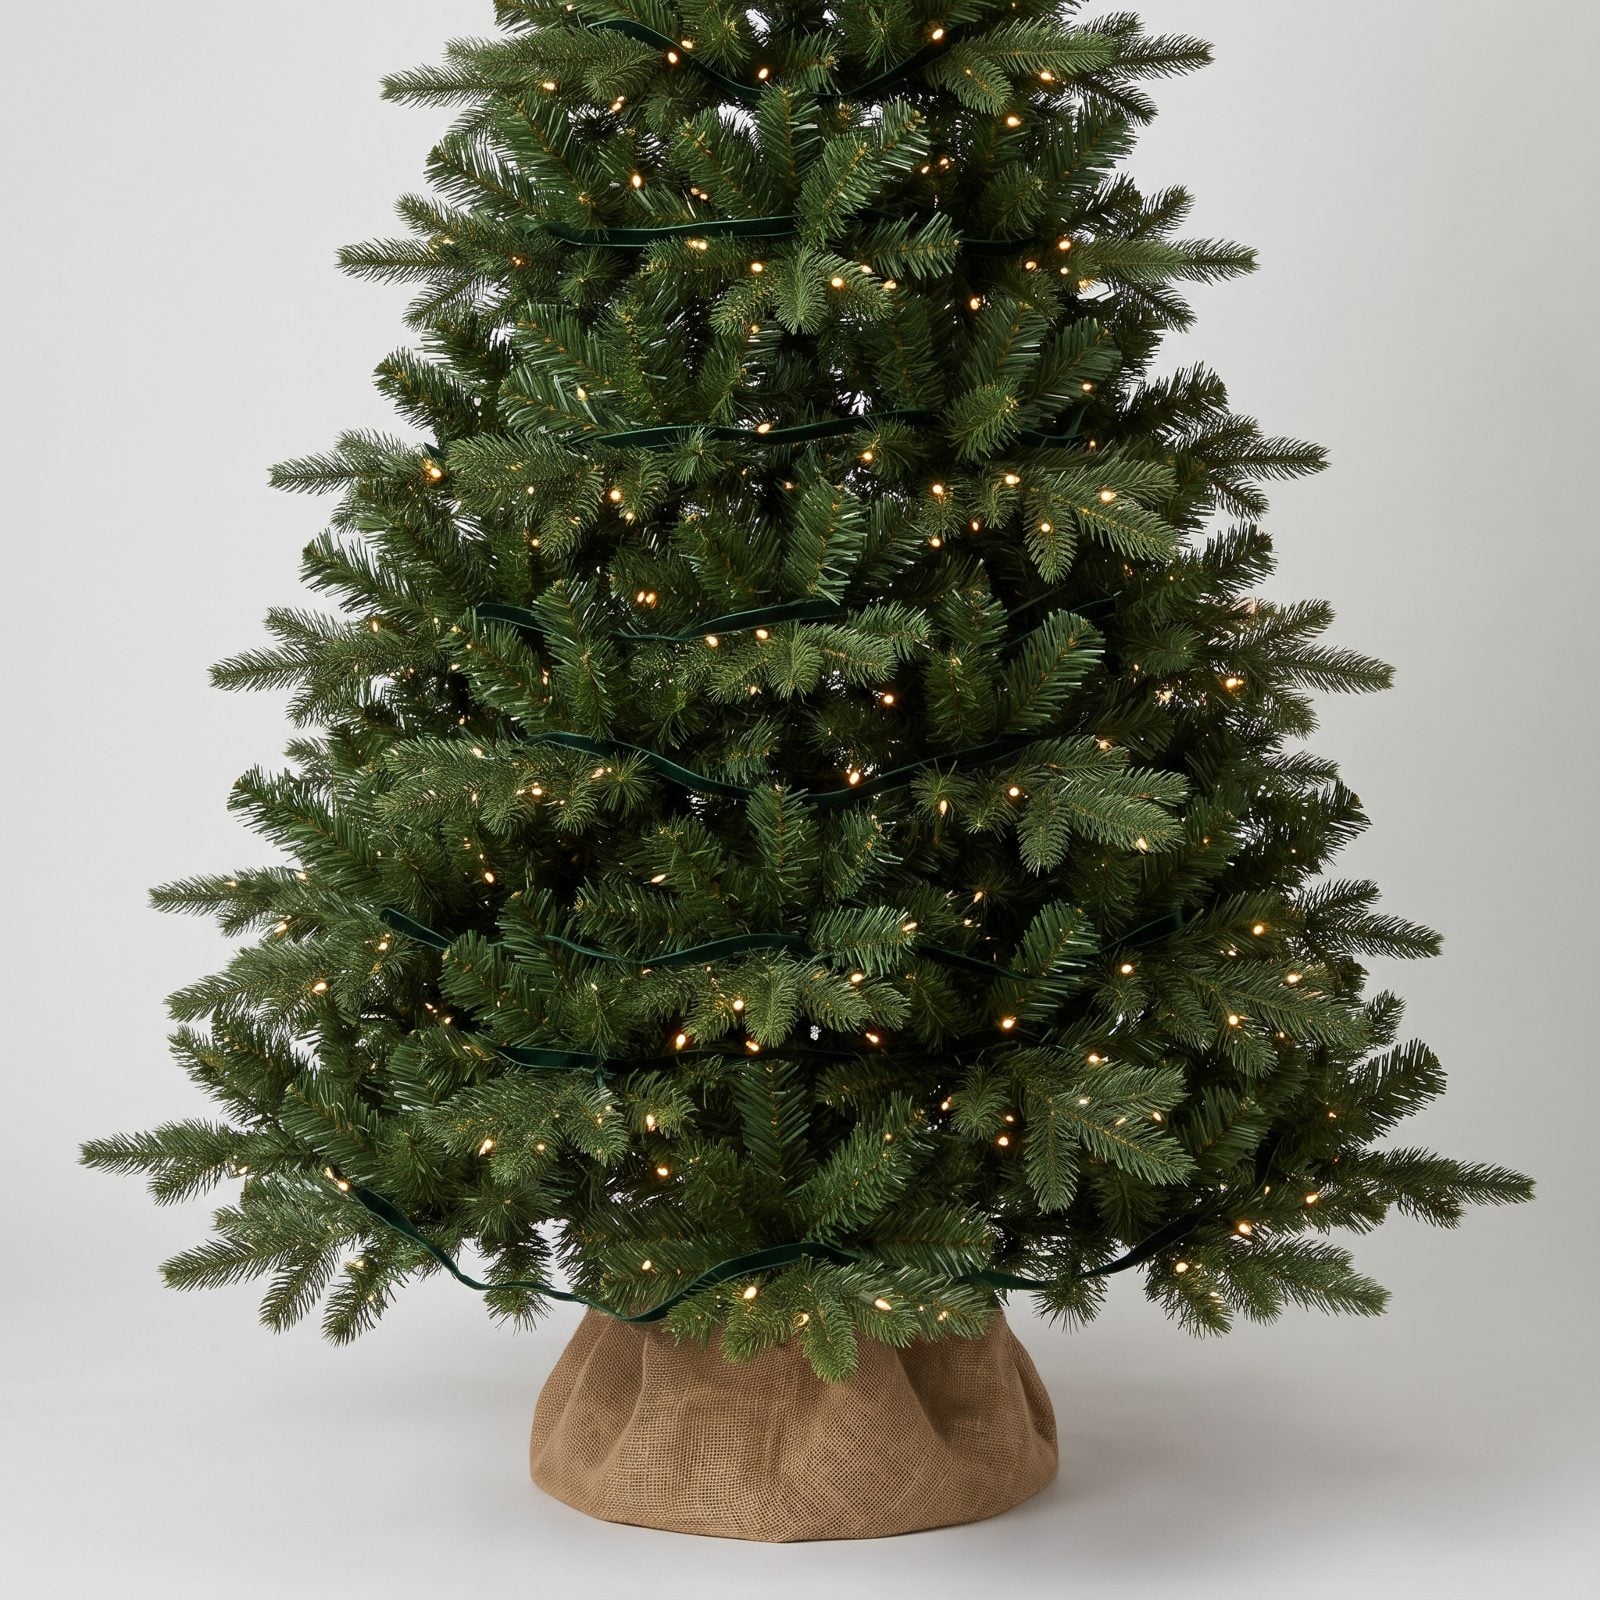
Thin ribbon on a full-size tree is a whisper in a stadium. It gets swallowed whole. You spend twenty minutes weaving it through the branches and from six feet away it reads as absolutely nothing.
Match your ribbon to your tree. A seven-to-nine-foot tree wants ribbon two-and-a-half to four inches wide — wide enough to hold its own against big branches and carry across a room. Skinny ribbon belongs on a tabletop tree and almost nowhere else.
5. Adding Too Many Competing Ribbon Patterns

Three patterns competing at once is the classic overcorrection. You bought good ribbon so you used all of it. Now the tree has plaid, polka dots, and stripes all arguing at the same volume, and your eye has nowhere to land.
Pick one hero pattern and let it lead. Want a second ribbon? Make it a plain solid or a quiet texture that supports instead of shouting back. Restraint on a tree looks expensive. A pattern pile-up looks like a clearance bin.
4. Draping Bead Garlands in Perfectly Even Scallops
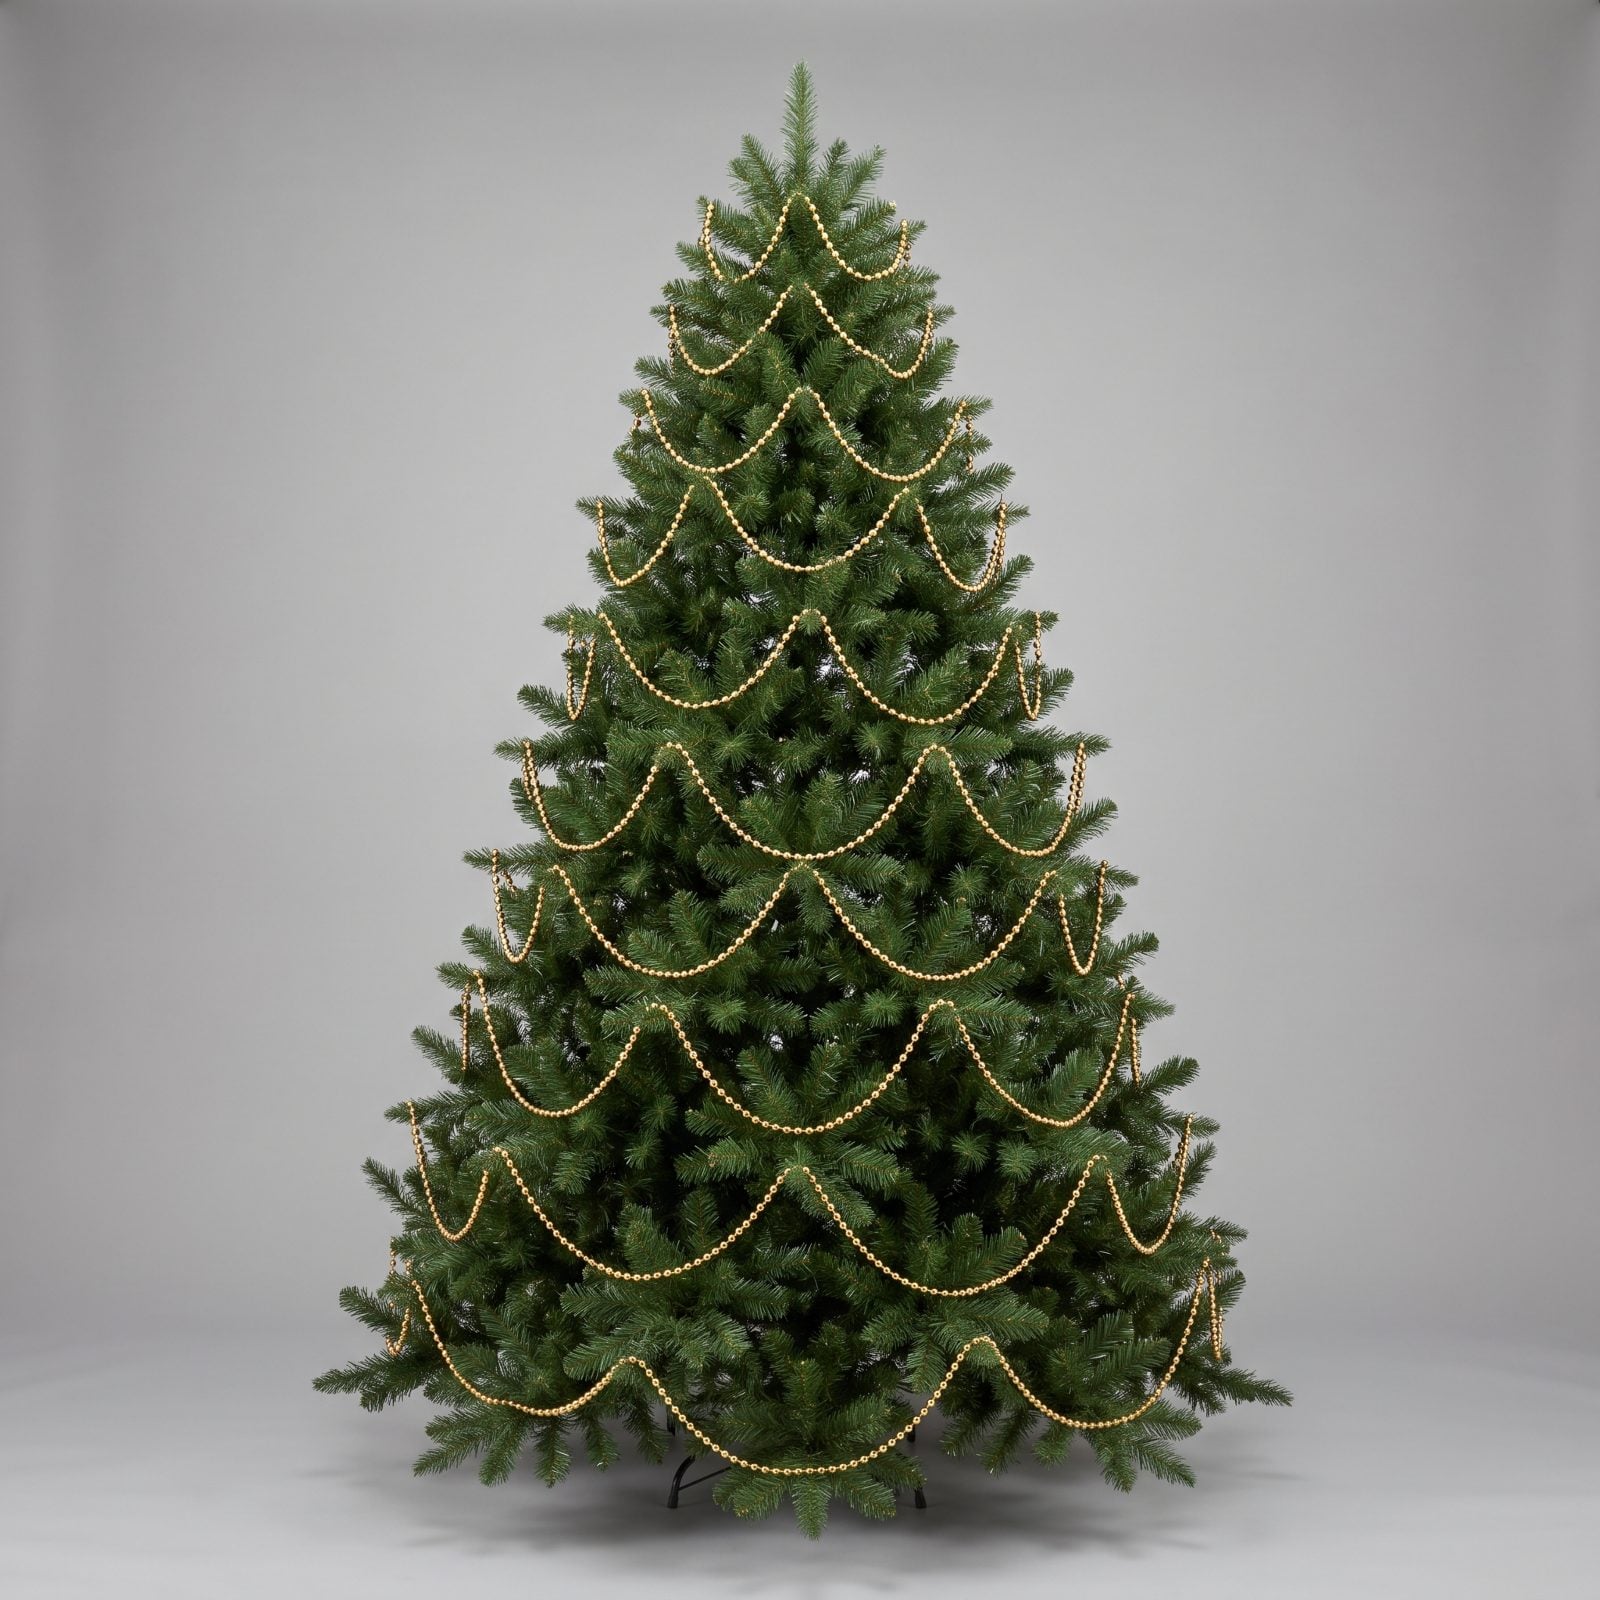
Perfect scallops look like a diagram — every swag identical, every gap matched, the garland behaving like a math problem instead of a decoration. It reads rigid, and rigid reads cheap.
Vary the depth of each drape. Let some swags dip low, some ride shallow, some vanish behind branches and reappear a foot over. That looseness is what makes a garland feel like it belongs to the tree instead of being bolted on. Nature doesn’t do matching intervals, and neither should your beads.
3. Using Tinsel That Emphasizes Every Empty Gap

Tinsel is supposed to fill. On a thin tree it does the opposite. The shiny strands catch light, and light is exactly what you don’t want landing on the sparse spots and the bare center pole lurking behind them.
Fix the density first. Fluff and spread each branch tip so the foliage overlaps and closes the gaps. Then, if you still crave shimmer, reach for garland or ornaments — not draped tinsel. Tinsel over an empty branch is a spotlight aimed straight at the problem.
2. Choosing a Tree Topper Too Small for the Tree
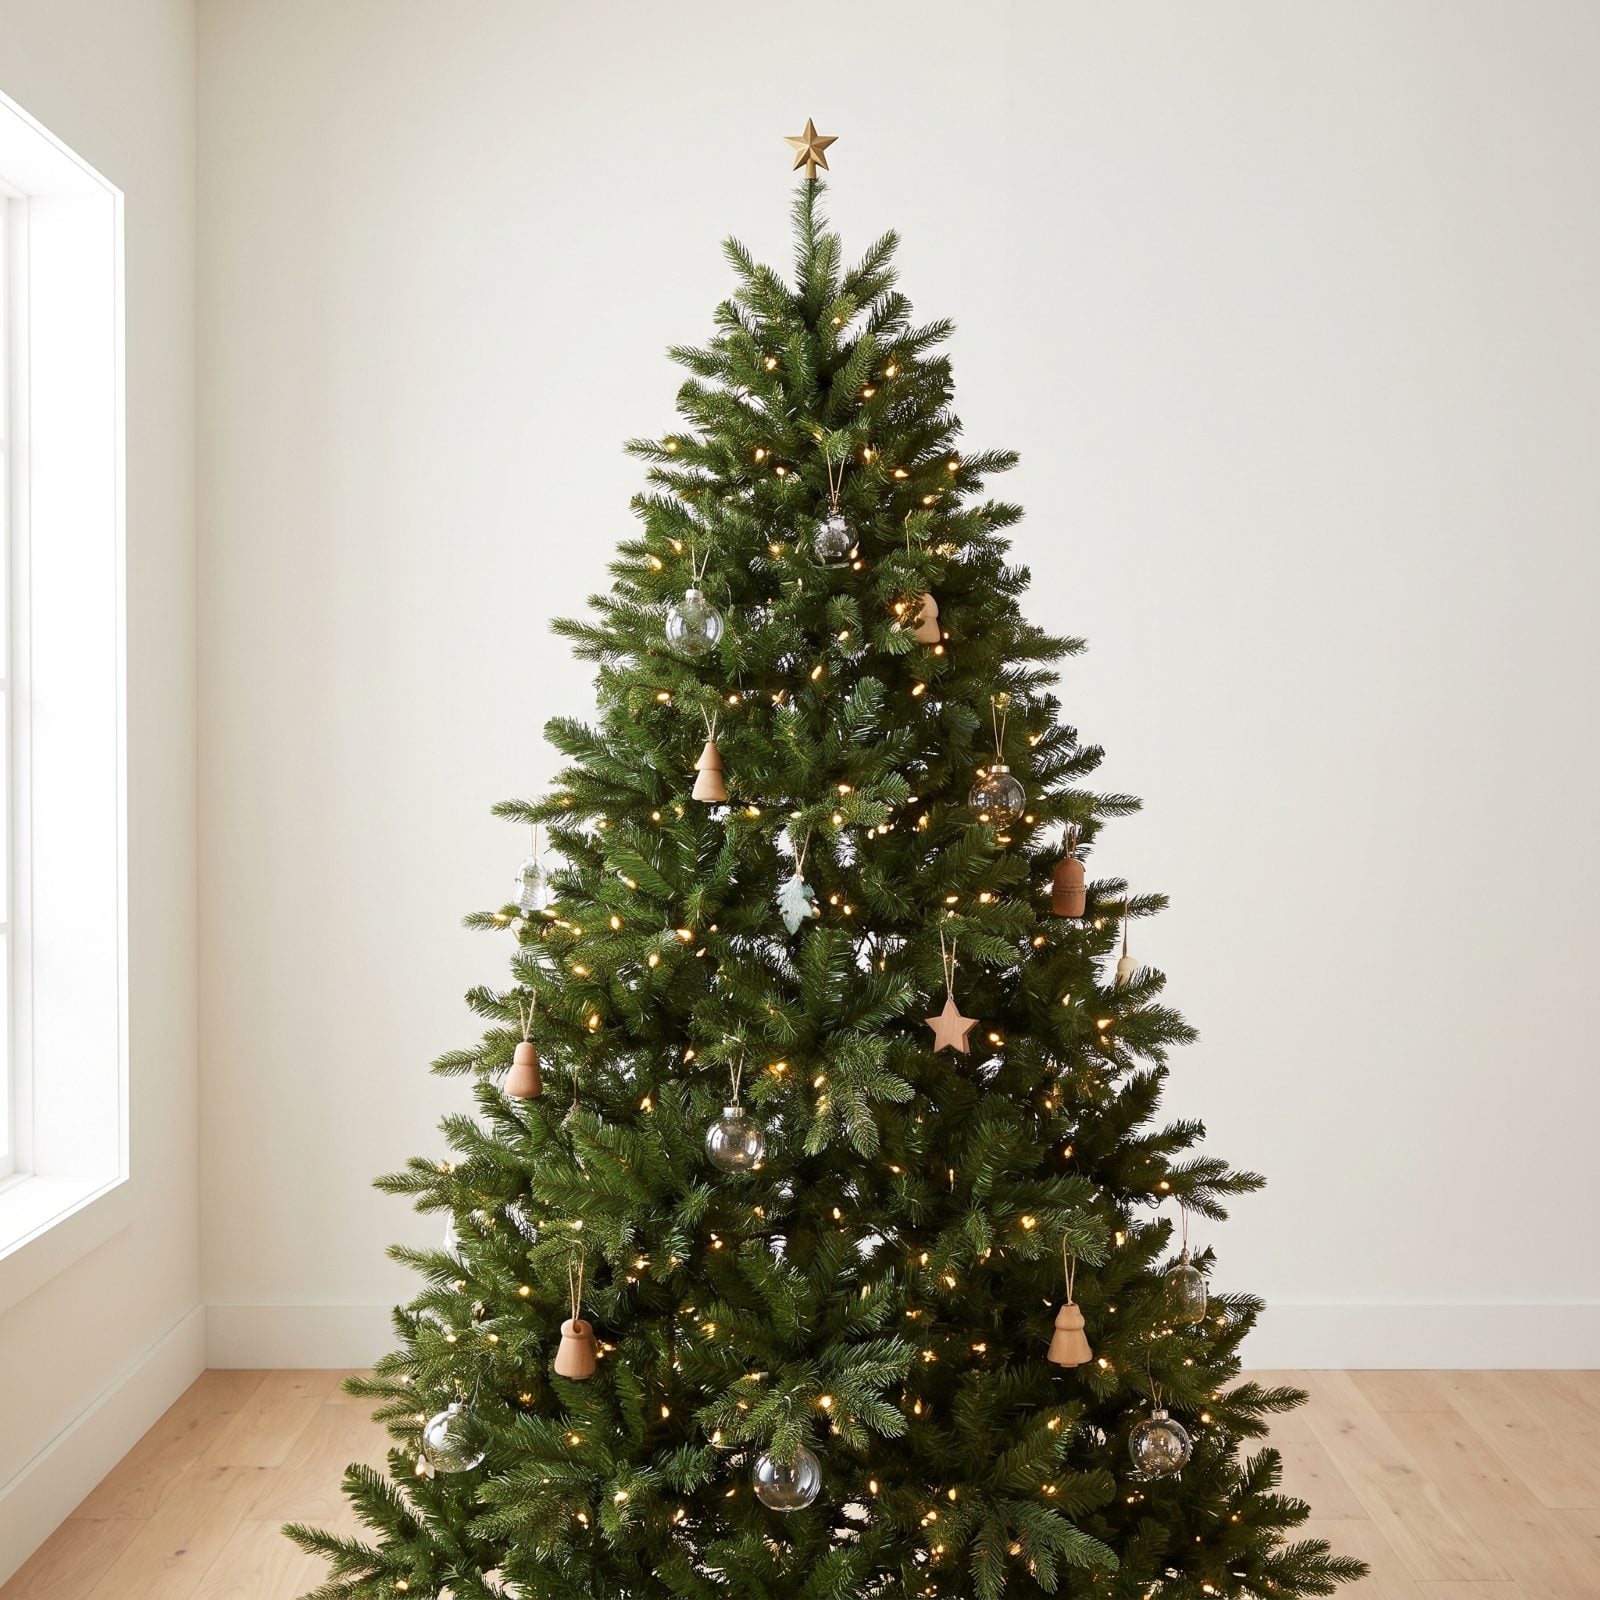
A tiny topper on a big tree looks like a hat two sizes too small. The tree has all this visual weight, then the top just trails off into a little point and the whole thing feels unfinished.
Scale up. A nine-to-ten-foot tree wants a topper in the eighteen-to-twenty-four-inch range so it reads as a proper crown instead of a garnish. The topper is the last thing your eye lands on going up, and it should feel like an arrival — not a shrug.
1. Balancing a Crooked Topper on an Unsupported Tip

A leaning topper undoes an entire tree. You can decorate for three hours, nail every ornament and every ribbon, then perch a heavy star on one bendy top branch and watch it list sideways like a ship taking on water.
Support it from behind. Twist a few upper branches together into a sturdier column, or run a bit of floral wire or a bamboo stake up the center to give the topper a spine. A dead-straight topper is the punctuation on a tree that looks intentional. A crooked one is the first thing everyone sees and the last thing they forget.